Contacts
Contacts is your team's shared address book: every buyer, seller, agent, owner, and property manager you work with, in one place. It gives you a single view of the people behind your jobs, instead of details scattered across individual inspections.
Every contact your team has ever added to an Inspection already appears here, so the list is populated from day one. You can also add people ahead of time, before there is an inspection to attach them to.
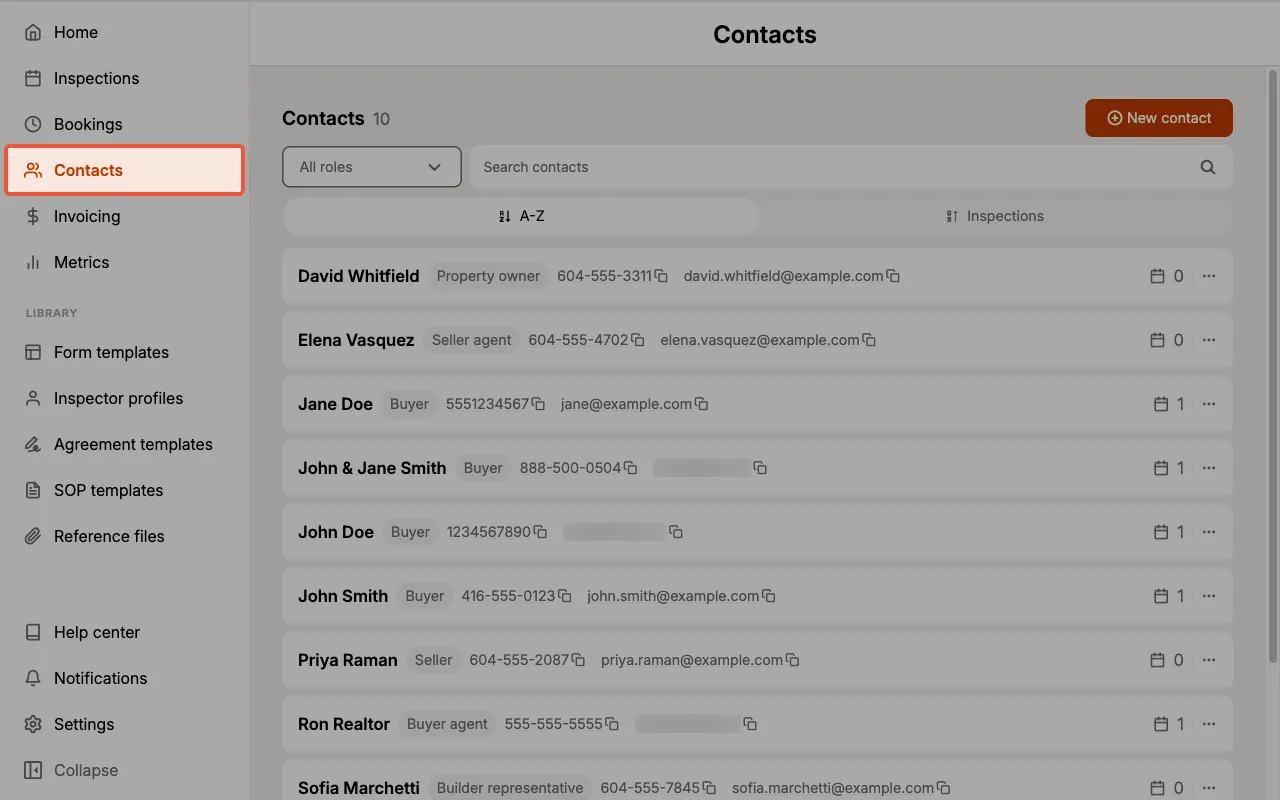
Contacts are shared across your whole team. A contact added by one team member is immediately available to everyone else.
Finding a contact
The list is sorted A-Z by name when you open it. Three controls sit above the list.
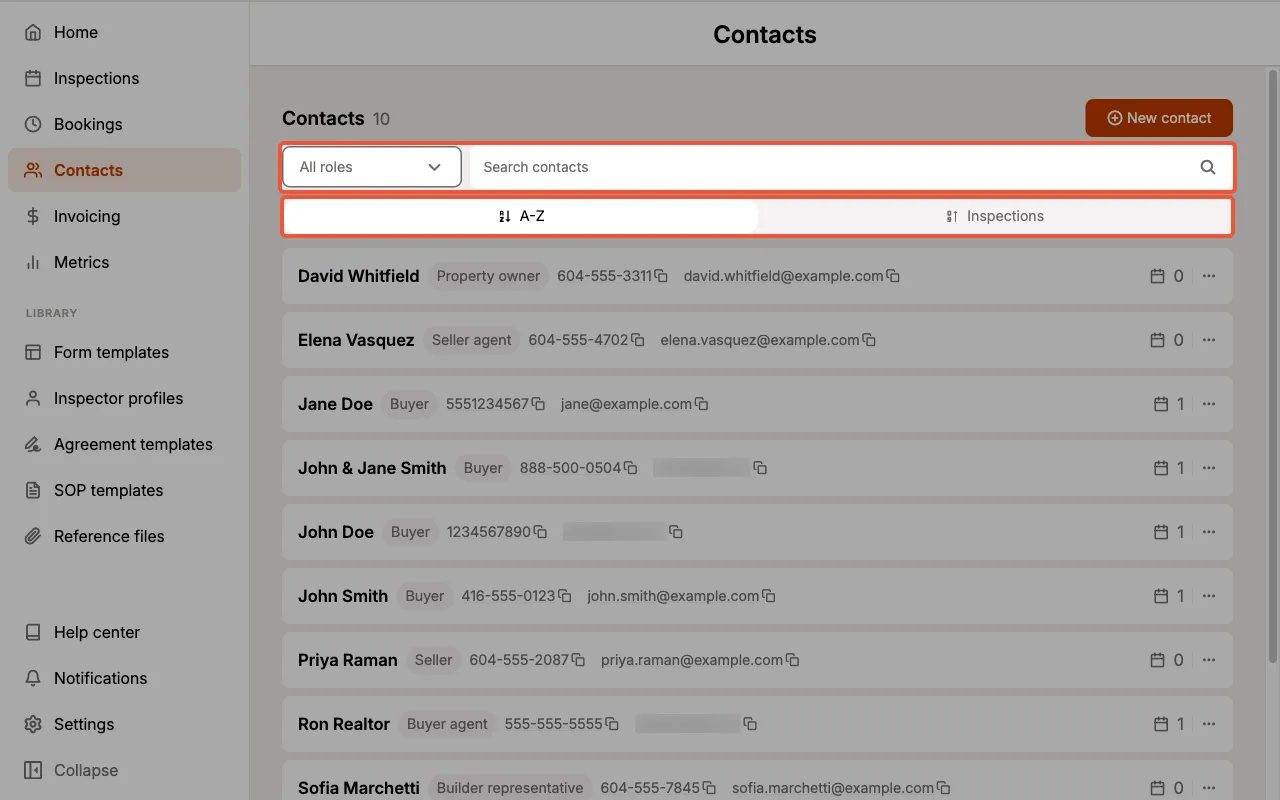
- All roles: narrows the list to a single role. There are eight roles: Buyer, Buyer agent, Seller, Property owner, Seller agent, Property manager, Builder representative, and Other.
- Search contacts: filters as you type. Search matches the contact's name only, not their email address or phone number.
- Sort: choose A-Z to sort by name, or Inspections to sort by how many inspections a contact appears on.
Selecting the sort option you are already using reverses its direction. Select A-Z a second time for Z-A, or Inspections a second time to put the fewest inspections first.
Reading a contact card
Each contact takes a single row: name, role, phone number, email address, an inspection count, and a menu.
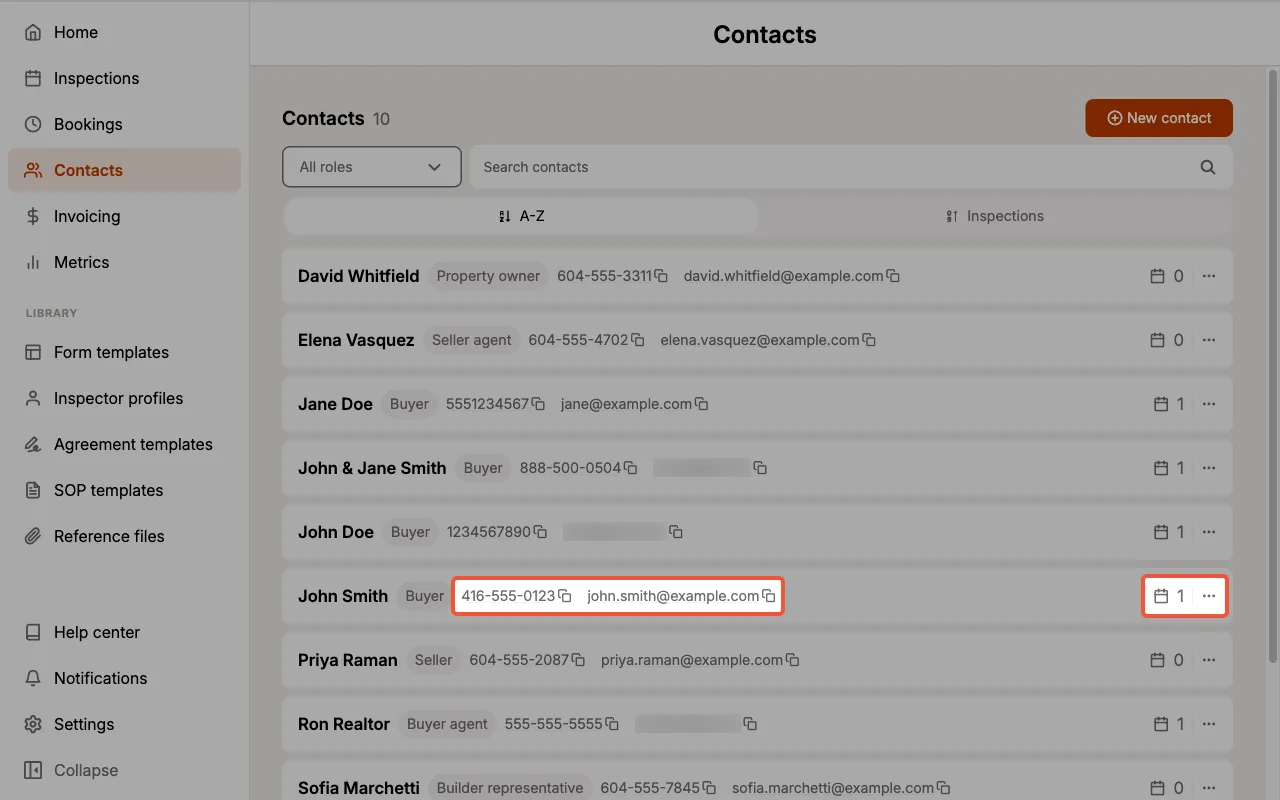
The phone number and email address are buttons, not just text:
- Select the phone number to start a call.
- Select the email address to start an email.
- Select the copy icon beside either one to copy it to your clipboard.
Only the details you have entered appear, so a contact with no phone number simply shows their email address.
Adding a contact
- Select Contacts from the sidebar.
- Select New contact.
- Choose the Contact role.
- Enter the Name. This is the only required field.
- Enter an Email and Phone, as desired.
- To record a mailing address, set Contact address to
Enabledand fill in the address fields. - Select Create new contact.
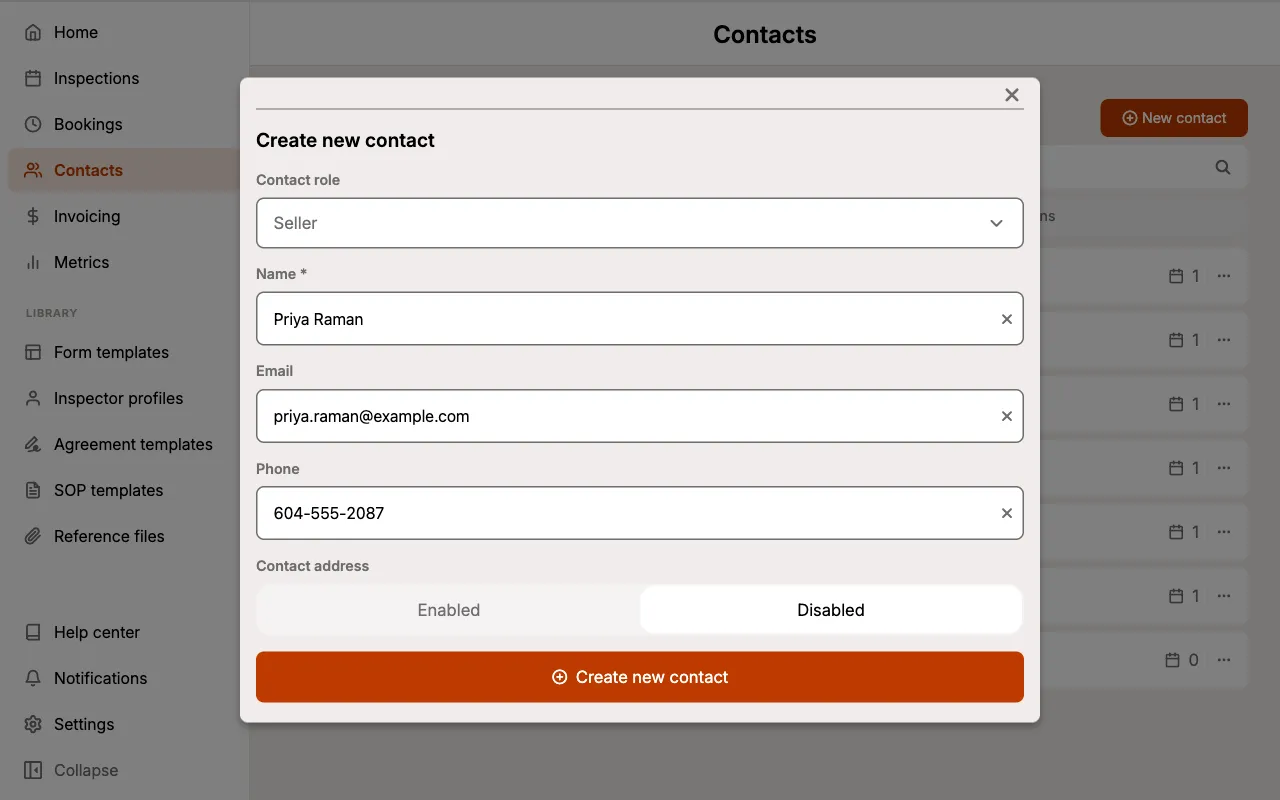
Adding a contact here does not attach them to an inspection. To use a saved contact on a job, open the inspection and select the contact from the Existing contacts list. See Contacts on the Inspections page.
Editing a contact and other actions
Select the ... icon on any contact row to open its menu.
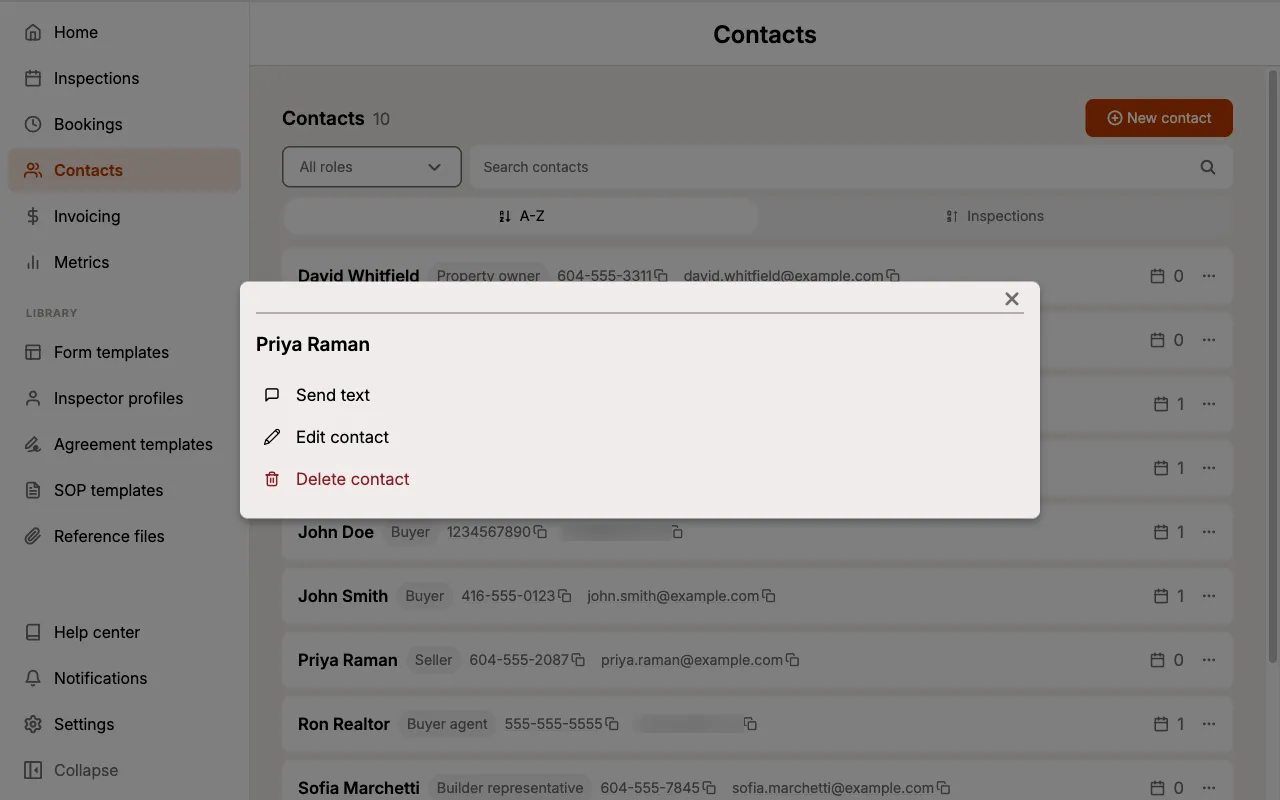
- Send text: opens a new message to the contact. This option only appears when the contact has a phone number.
- Edit contact: opens the contact's details so you can change their role, name, email, phone, or address.
- Delete contact: permanently removes the contact from your team.
Edits apply everywhere the contact is used from that point forward.
Viewing a contact's inspections
The number beside the calendar icon is how many inspections that contact appears on. Select it to see them, newest first.
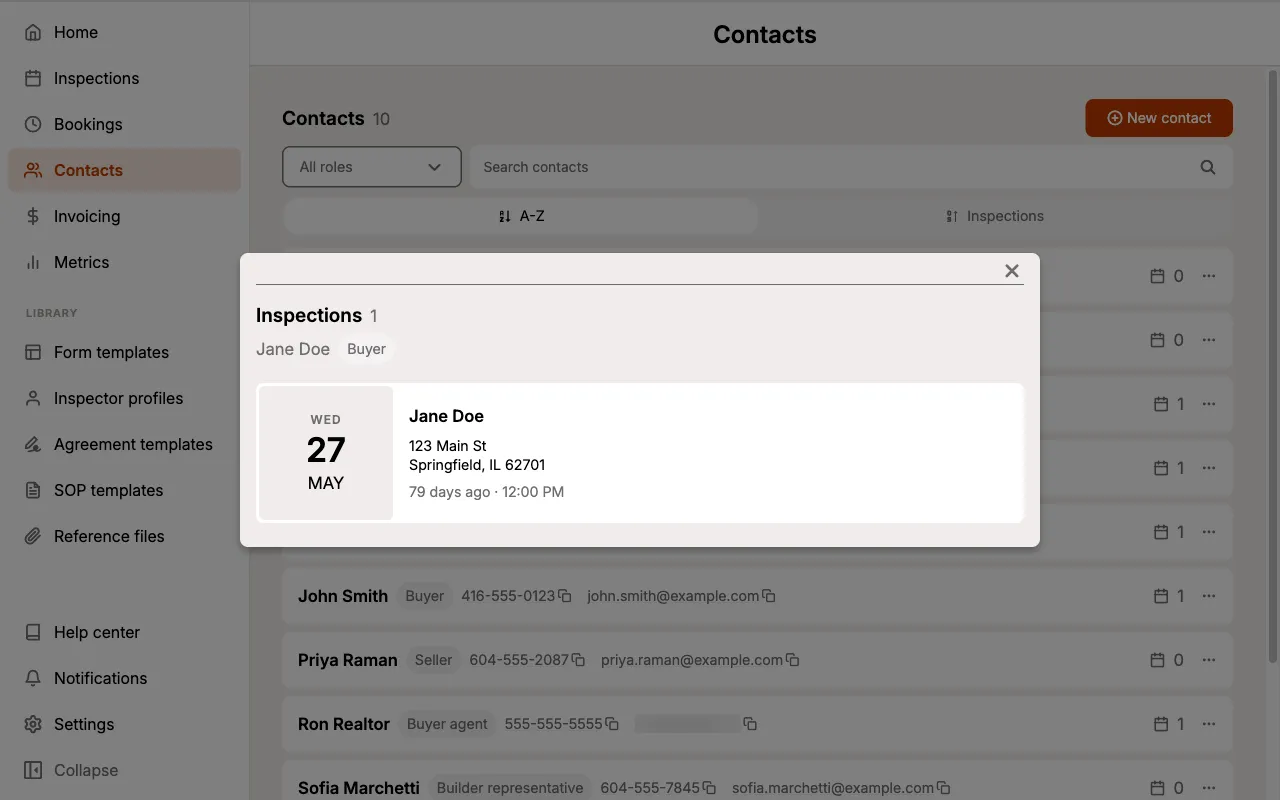
Select any inspection in the list to open it.
This is the quickest way to answer "what have we done for this person?" without searching your inspection list, which is especially useful for repeat clients and for agents who refer you regularly.
Deleting a contact
- Select the
...icon on the contact's row. - Select Delete contact.
- Select Delete to confirm.
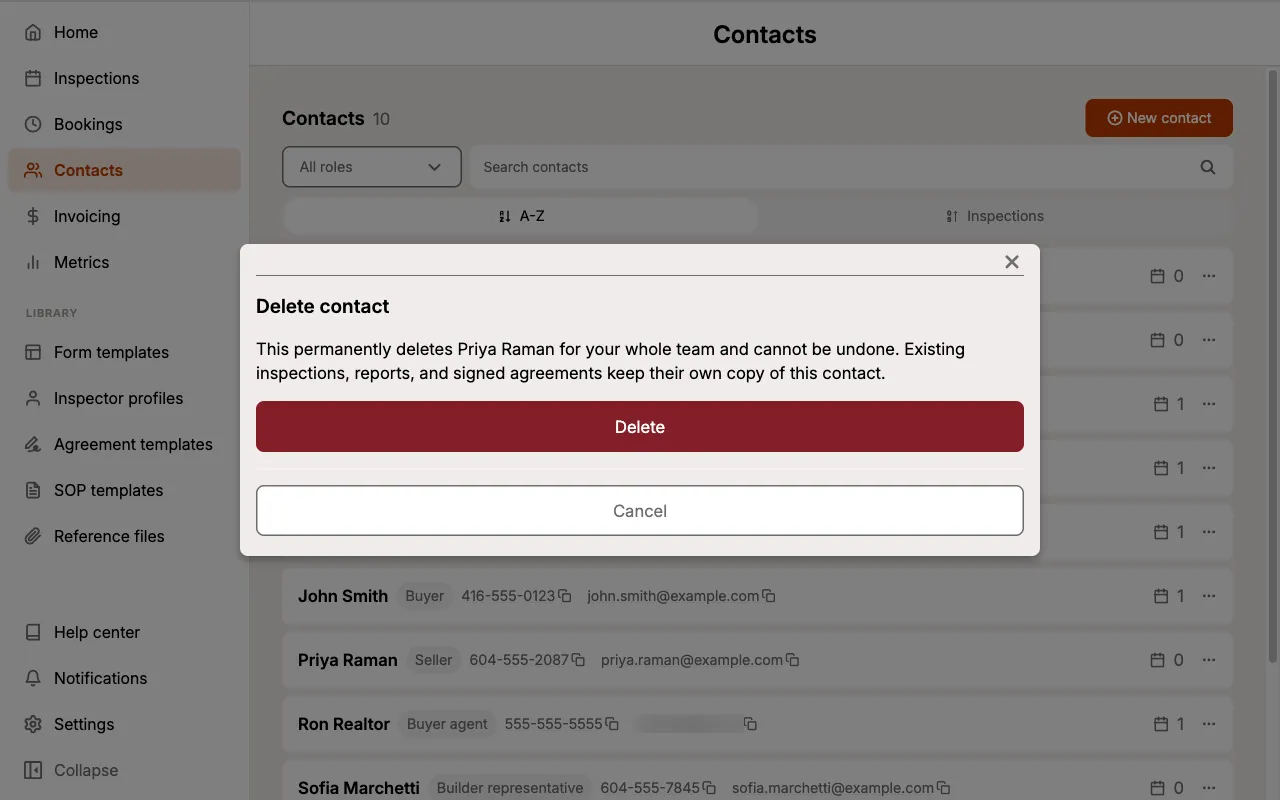
Deleting a contact is permanent, cannot be undone, and removes them for your entire team.
Deleting a contact does not alter your existing work. Inspections, reports, and signed service agreements keep their own copy of the contact's details, so a report you have already published is unaffected. What you lose is the entry in the shared address book, so the contact is no longer available to add to future inspections.
Team members with the Inspector role cannot delete contacts, and do not see inspection counts. See Multi-inspector for the full permissions breakdown.
Related
- Contacts on an Inspection: adding contacts to an individual job.
- Multi-inspector: roles, permissions, and team access.
- Service Agreement Templates: sending agreements to the contacts on an inspection.