Inspections
An Inspection in Eneris is a structured record of an on-site evaluation of a property. It includes everything you need to document the condition of a building such as the location, time, client details, and the entries captured in one or more inspection forms.
Each inspection serves as the container for:
- Where the inspection took place (address)
- When it happened (date and time)
- Who was involved (client, agent, inspector)
- What was inspected (via attached forms for different scopes like general home, asbestos, radon, etc.)
- Notes and Memos for both client-facing and internal
In short, an Inspection is the central workspace where all relevant information and documentation for a site visit is entered, stored, and transformed into a client-ready report.
View Inspections
See all your inspections — past, present, and upcoming — in one place.
The home page will display upcoming inspections. Inspection cards show the client name as the primary identifier, along with the report name and address.
-
Selecting
View alltakes you to the Inspection List page.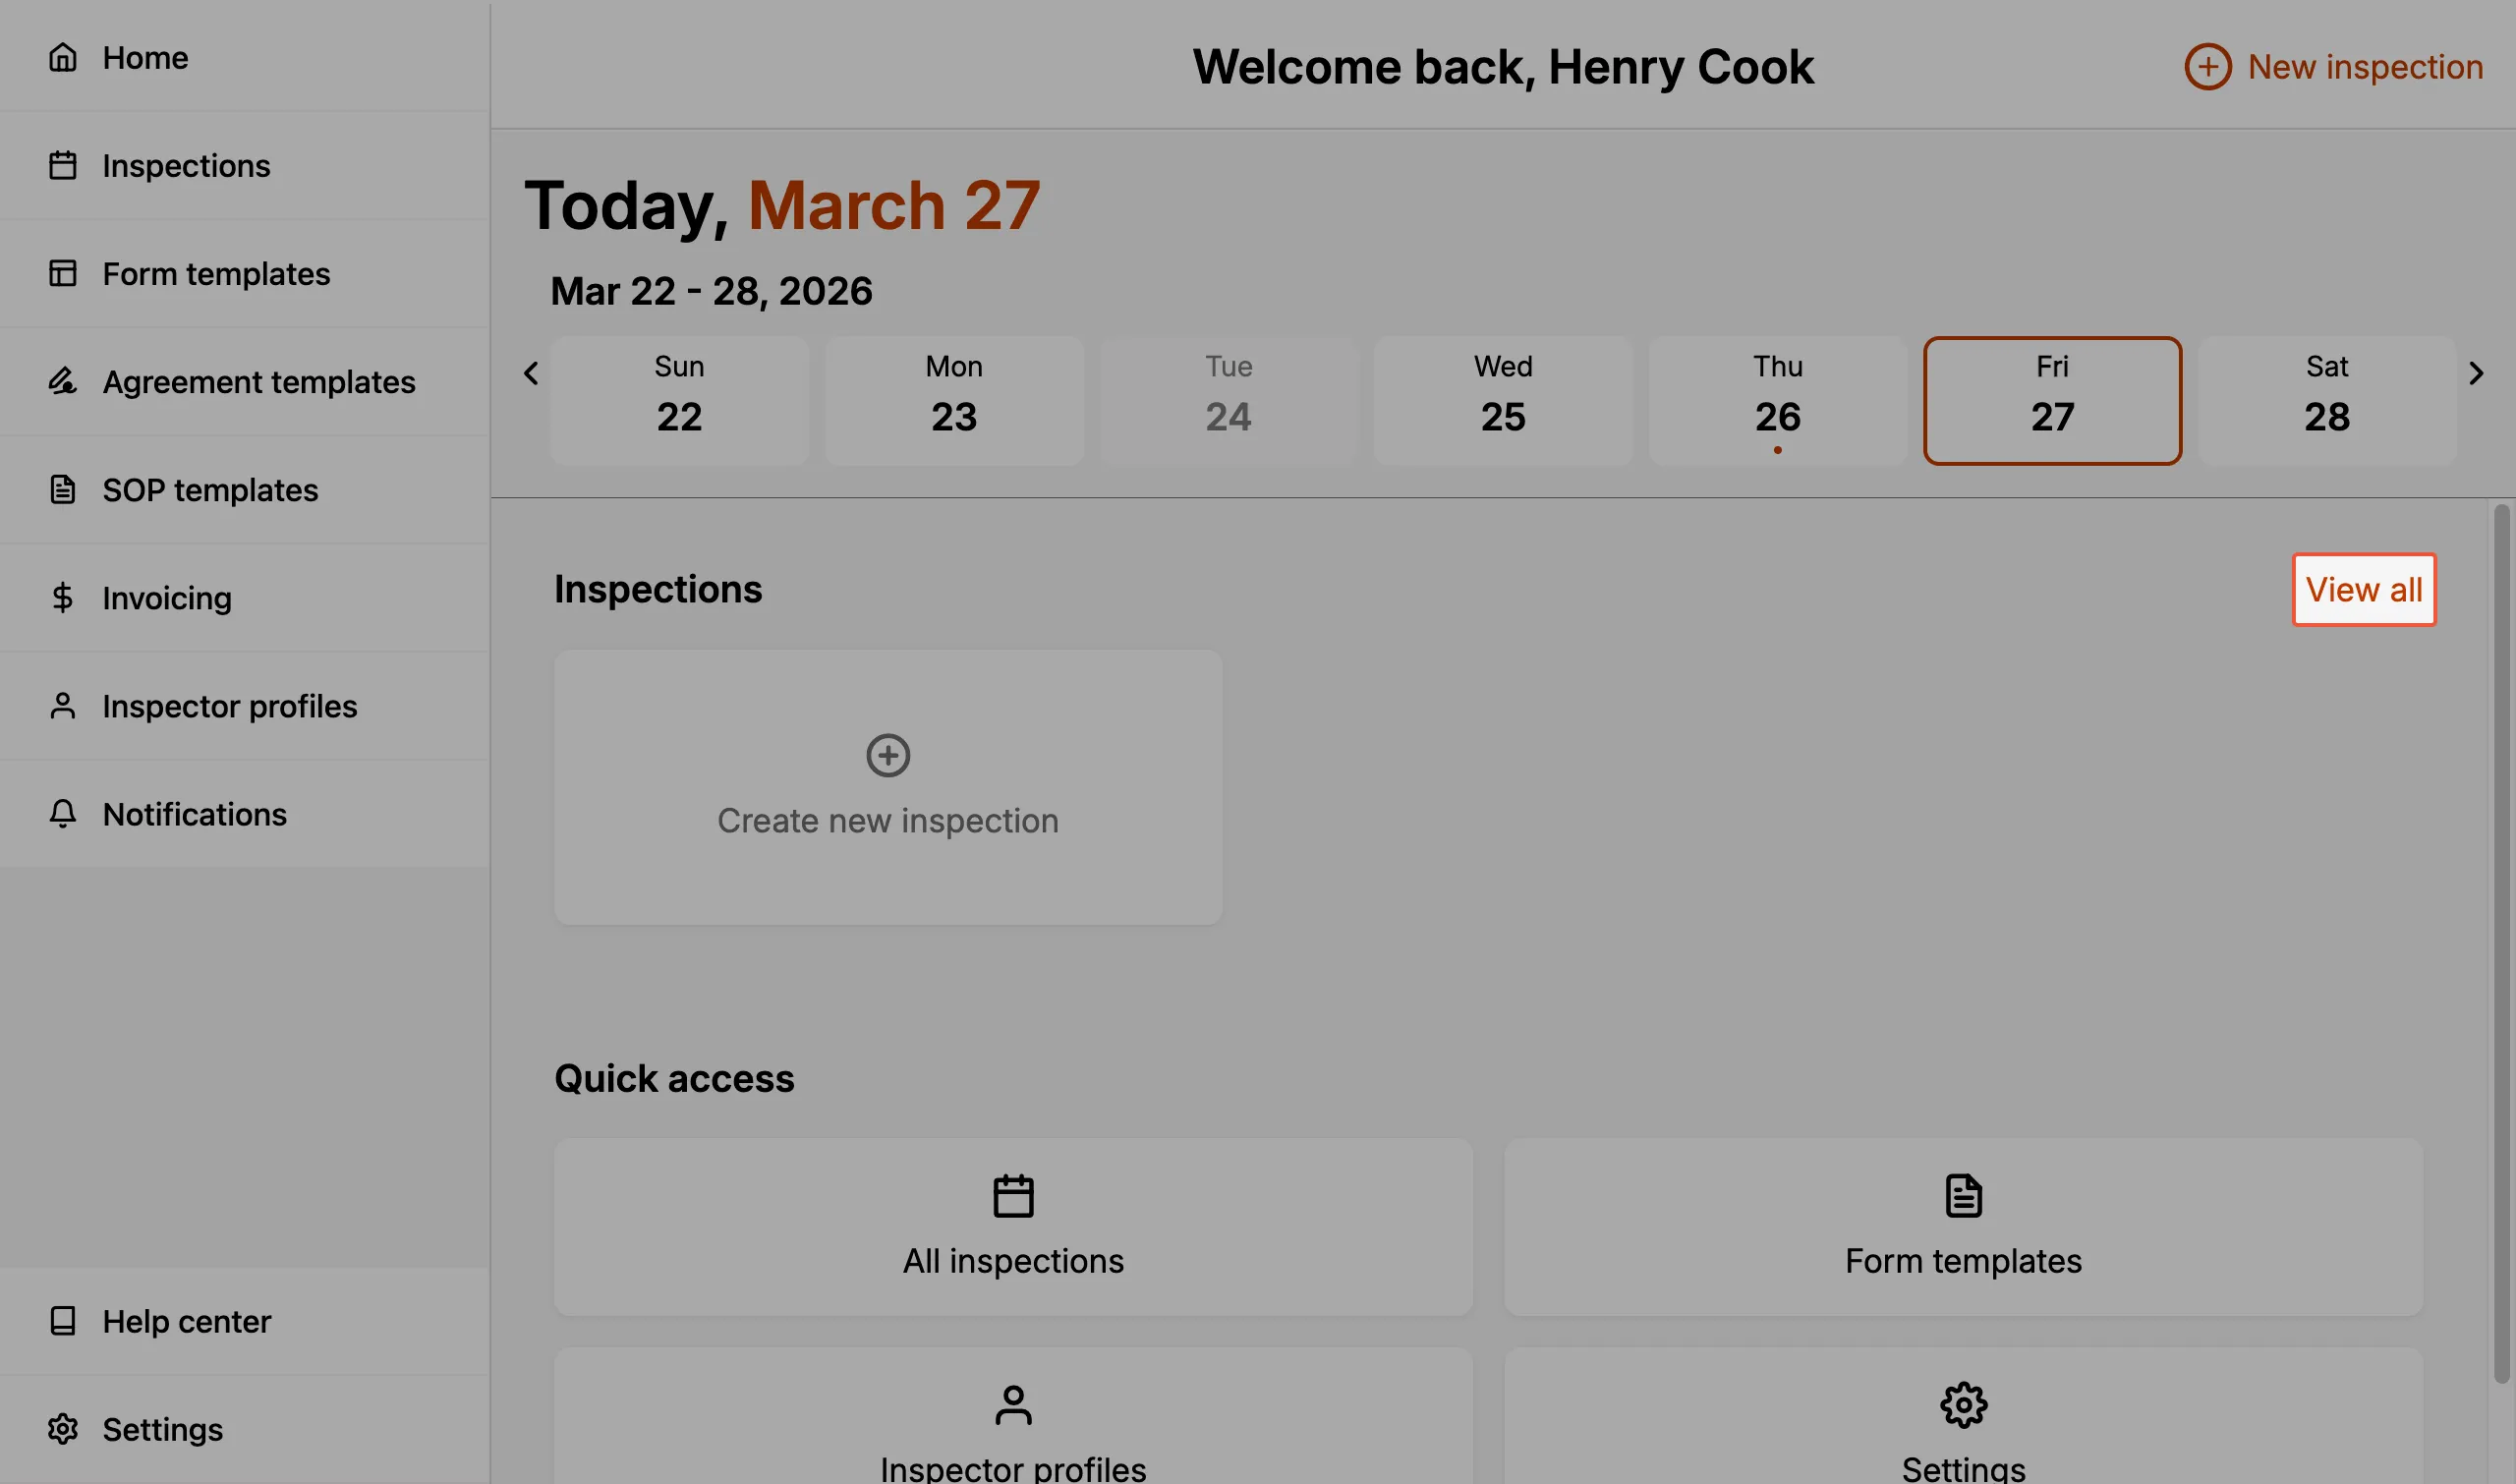
-
You may also navigate to the Inspection List page by selecting
Inspectionsfrom the sidebar menu.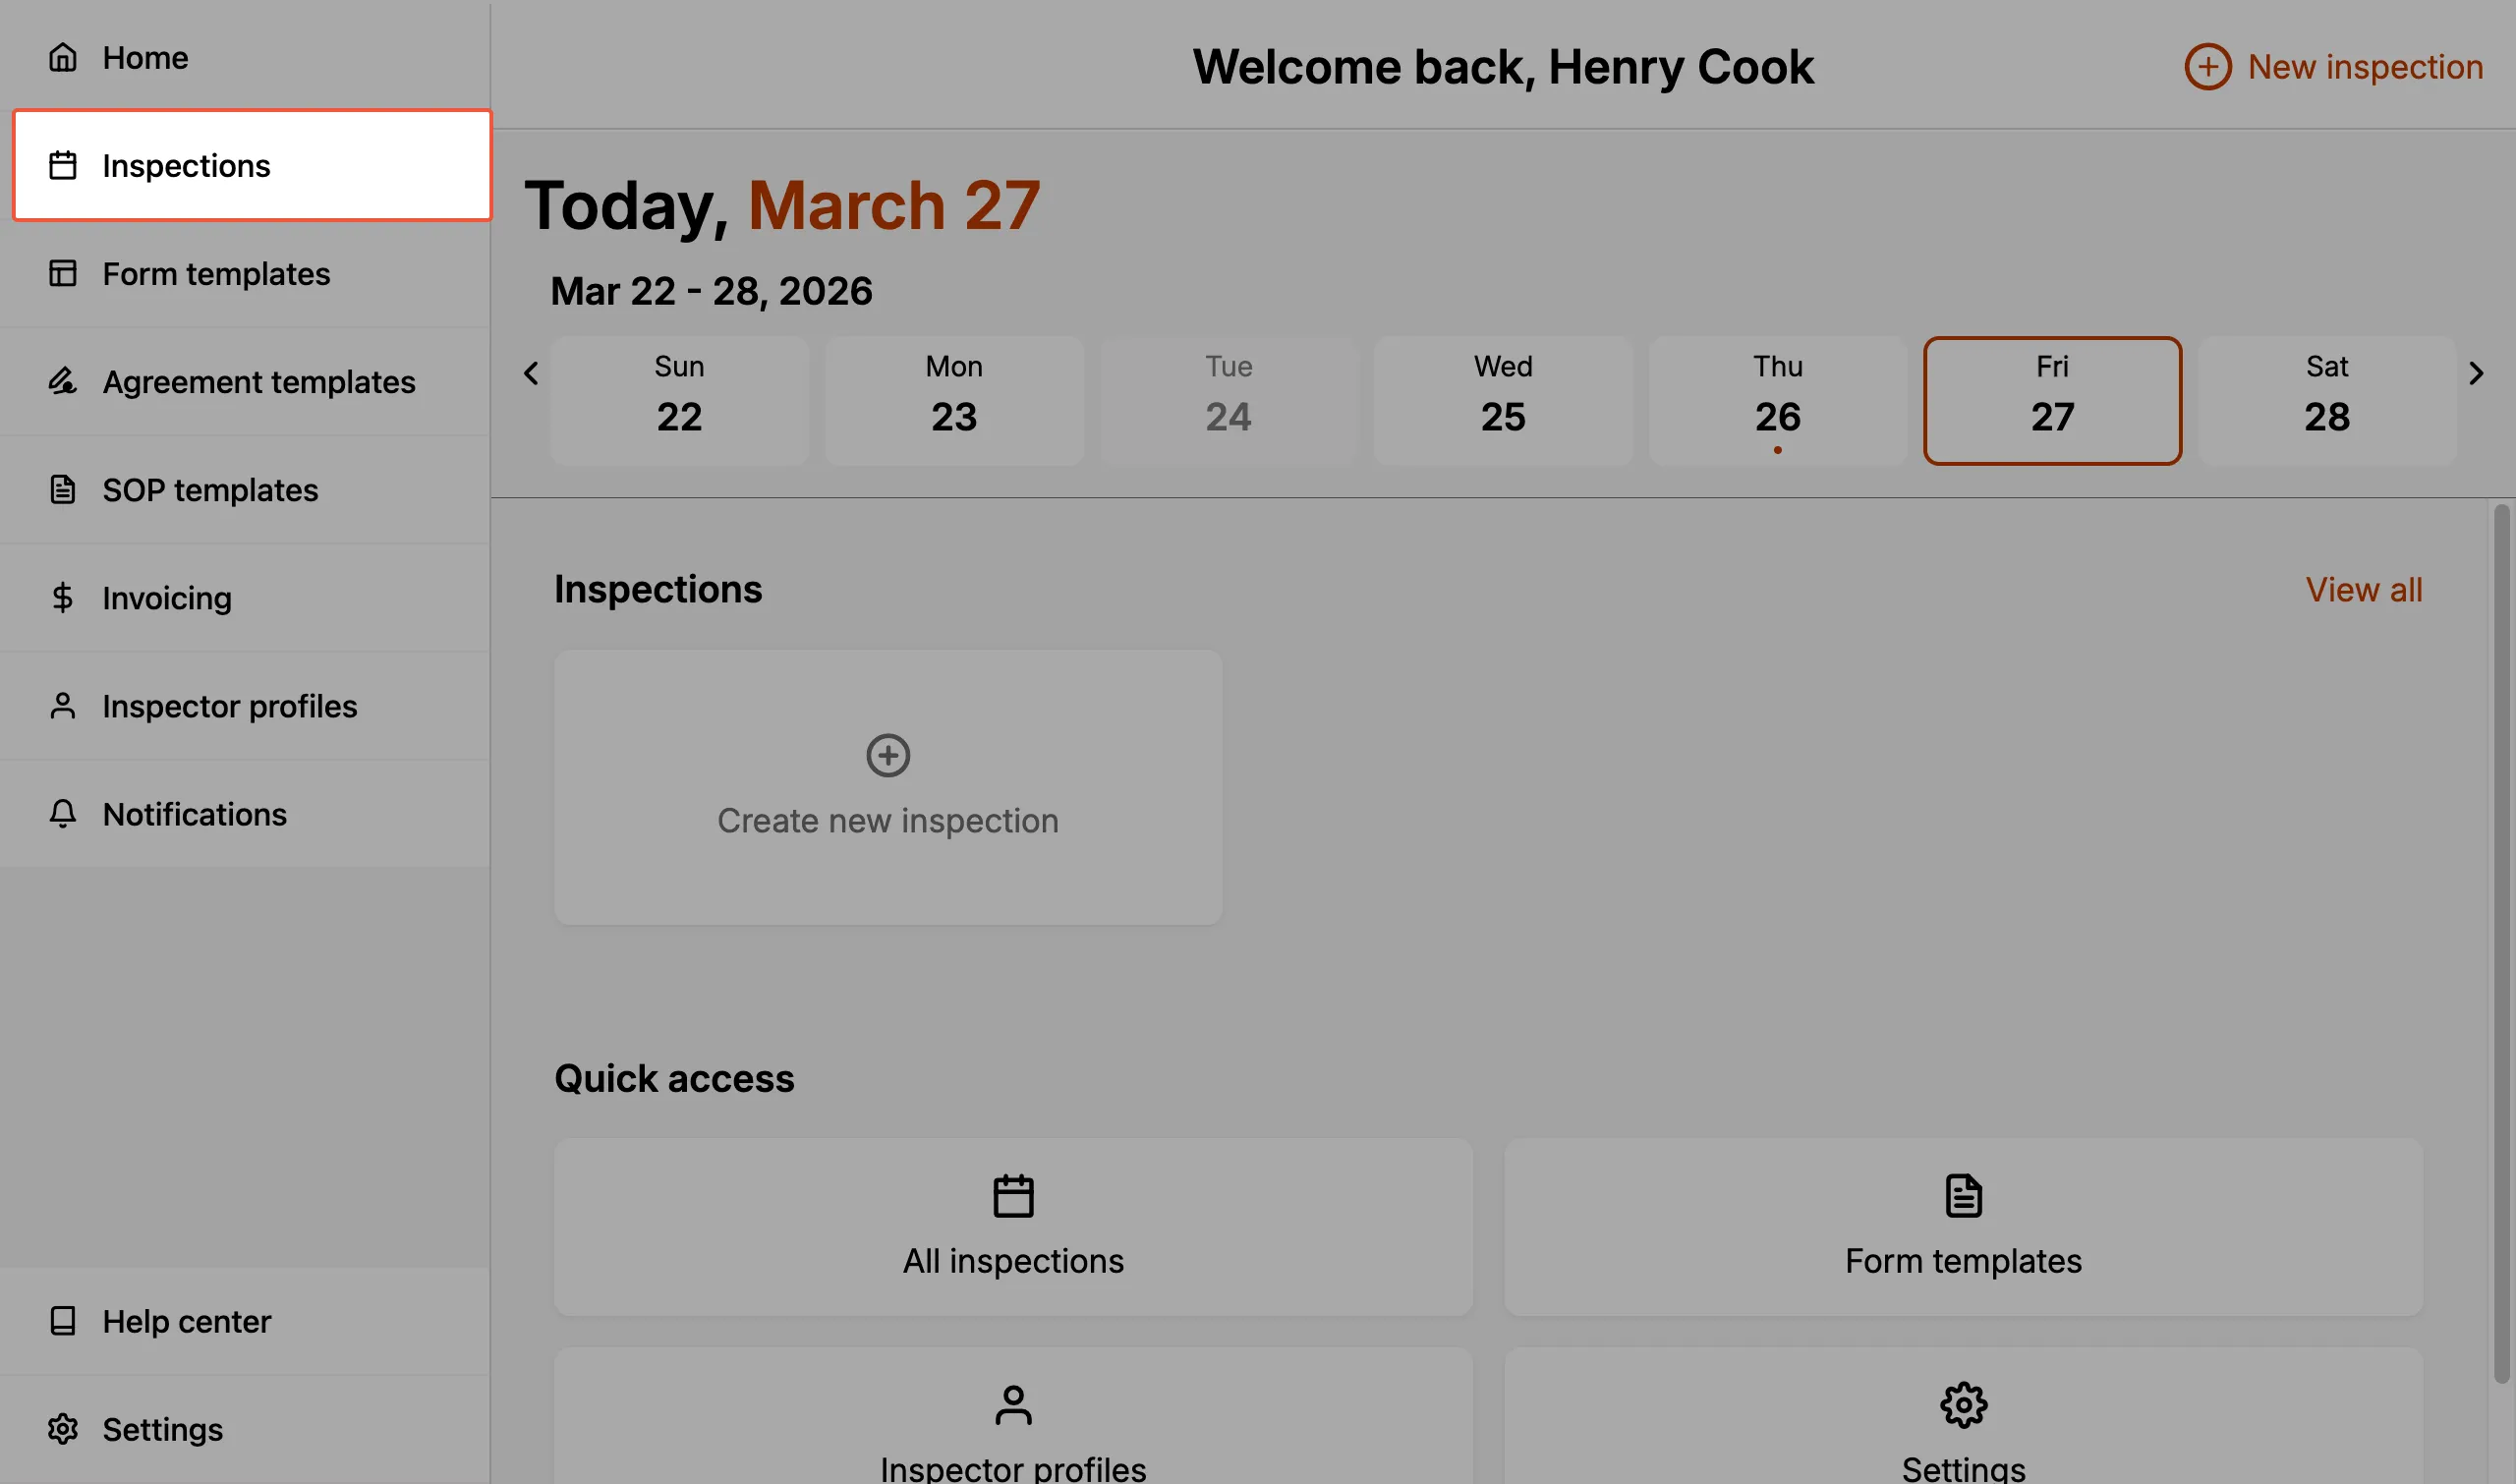
-
-
The filter buttons at the top —
Today,This week,This month, andAll— filter the inspections that show up on the page. -
The search bar at the top allows you to quickly locate the inspection you're looking for.
- Search by typing in your client's name(s) or a property address.
- The search bar functionality takes into account the time period filter. If you are searching for older inspections, ensure you have updated the filter to
All.
Create an Inspection
There are three ways to create a new inspection:
-
The quickest way is to select the
+button in the top-right corner of the header. This button is visible on the home page, inspections list, and calendar page.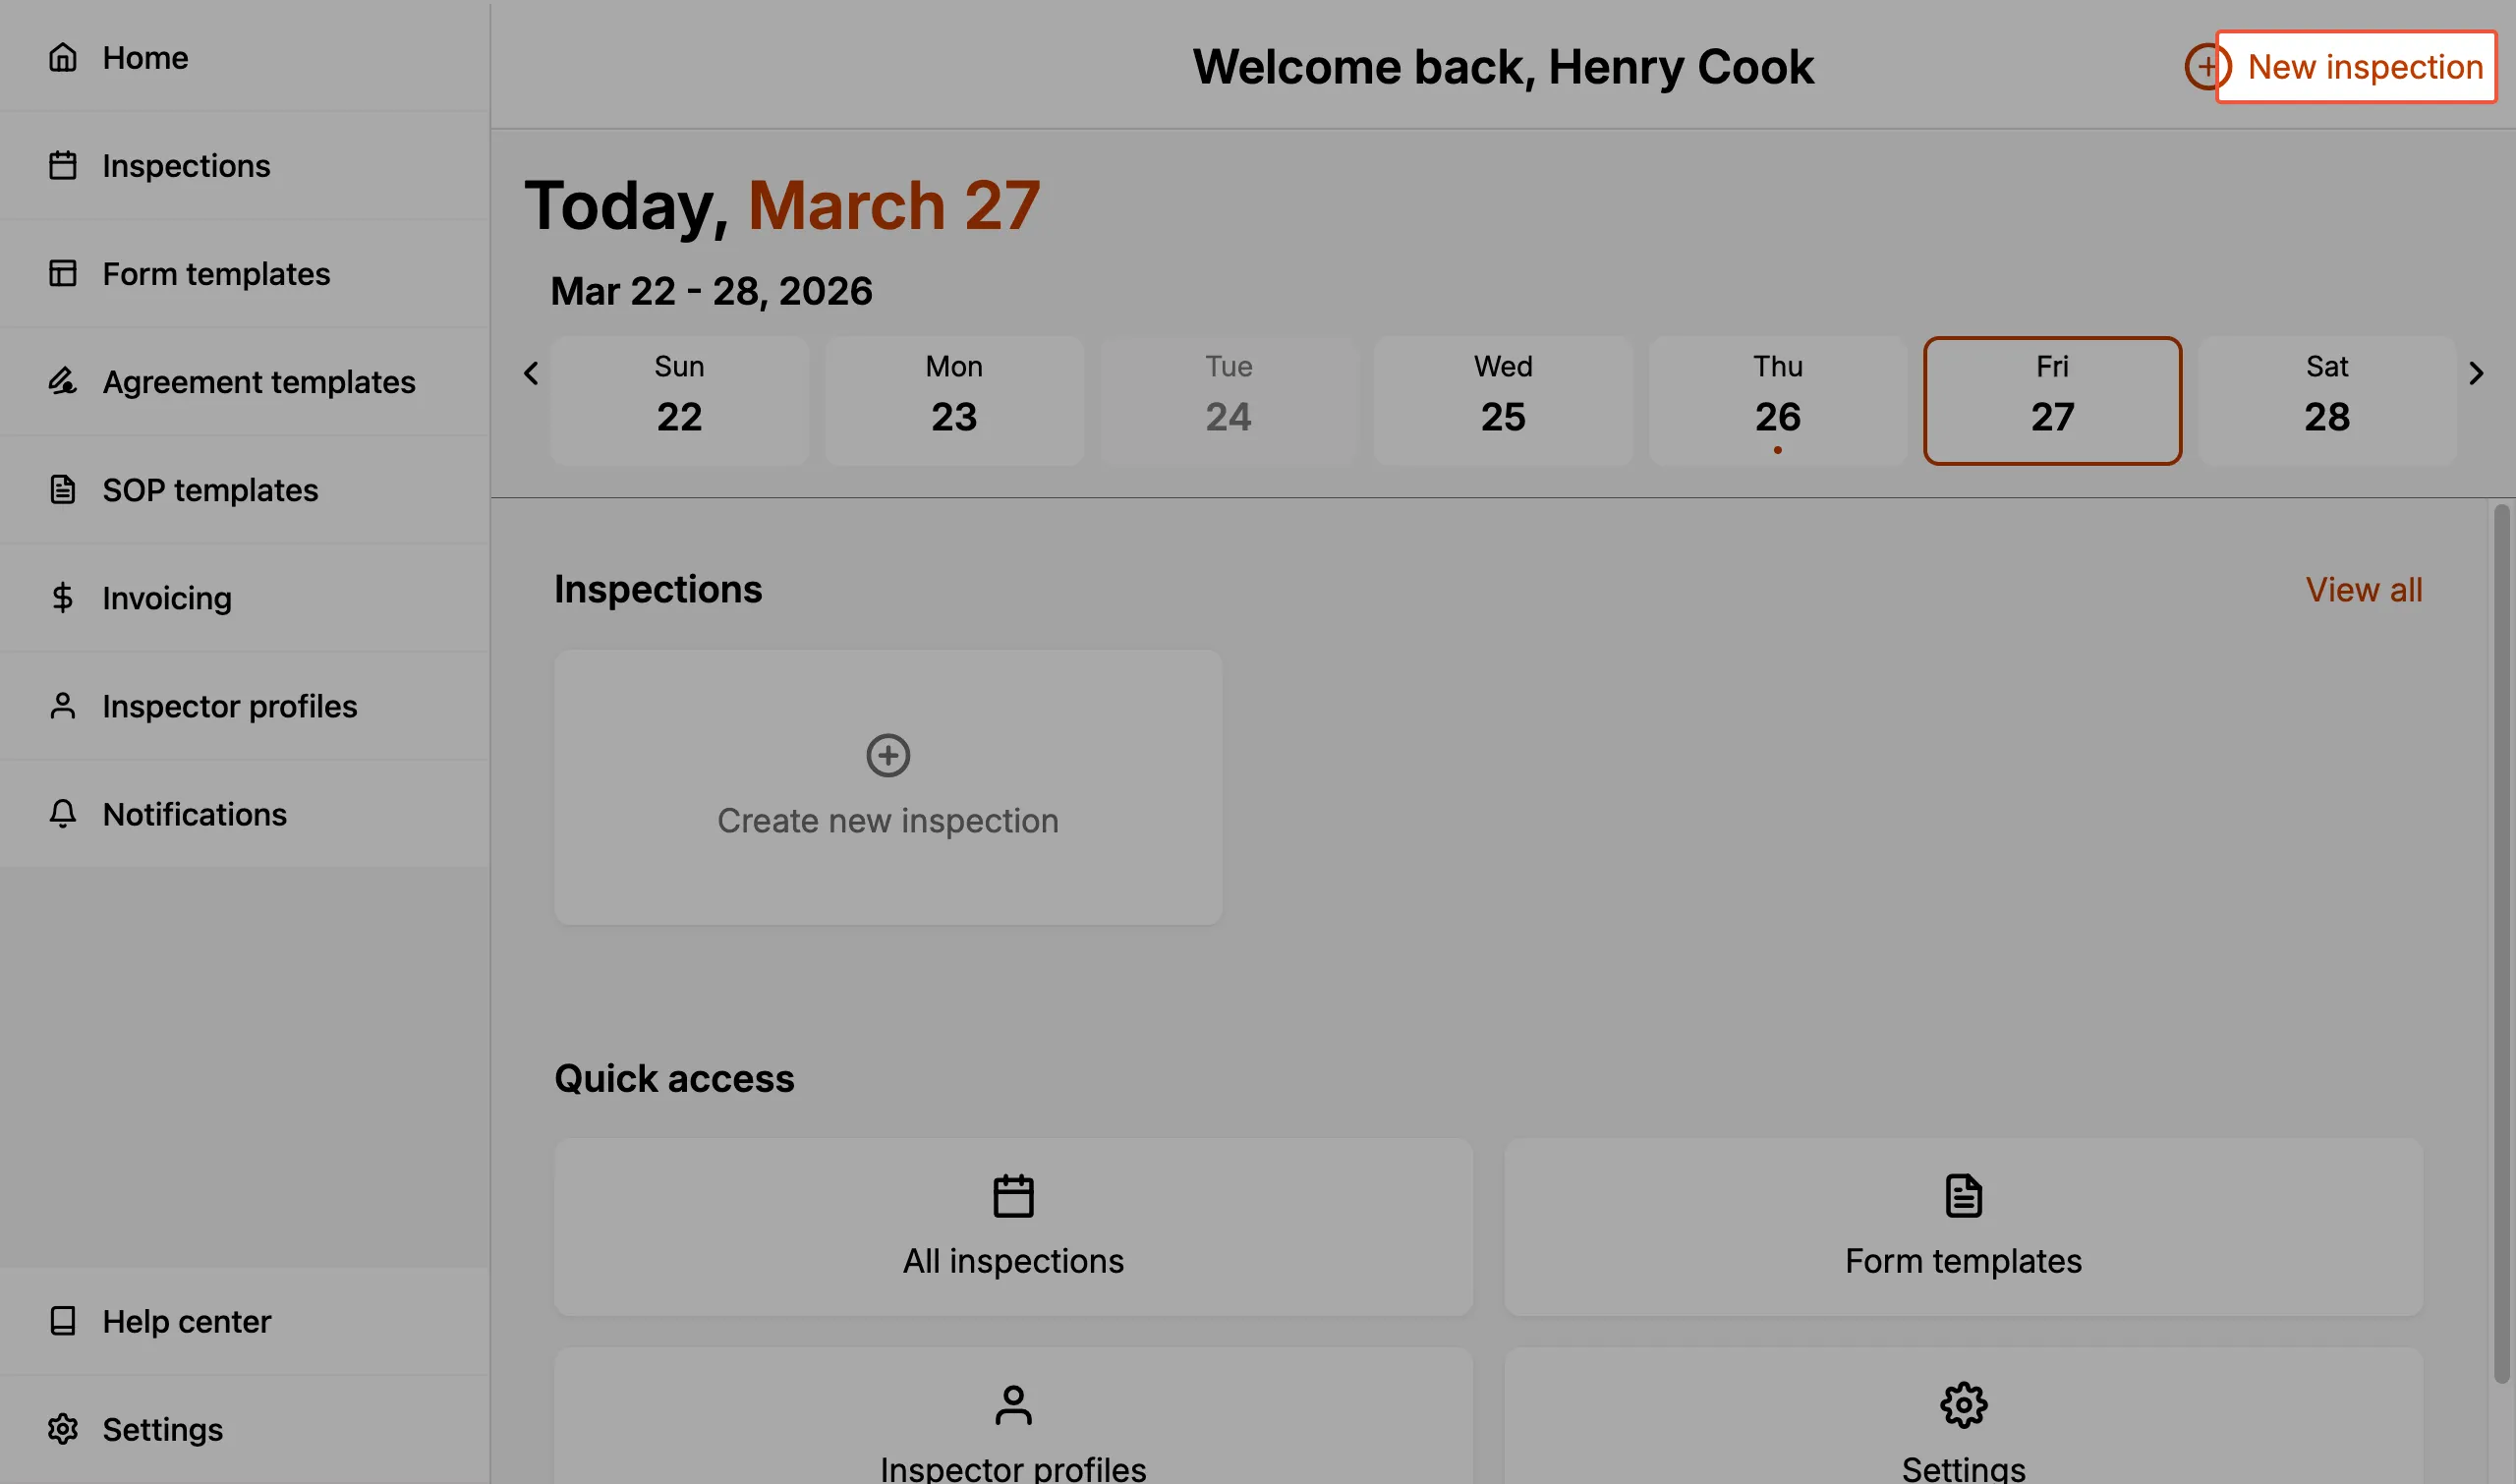
-
You may also select a date on the home page calendar to navigate to the Calendar page, which shows a daily schedule view. Each day slot has a
Create new inspectionbutton.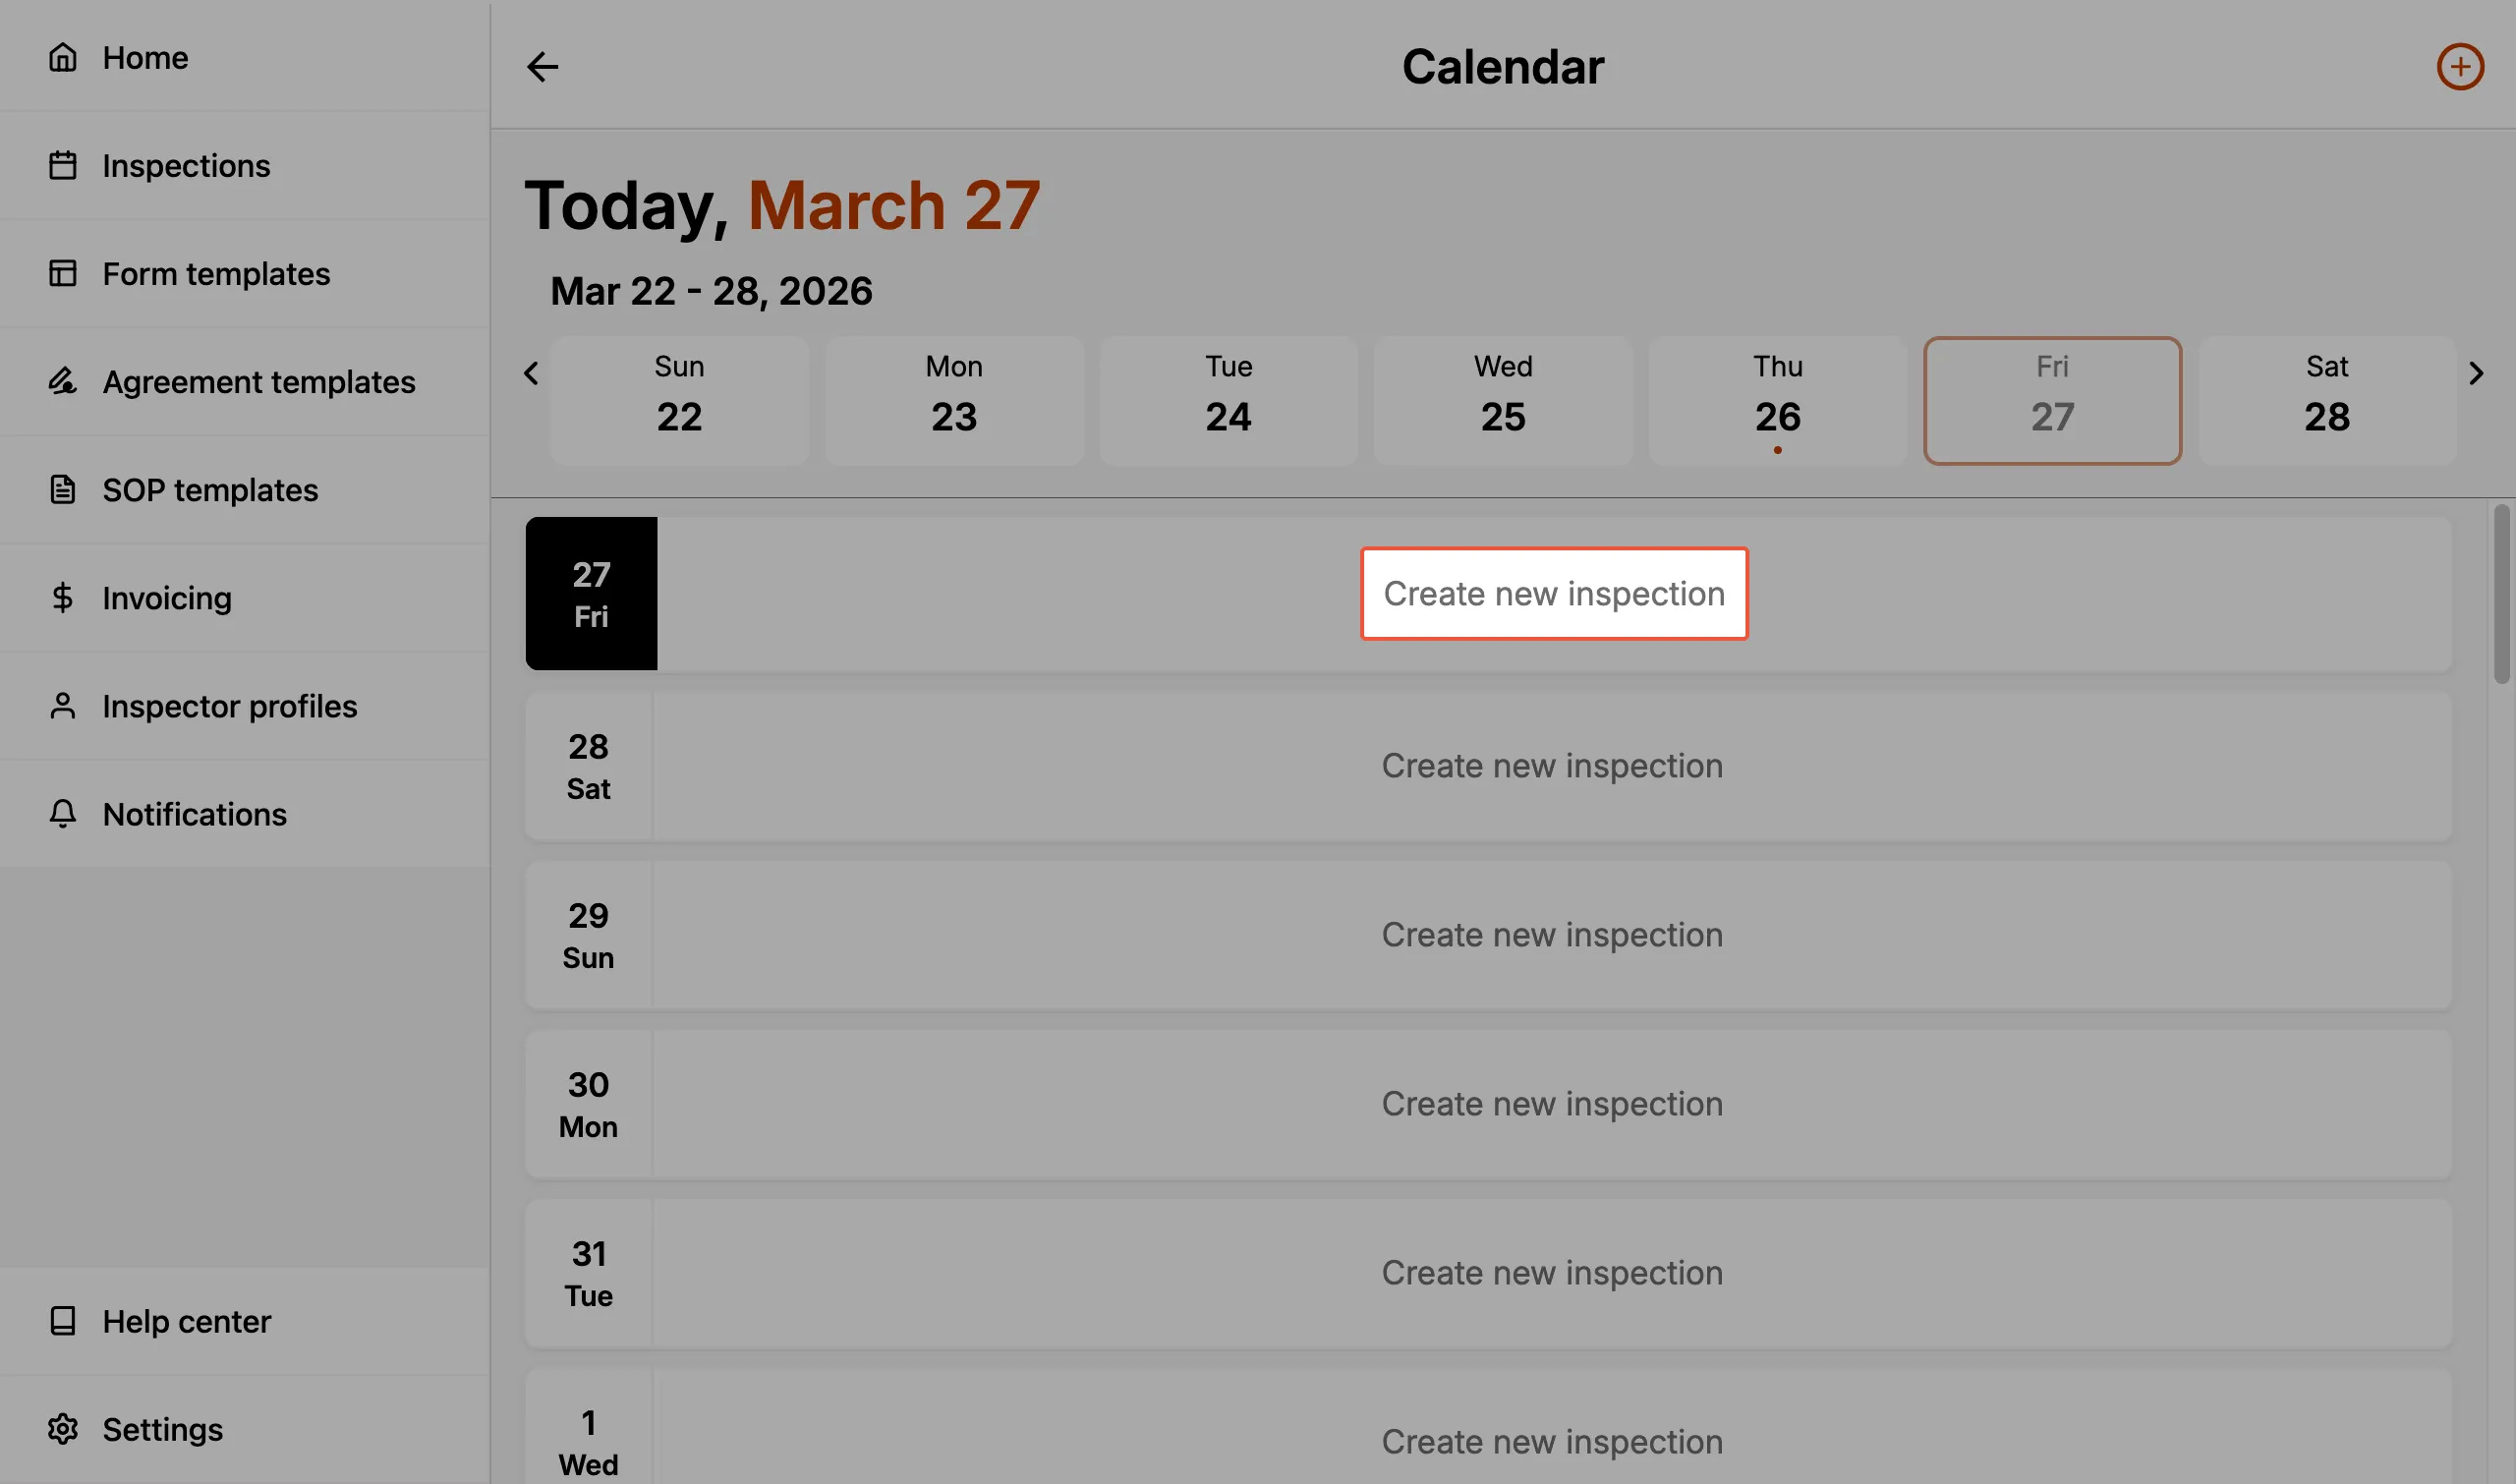
-
The Calendar page also has a
+button in the top-right corner.
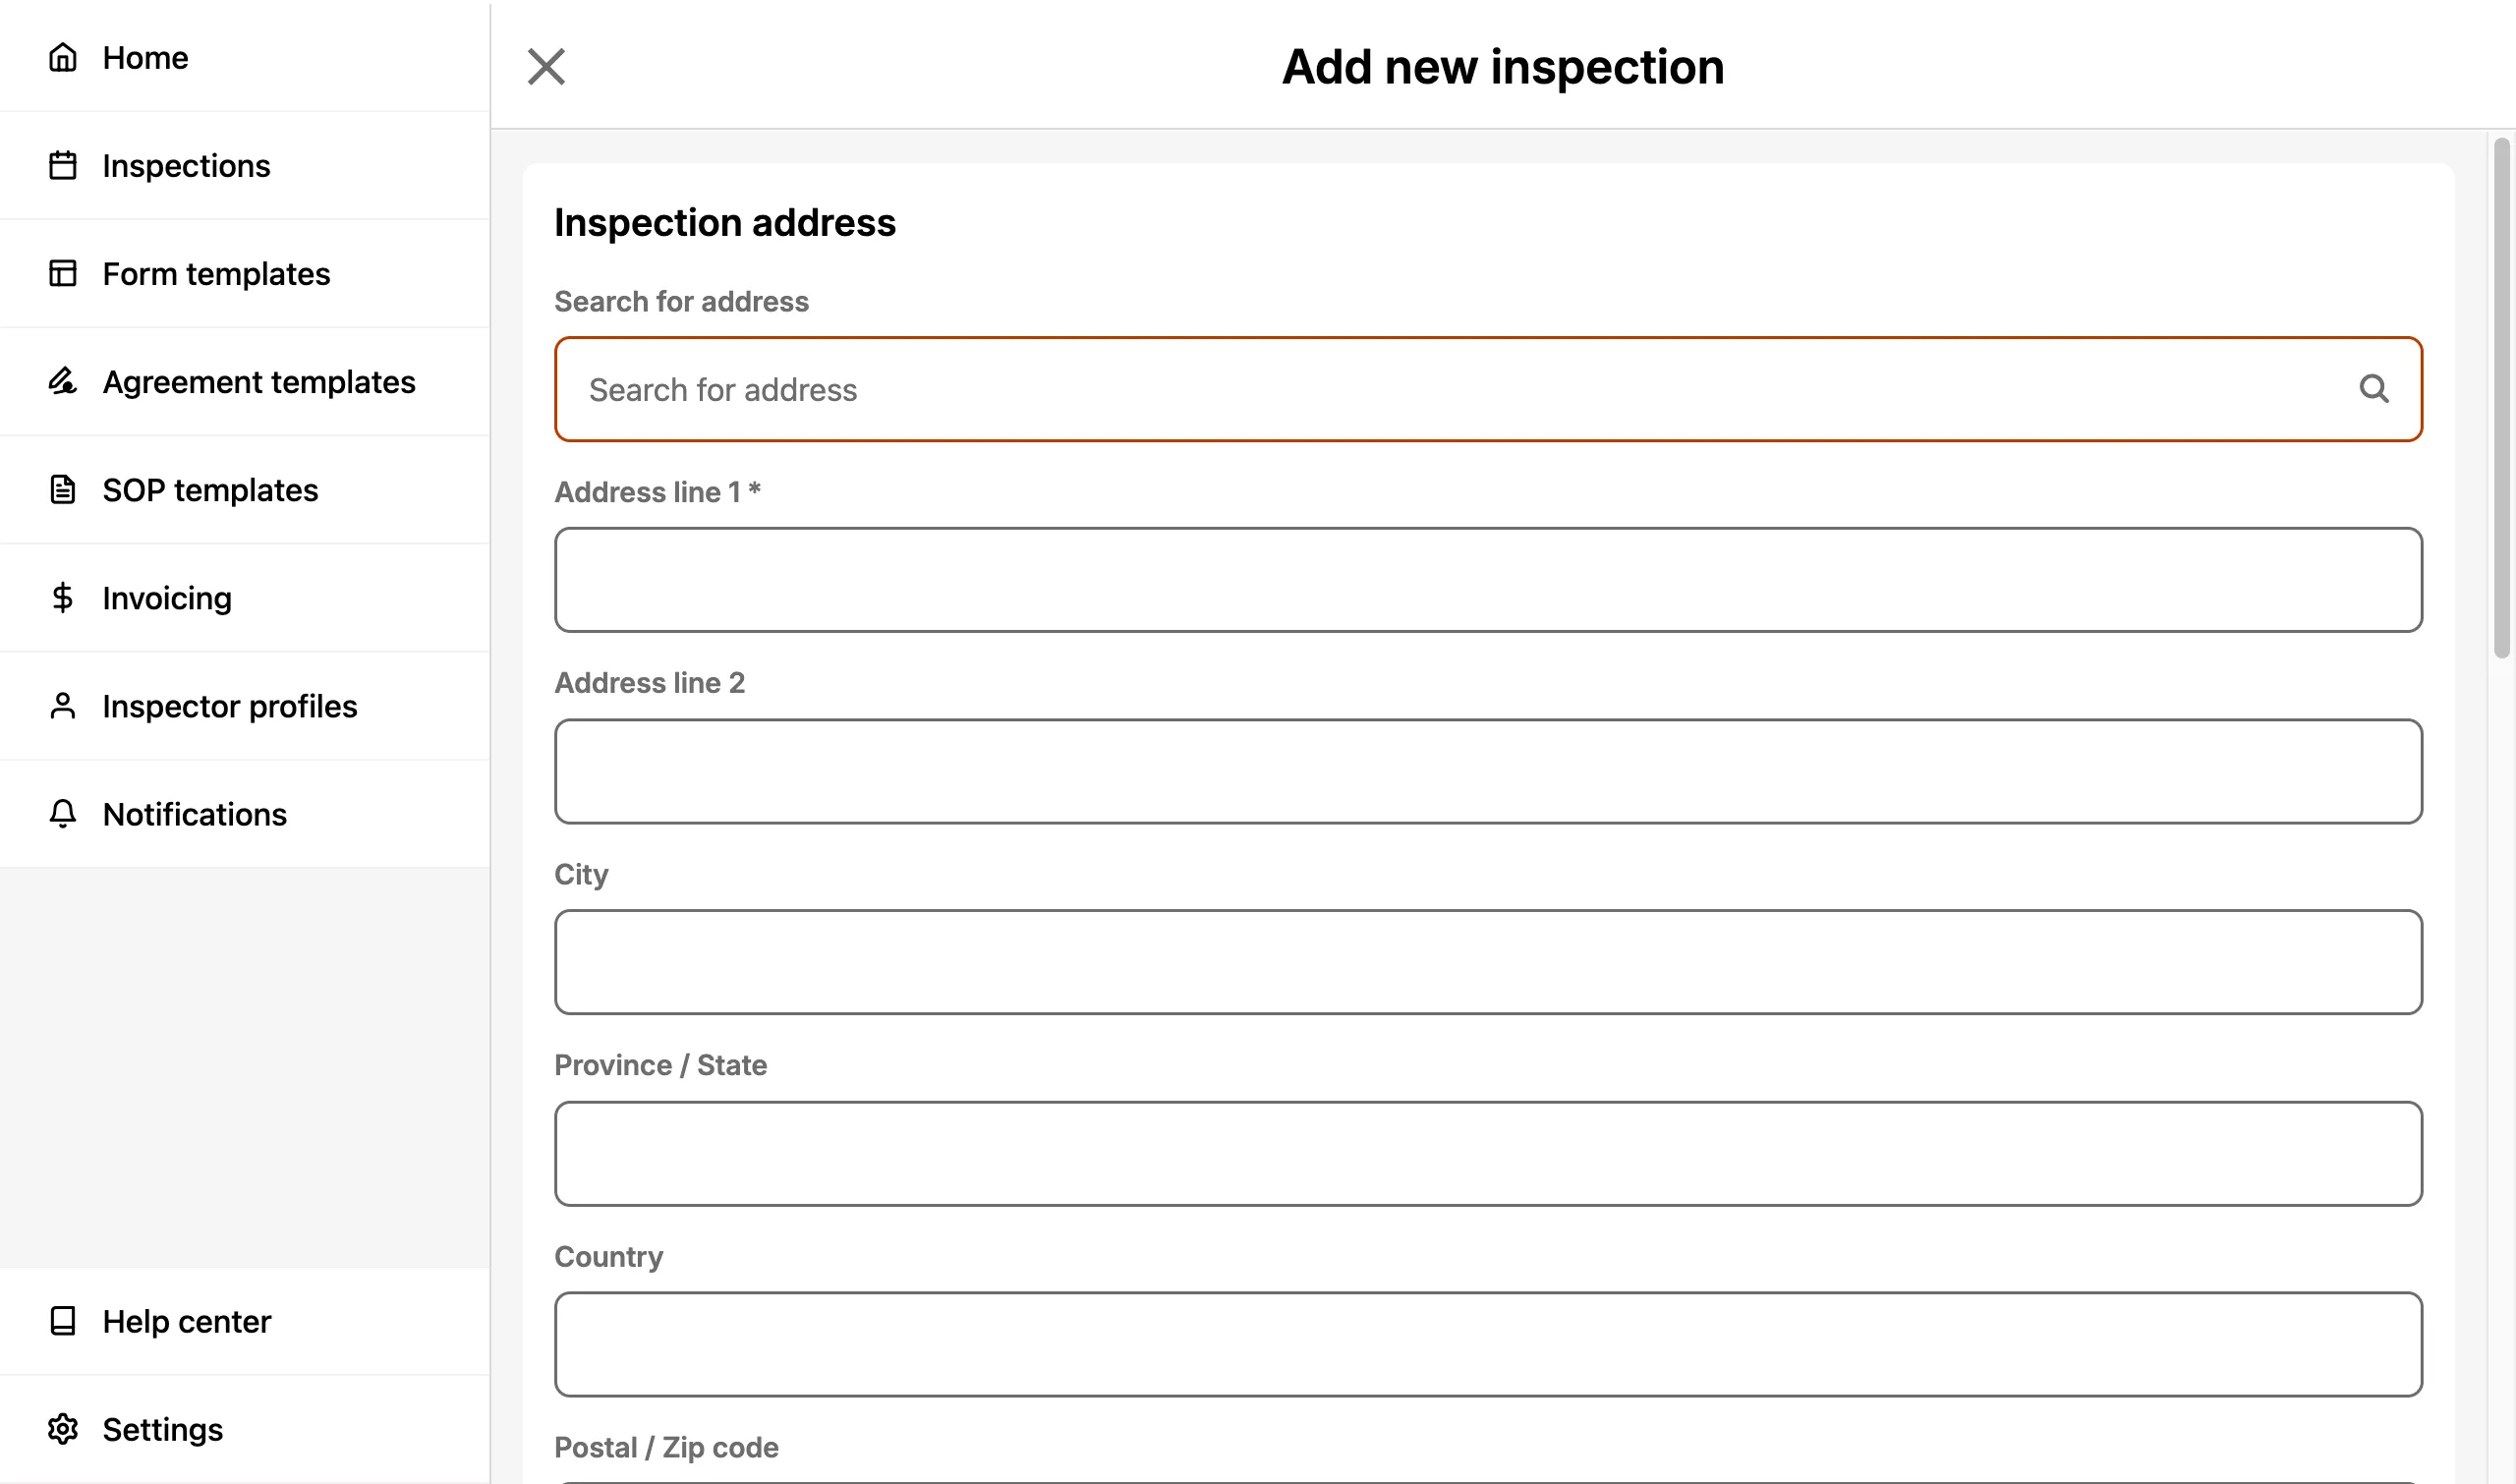
Using any of the above methods takes you to the Add new inspection page where you can enter the inspection address, time, and configuration details. The Configuration section allows you to select an Inspector Profile and Form Template upfront.
Inspections are also created automatically when you accept a Booking Request from one of your scheduling pages.
Inspection Sections
Every Inspection is comprised of the sections below:
- Inspection Address
- Inspection Time
- Inspection Forms
- Contacts
- Inspector Profile
- Invoice
- Property Details
- General Remarks
- Internal Memo
- Delete Inspection
Inspection Address
Enter an Inspection Address by using the search functionality or manually typing the address.
- The address can be updated at any time within an Inspection.
- The Inspection Address appears in the final client-facing report.
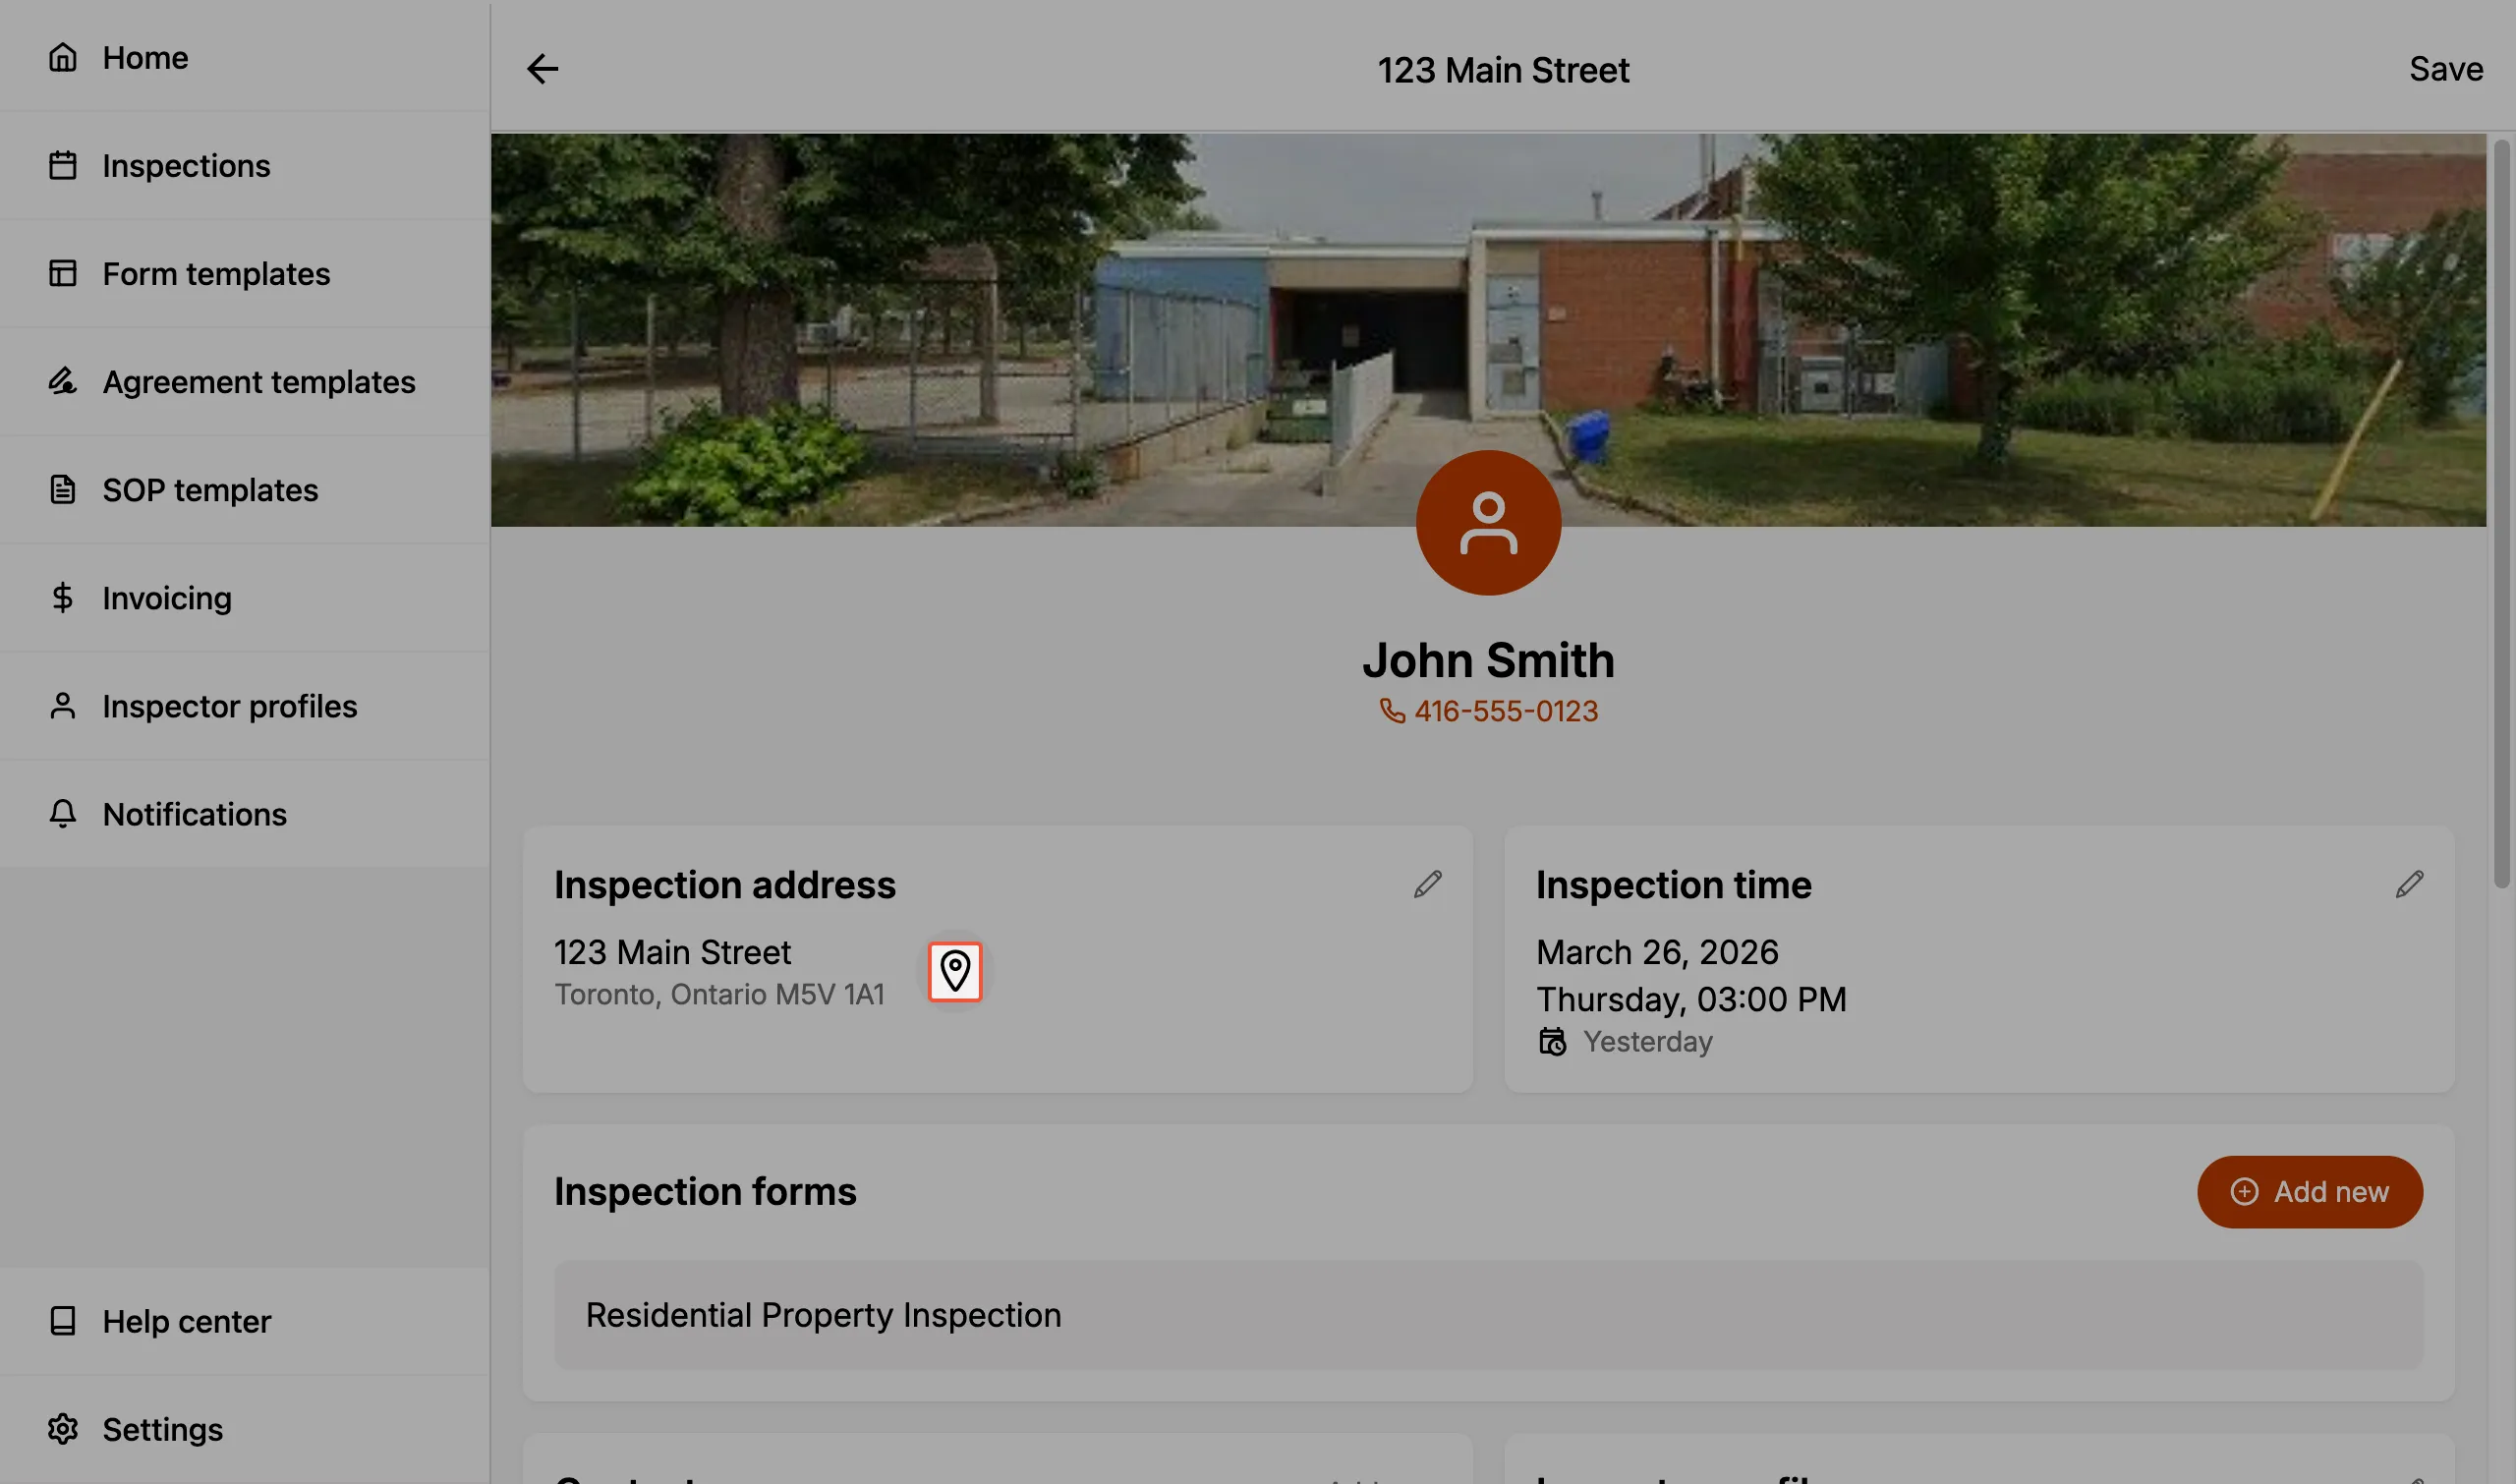
Within an Inspection, a map pin icon is visible next to the address. Selecting this icon opens the maps application on your device.
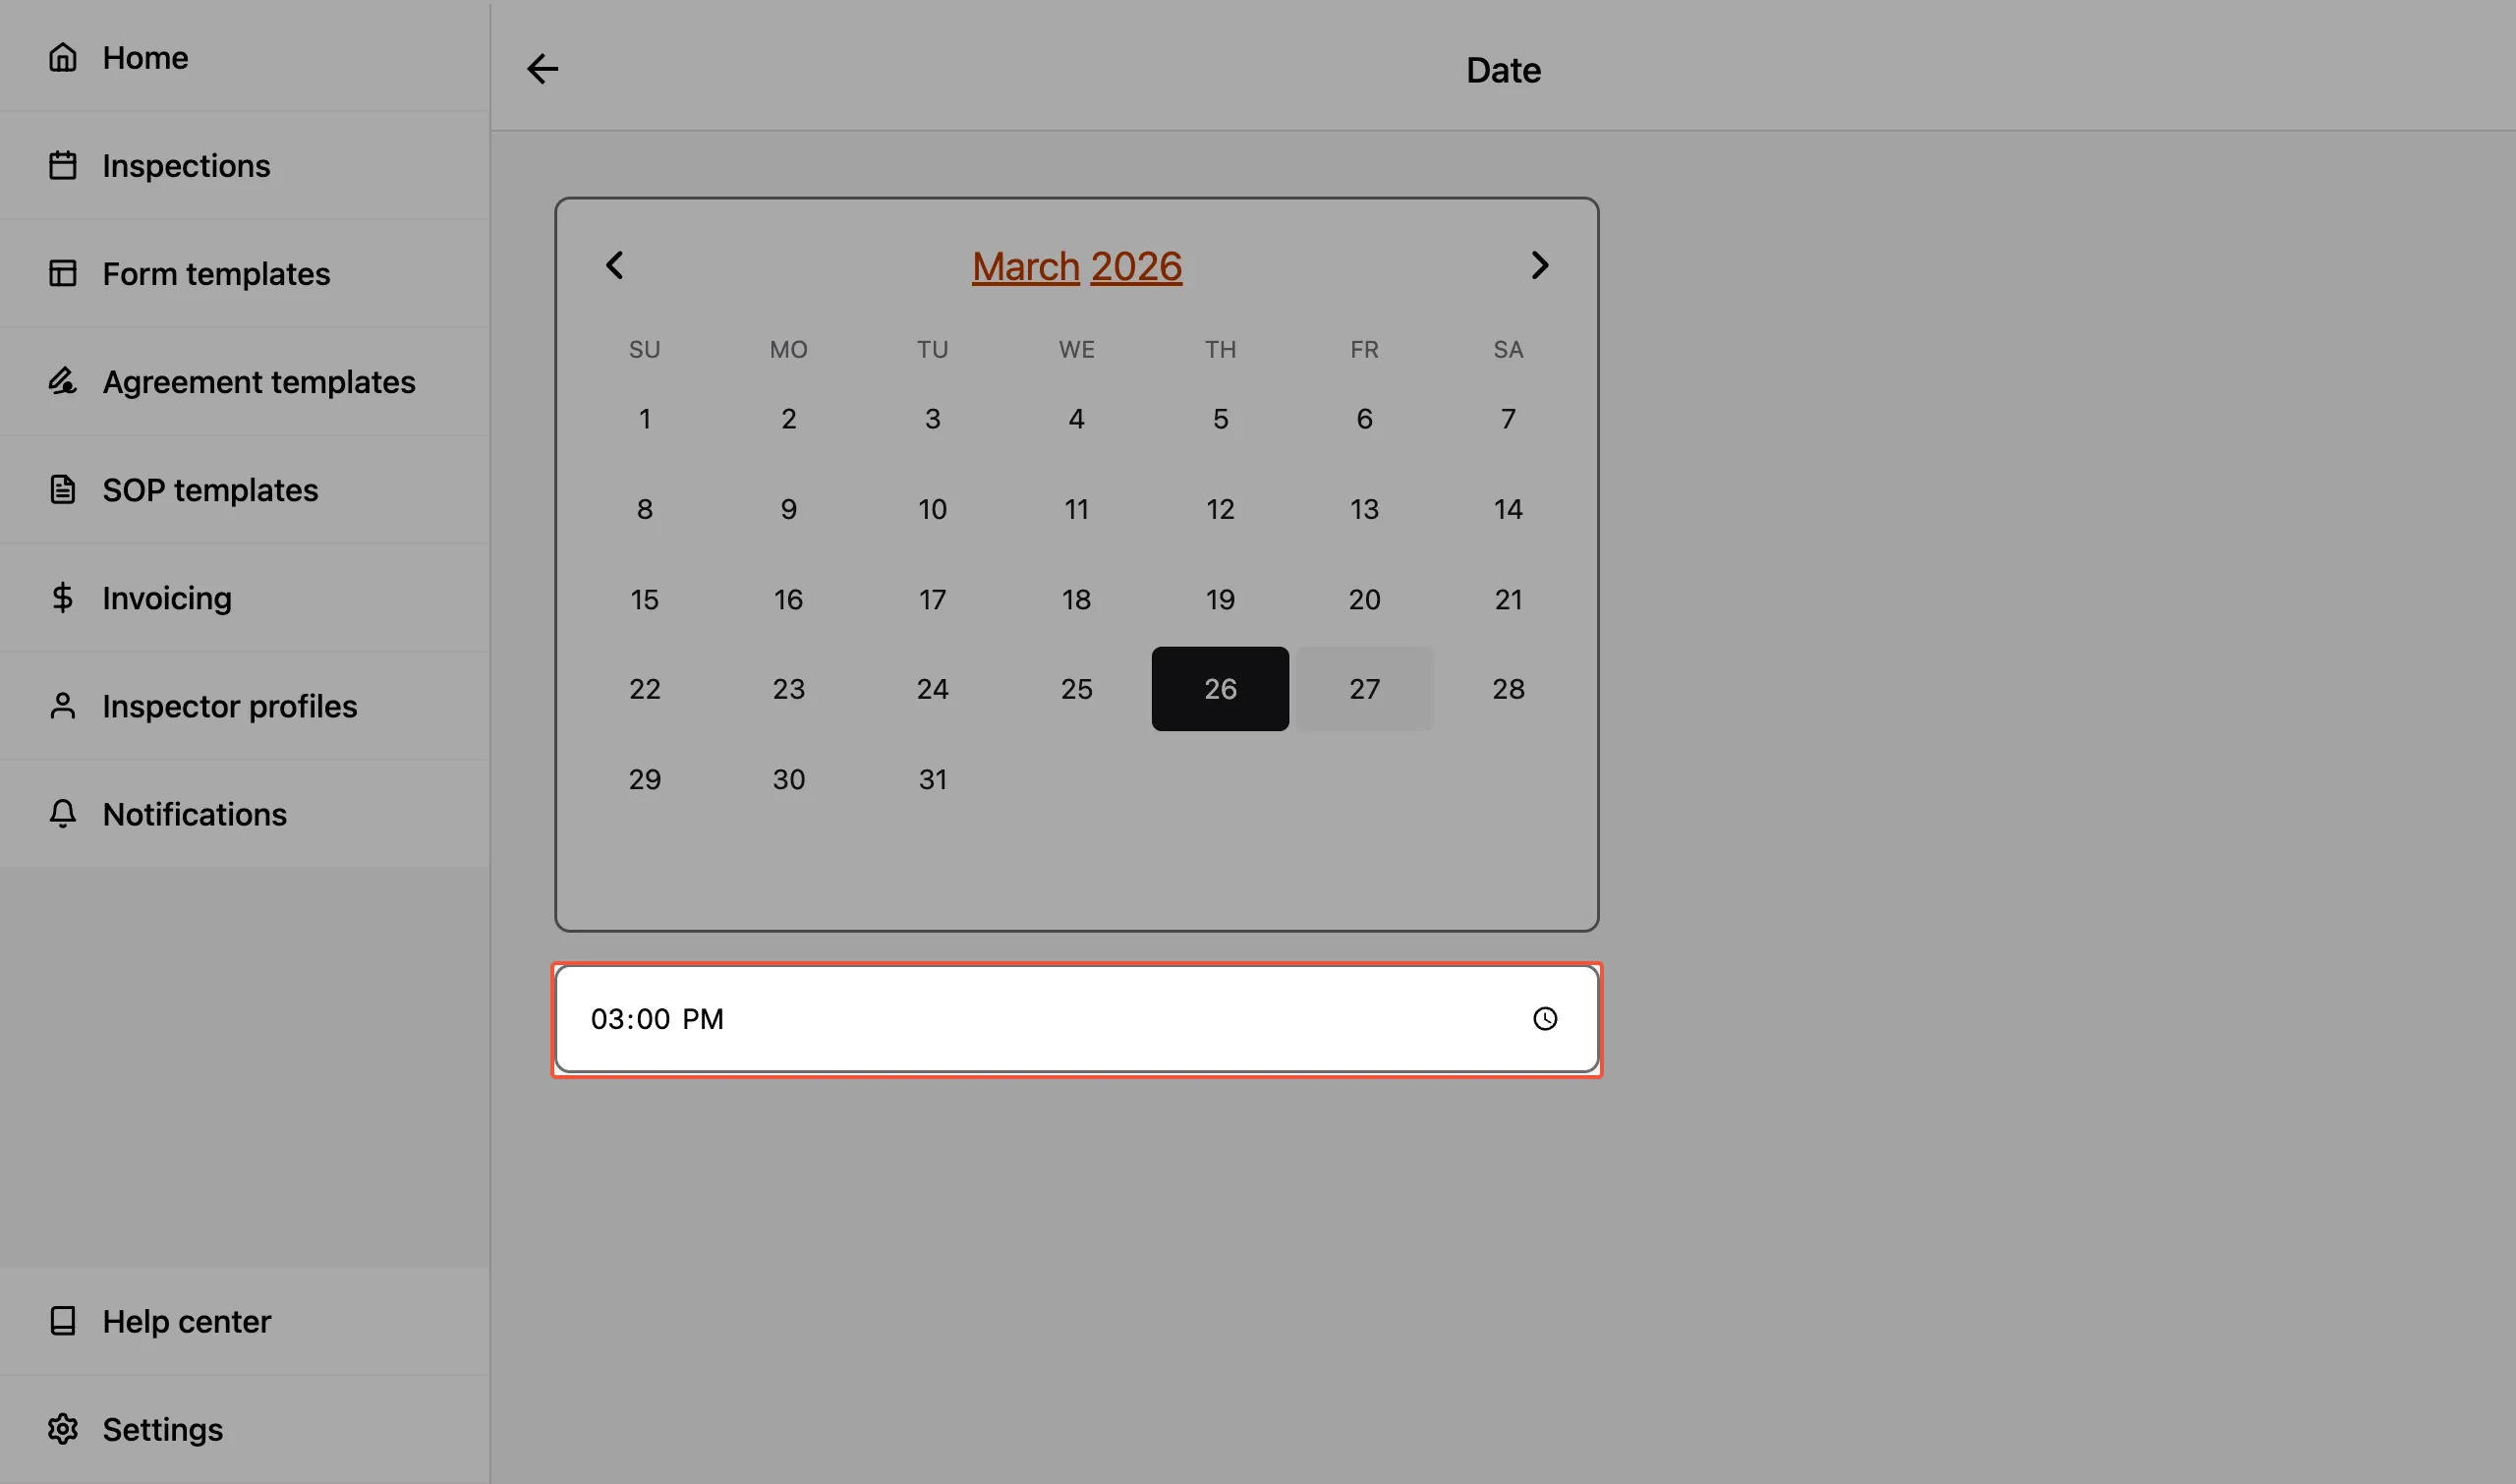
Inspection Time
Set the Inspection Time by selecting the appropriate date and time when creating the inspection.

-
The Inspection Time can be updated at any time within an Inspection by selecting the time card.
-
The Inspection Time appears in the final client-facing report.
Setting an inspection time helps with scheduling, lets clients know when to expect you, and appears on all report documentation (such as service agreements, invoices, etc.).
Inspection Forms
Each Inspection can have one or more Inspection Forms associated with it. Inspection Forms allow you to associate different types of inspections with a single inspection site visit.
-
e.g., If you are certified to perform multiple types of inspections (e.g. home inspection, asbestos inspection, radon inspection, etc.) on a property then you can pre-setup various Form Templates and load them into the same Inspection.
Each Inspection Form allows you to generate a distinct report (Web report and/or PDF) pertaining specifically to the inspection performed.
We'll go into more detail on how Inspection Forms work here.
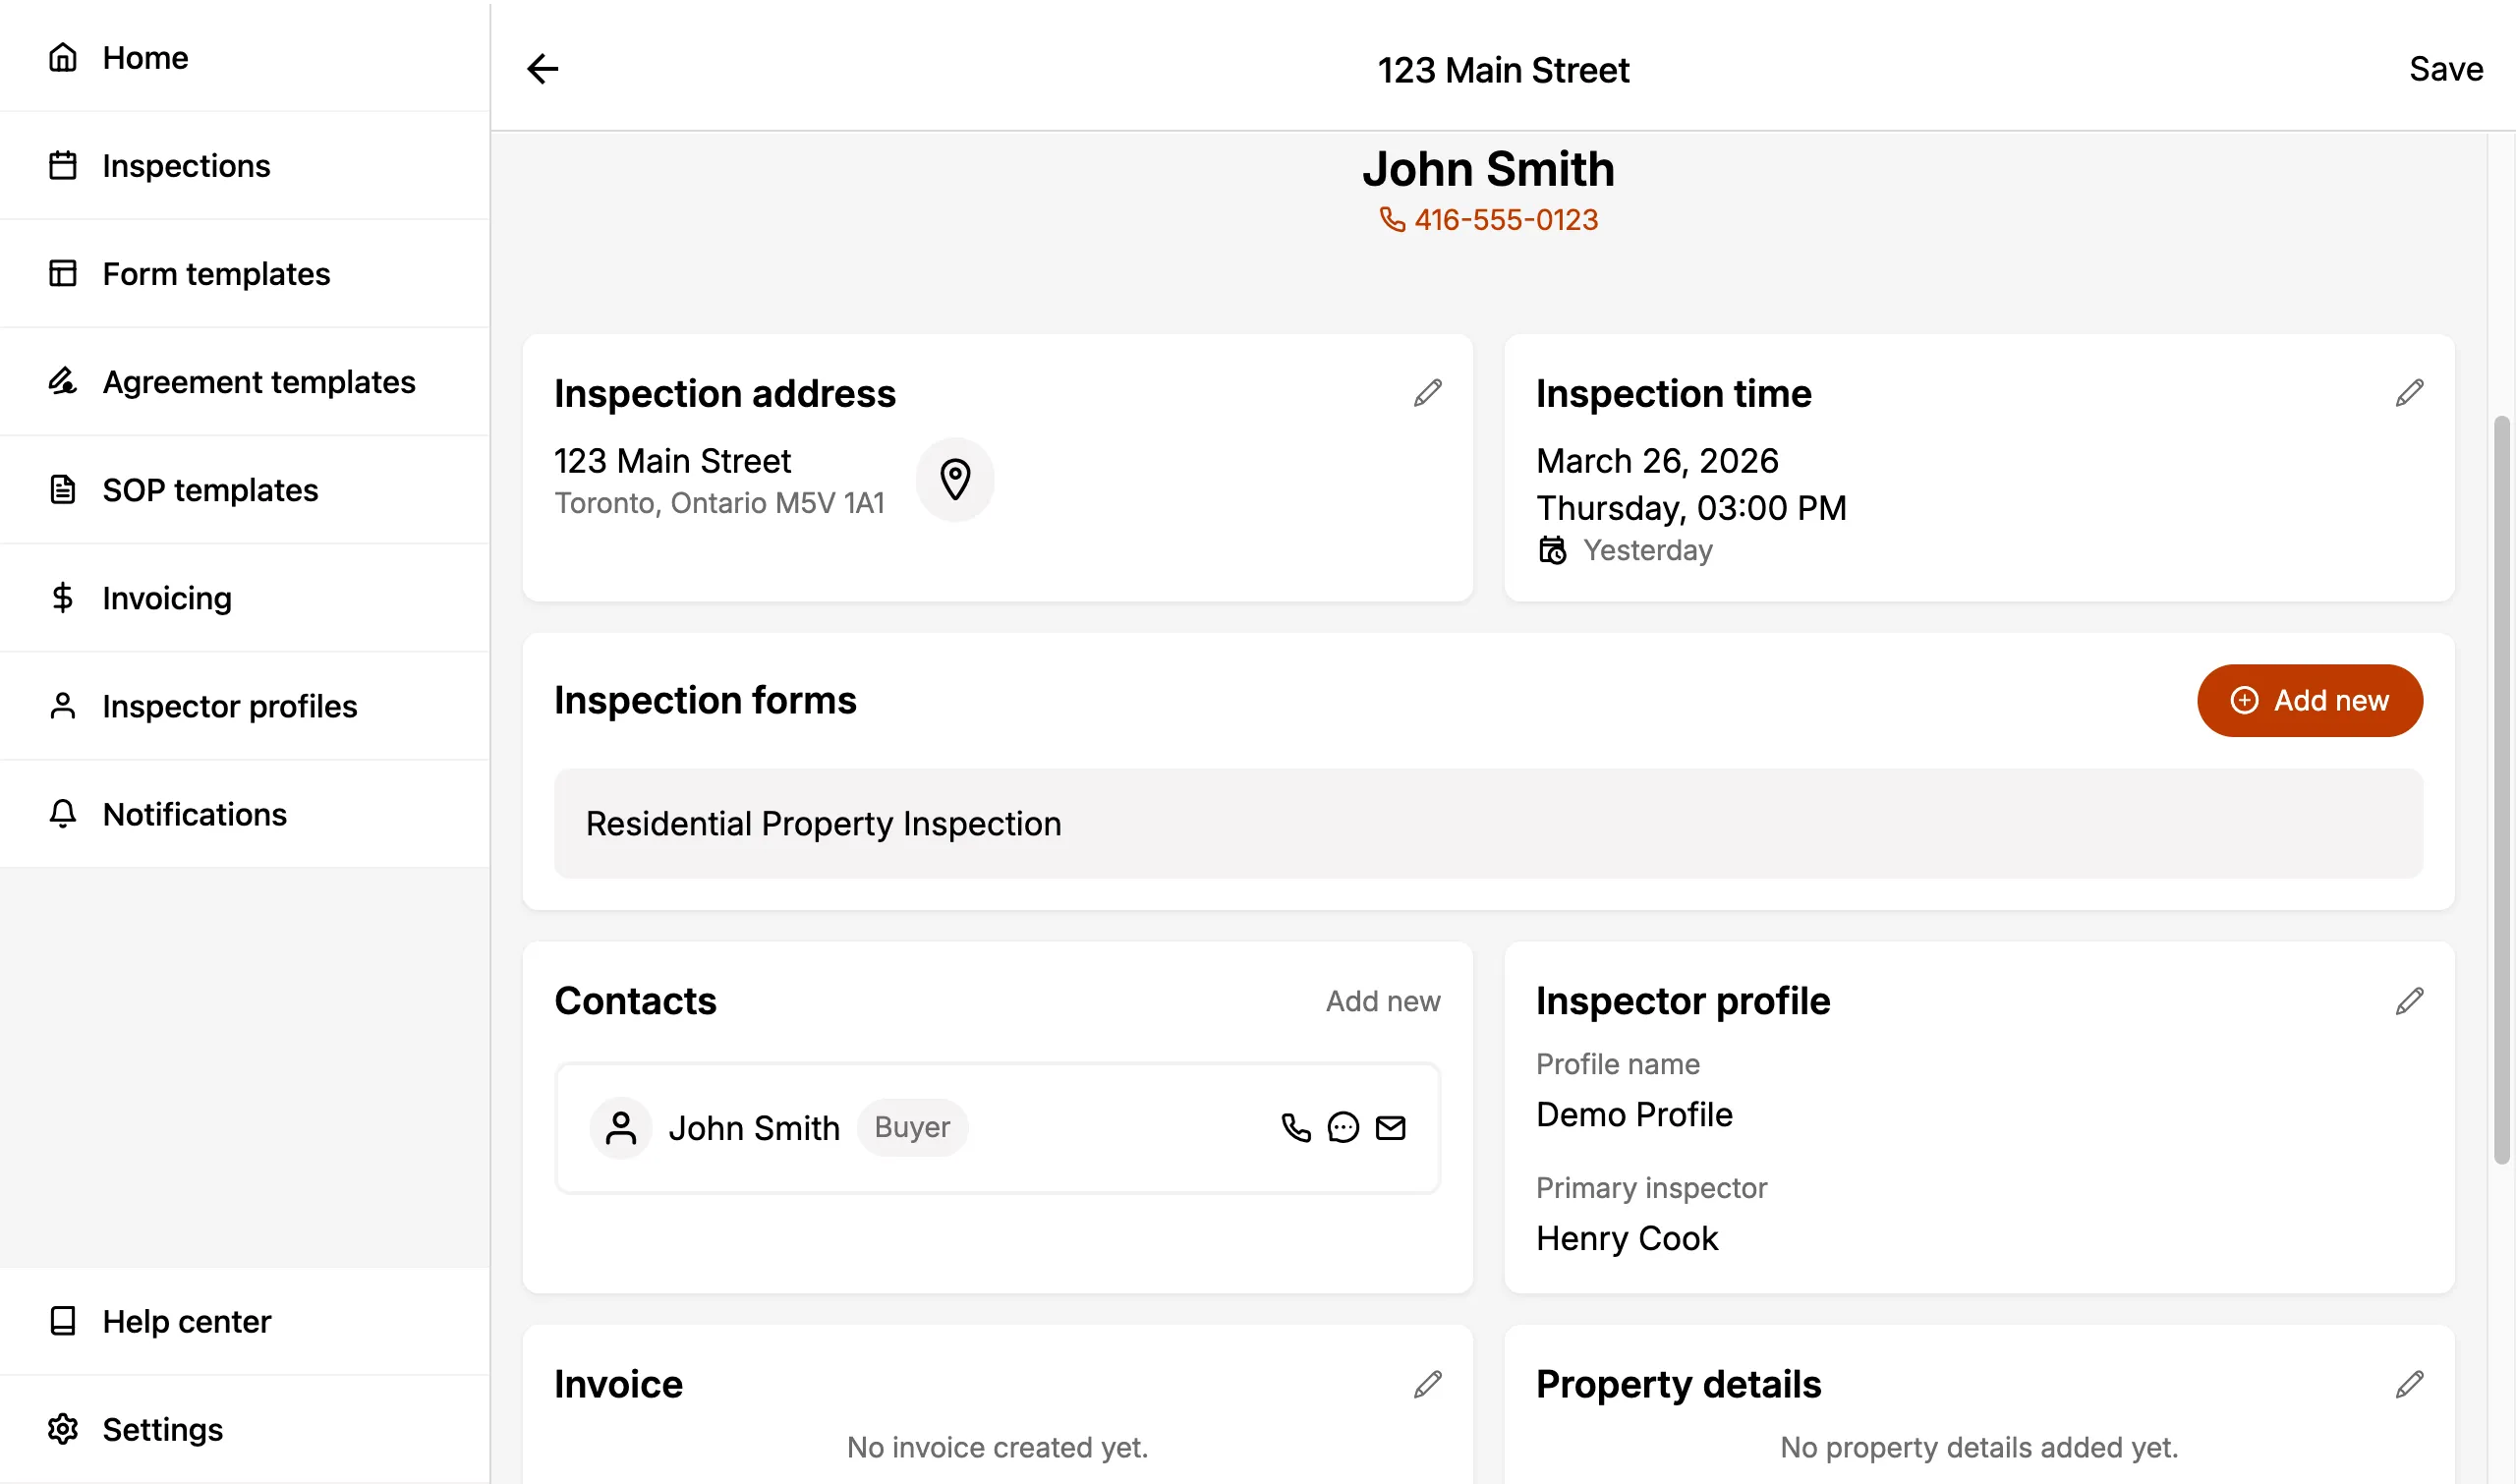
Contacts
Contacts allow you to enter the details of associated individuals, or entities, to the Inspection.
A contact must have a role assigned to them. There are currently seven roles:
- Buyer
- Buyer agent
- Seller
- Seller agent
- Property manager
- Builder representative
- Other
To create a new contact, select Add new.
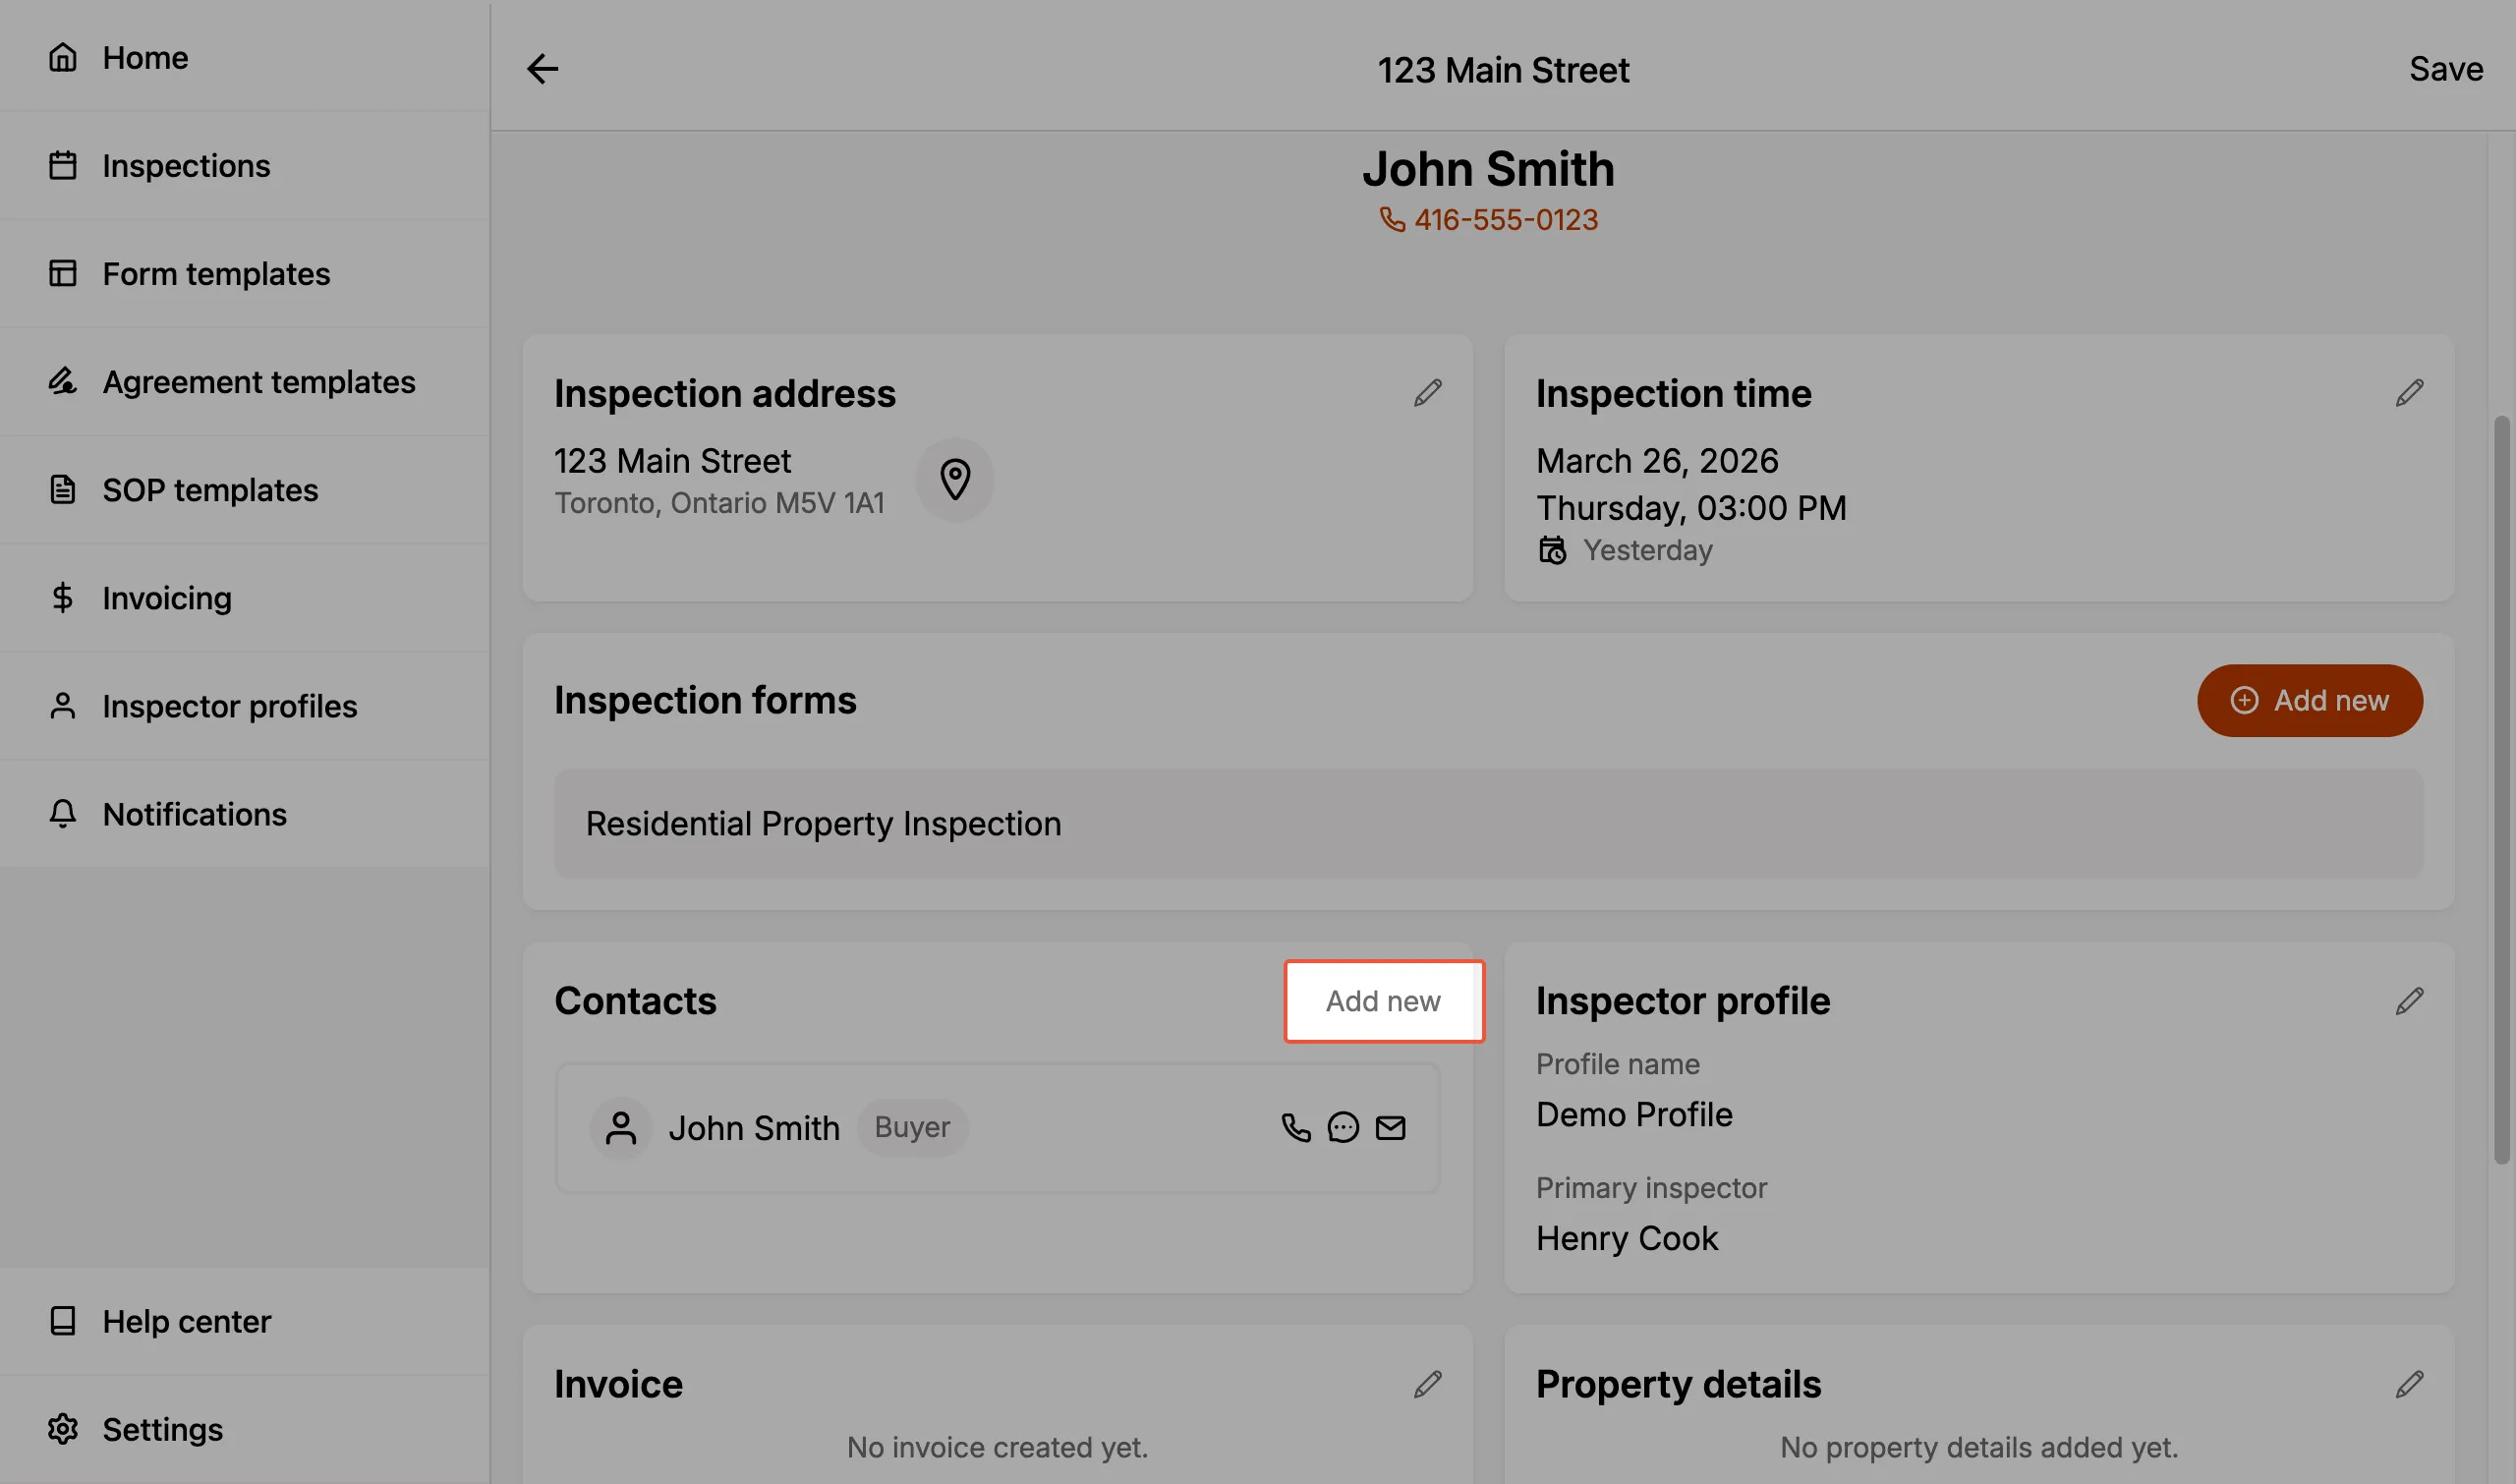
You will then be prompted to select one of the roles above and then to either:
-
Input the name, email, phone number, and address of the new contact.
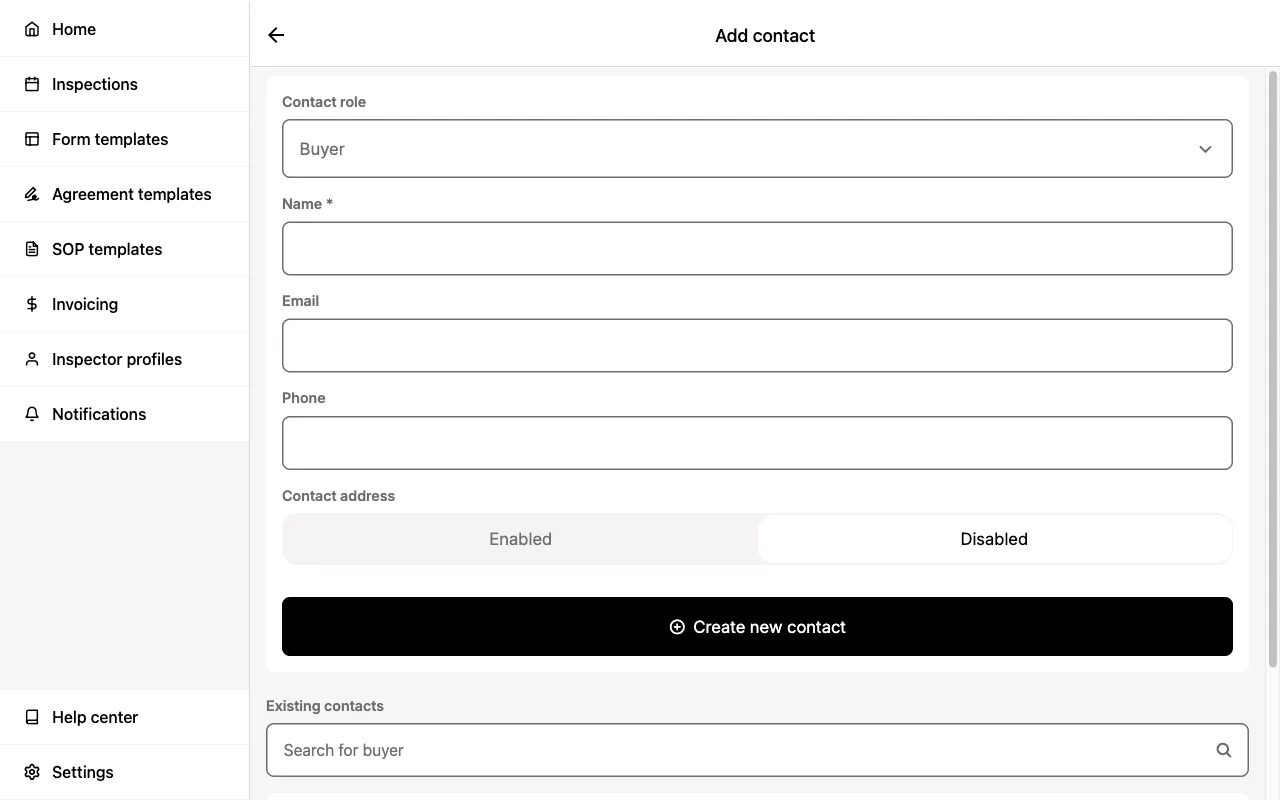
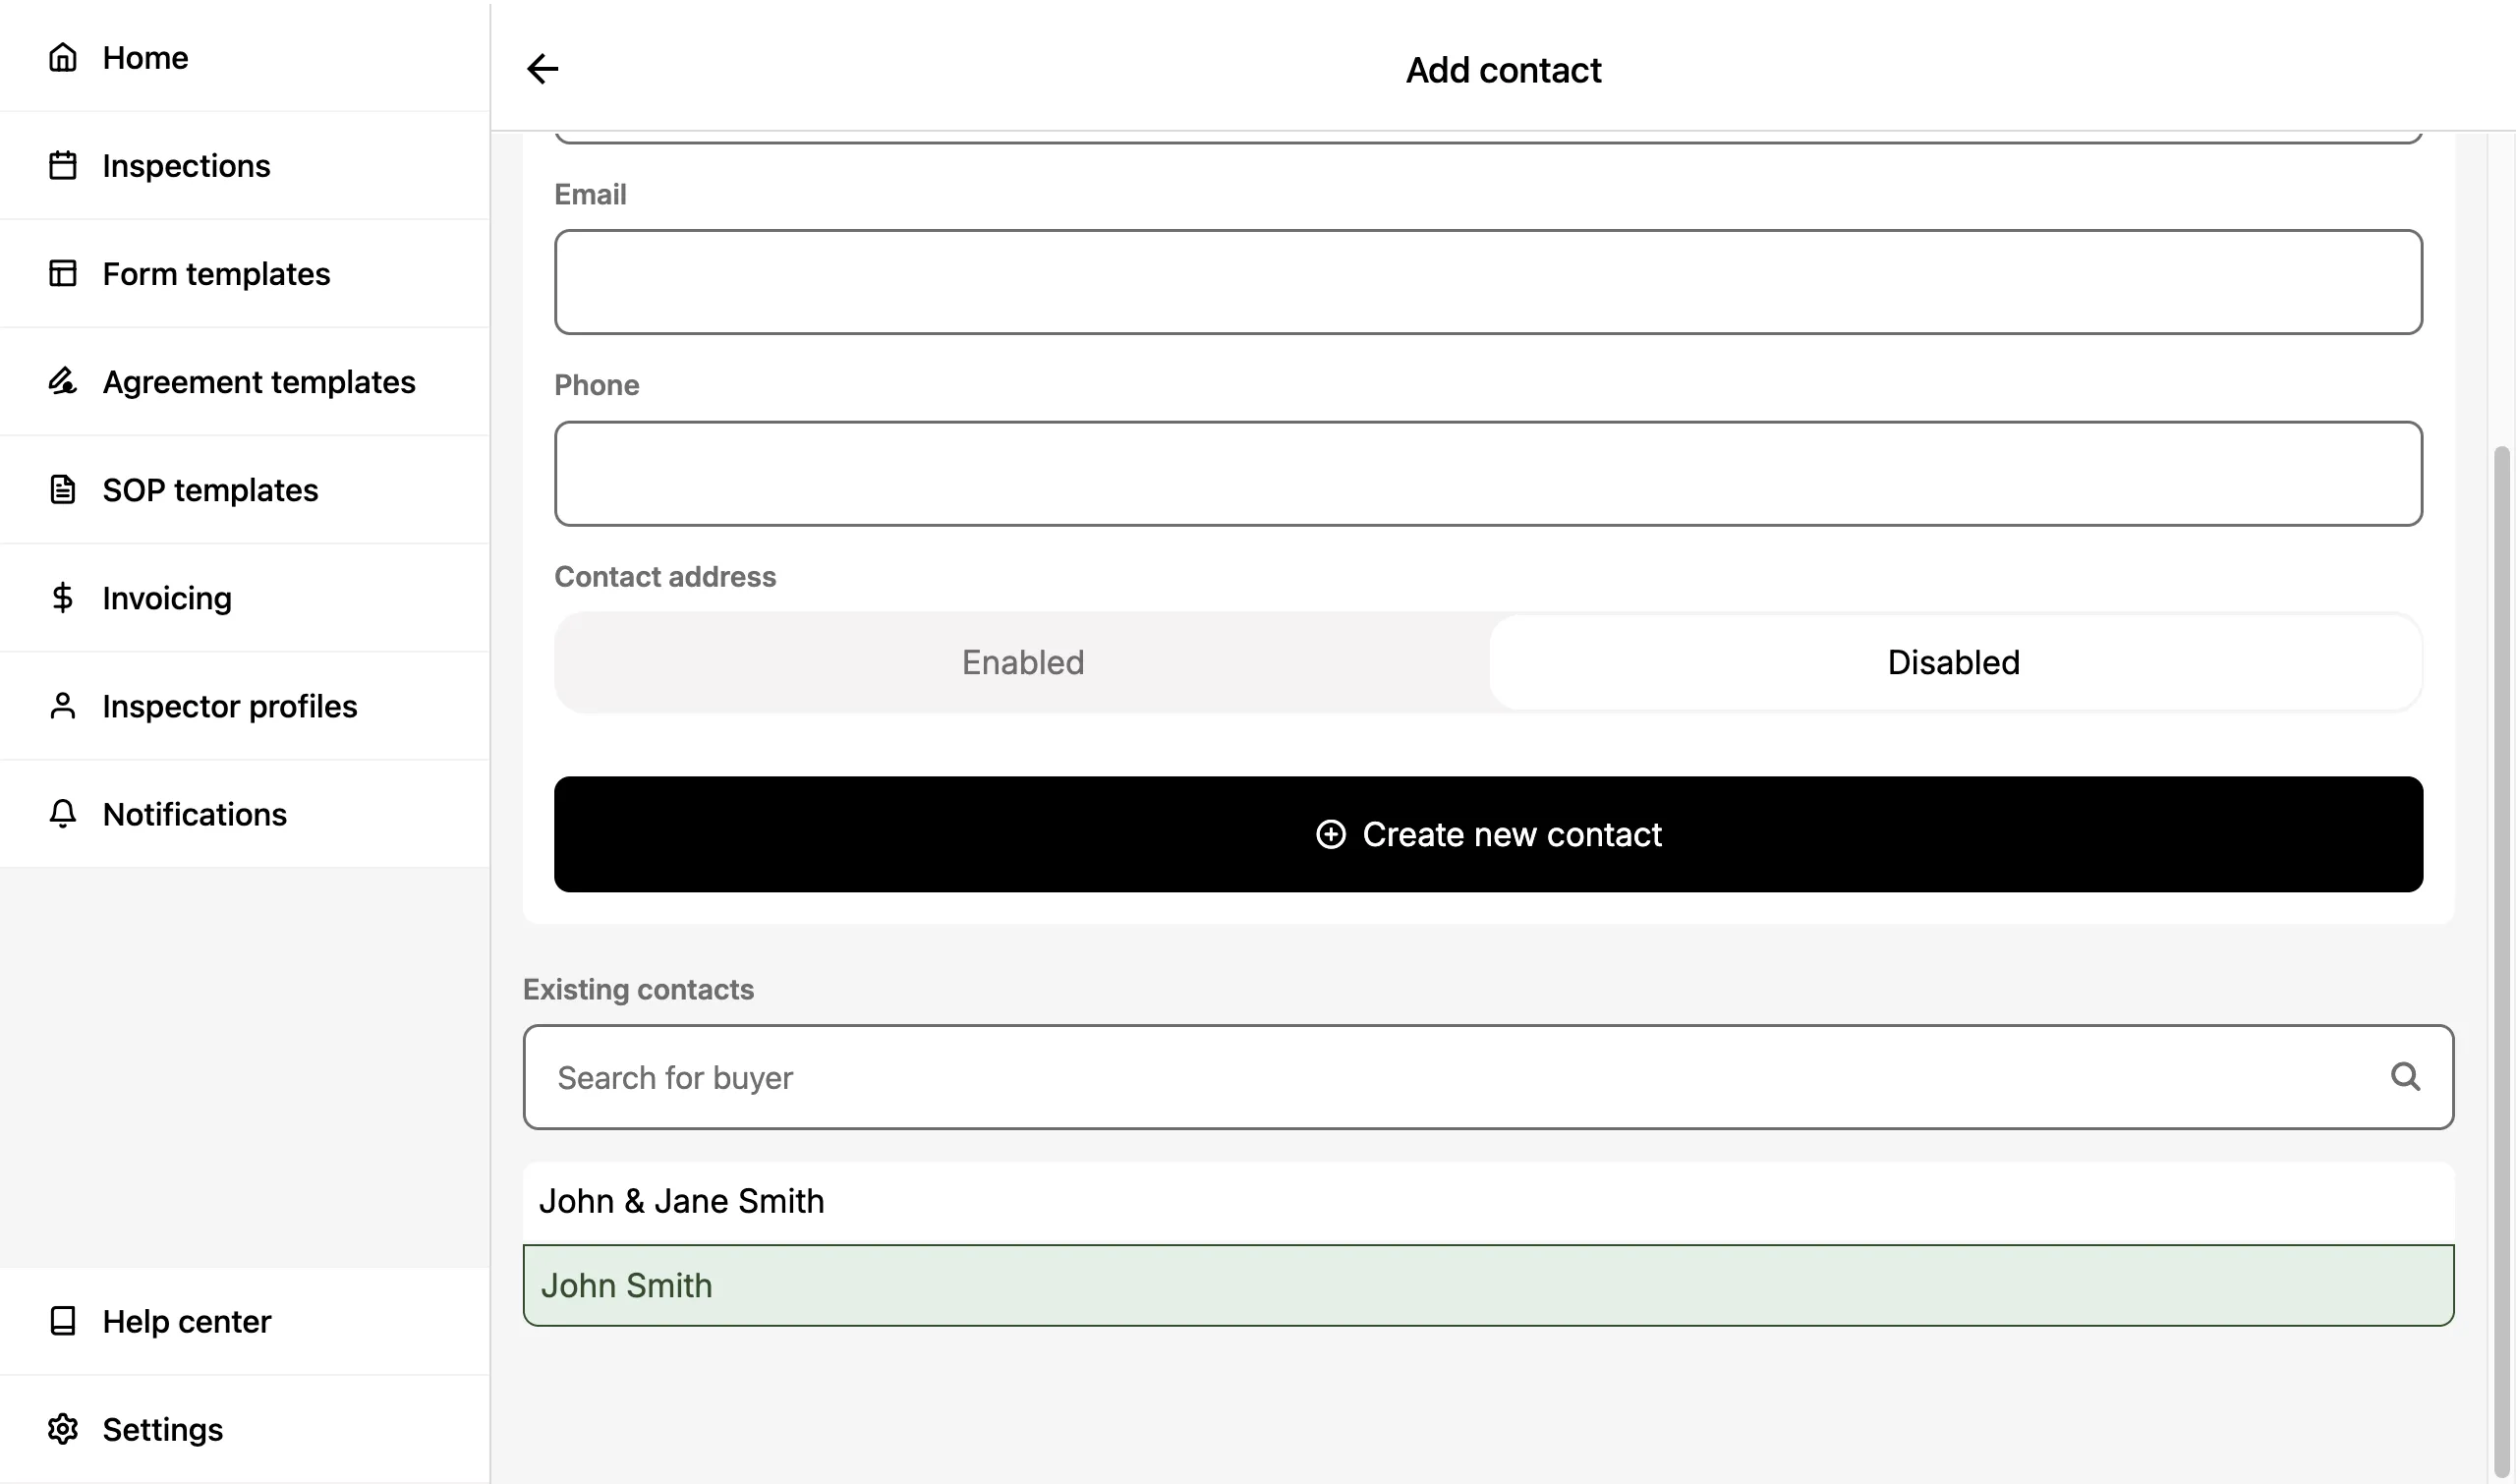
-
Search and select from a list of existing contacts.
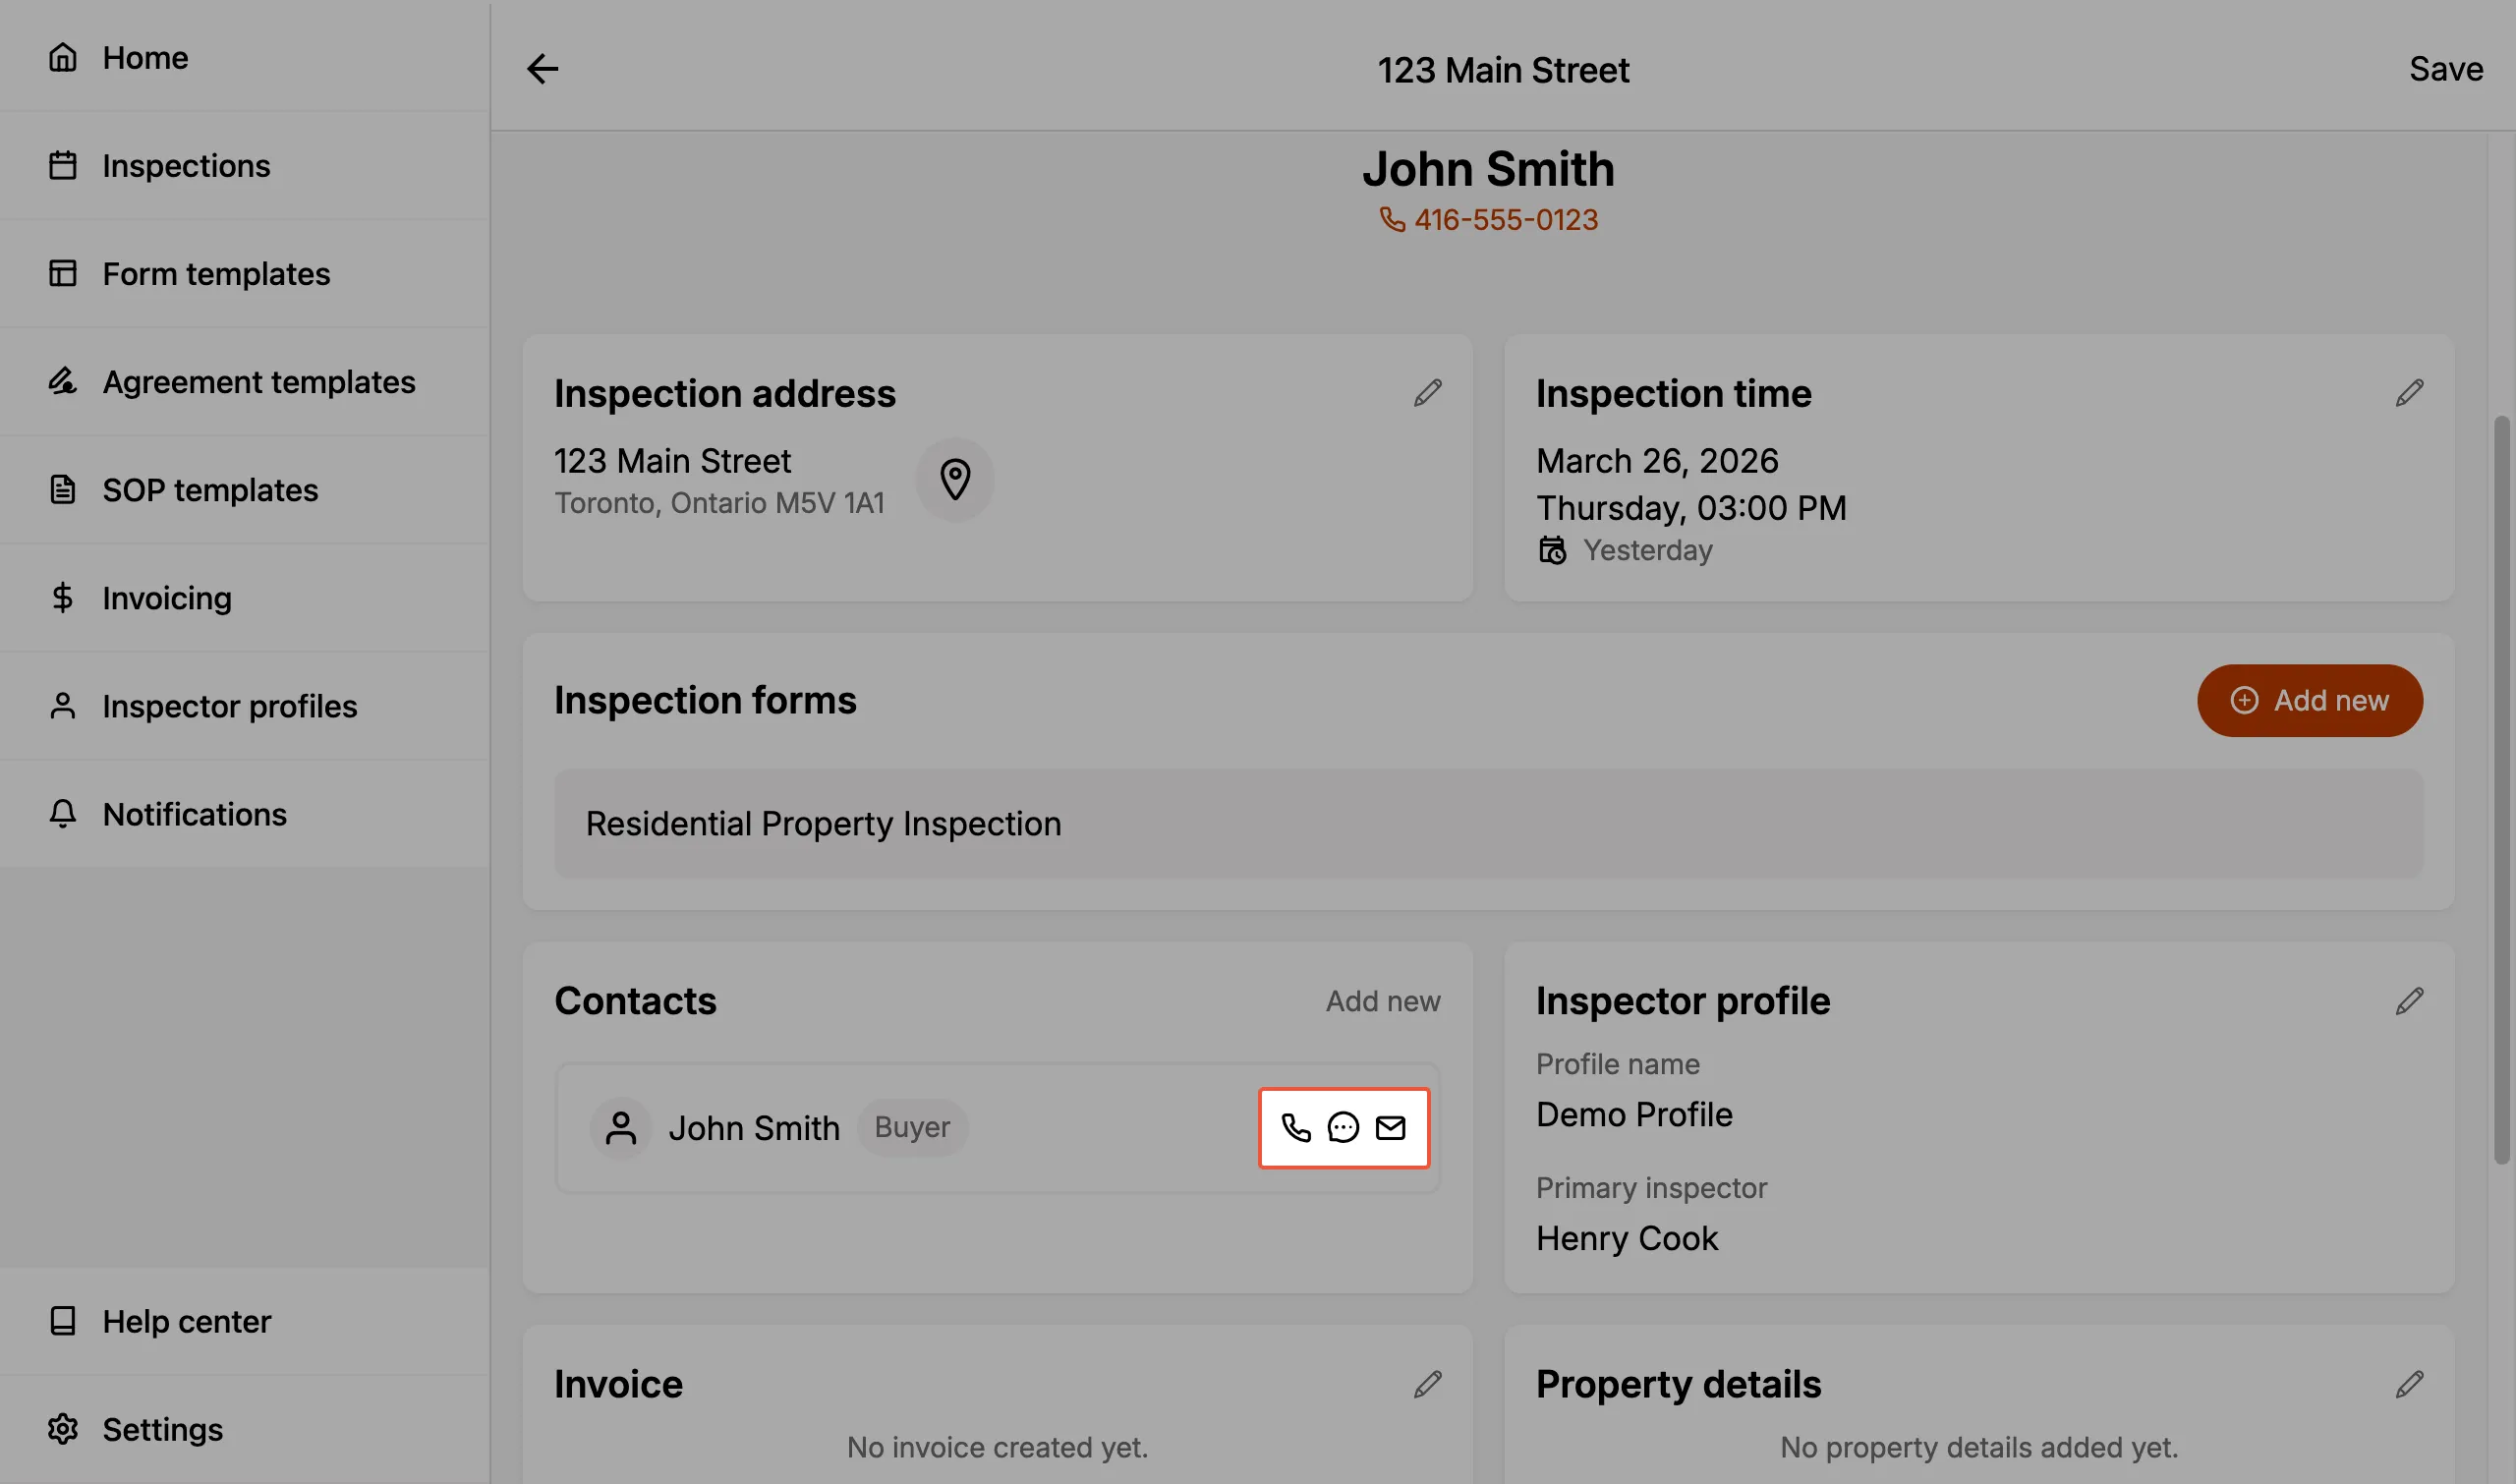
Calling, Texting, and Emailing Contacts
If a contact's phone number or email address is entered, action icons will appear directly on the contact card within the inspection. These icons allow you to call, text, or email the contact.
The individuals, or entities, entered as Contacts will automatically have their email inserted into the To: field when sharing a PDF report.
- You may manually remove them, as necessary.
Inspector Profile
The Inspector Profile card displays the profile name and primary inspector assigned to the inspection.
If you have multiple certifications you may want to associate the relevant credentials and business information for each of your inspections. Inspector Profiles allow you to easily switch between your profiles.
- e.g., You are certified in both home inspections and asbestos inspections and have different business entities for each. Your upcoming job is strictly for an asbestos inspection. By selecting your asbestos inspection profile, you can have the relevant business info (name, website, phone number, address, logo, association details, etc.) populated in your inspection report.
Learn more about Inspector Profiles here.
If you're part of a multi-inspector organization as an admin or scheduler then the Inspector Profile allows you to identify which inspector has been assigned to the inspection job.
Invoice
The Invoice section allows you to create and manage an invoice associated with the inspection. This section streamlines the billing process by keeping invoice details directly within the inspection record.
Property Details
Capture key facts about the property in Property Details. Property features are displayed as tags (e.g., "Attic", "Garage") above the detail fields. Enter fields such as:
- Property type (selecting "other" allows you to enter custom text)
- Property features (you can add custom options in addition to the standard selections available)
- Year built
- Number of floors
- Number of bedrooms
- Number of bathrooms
- Building size
- Lot size
These property details help contextualize your report.
General Remarks
General Remarks is a structured set of notes that apply to the overall inspection and are shared with your client(s). They appear in the PDF report under the General Information section.
There are five sub-fields:
- Weather conditions — Weather and ground conditions observed at the time of the inspection.
- Property orientation — The direction the front of the property faces, used as a reference for describing observations.
- Purpose of inspection — The reason for the inspection, such as pre-purchase, pre-listing, or warranty.
- Attendees — Anyone present during the inspection, such as the buyer, seller, or their agents.
- Additional notes — Any other context or observations that apply to the inspection as a whole.
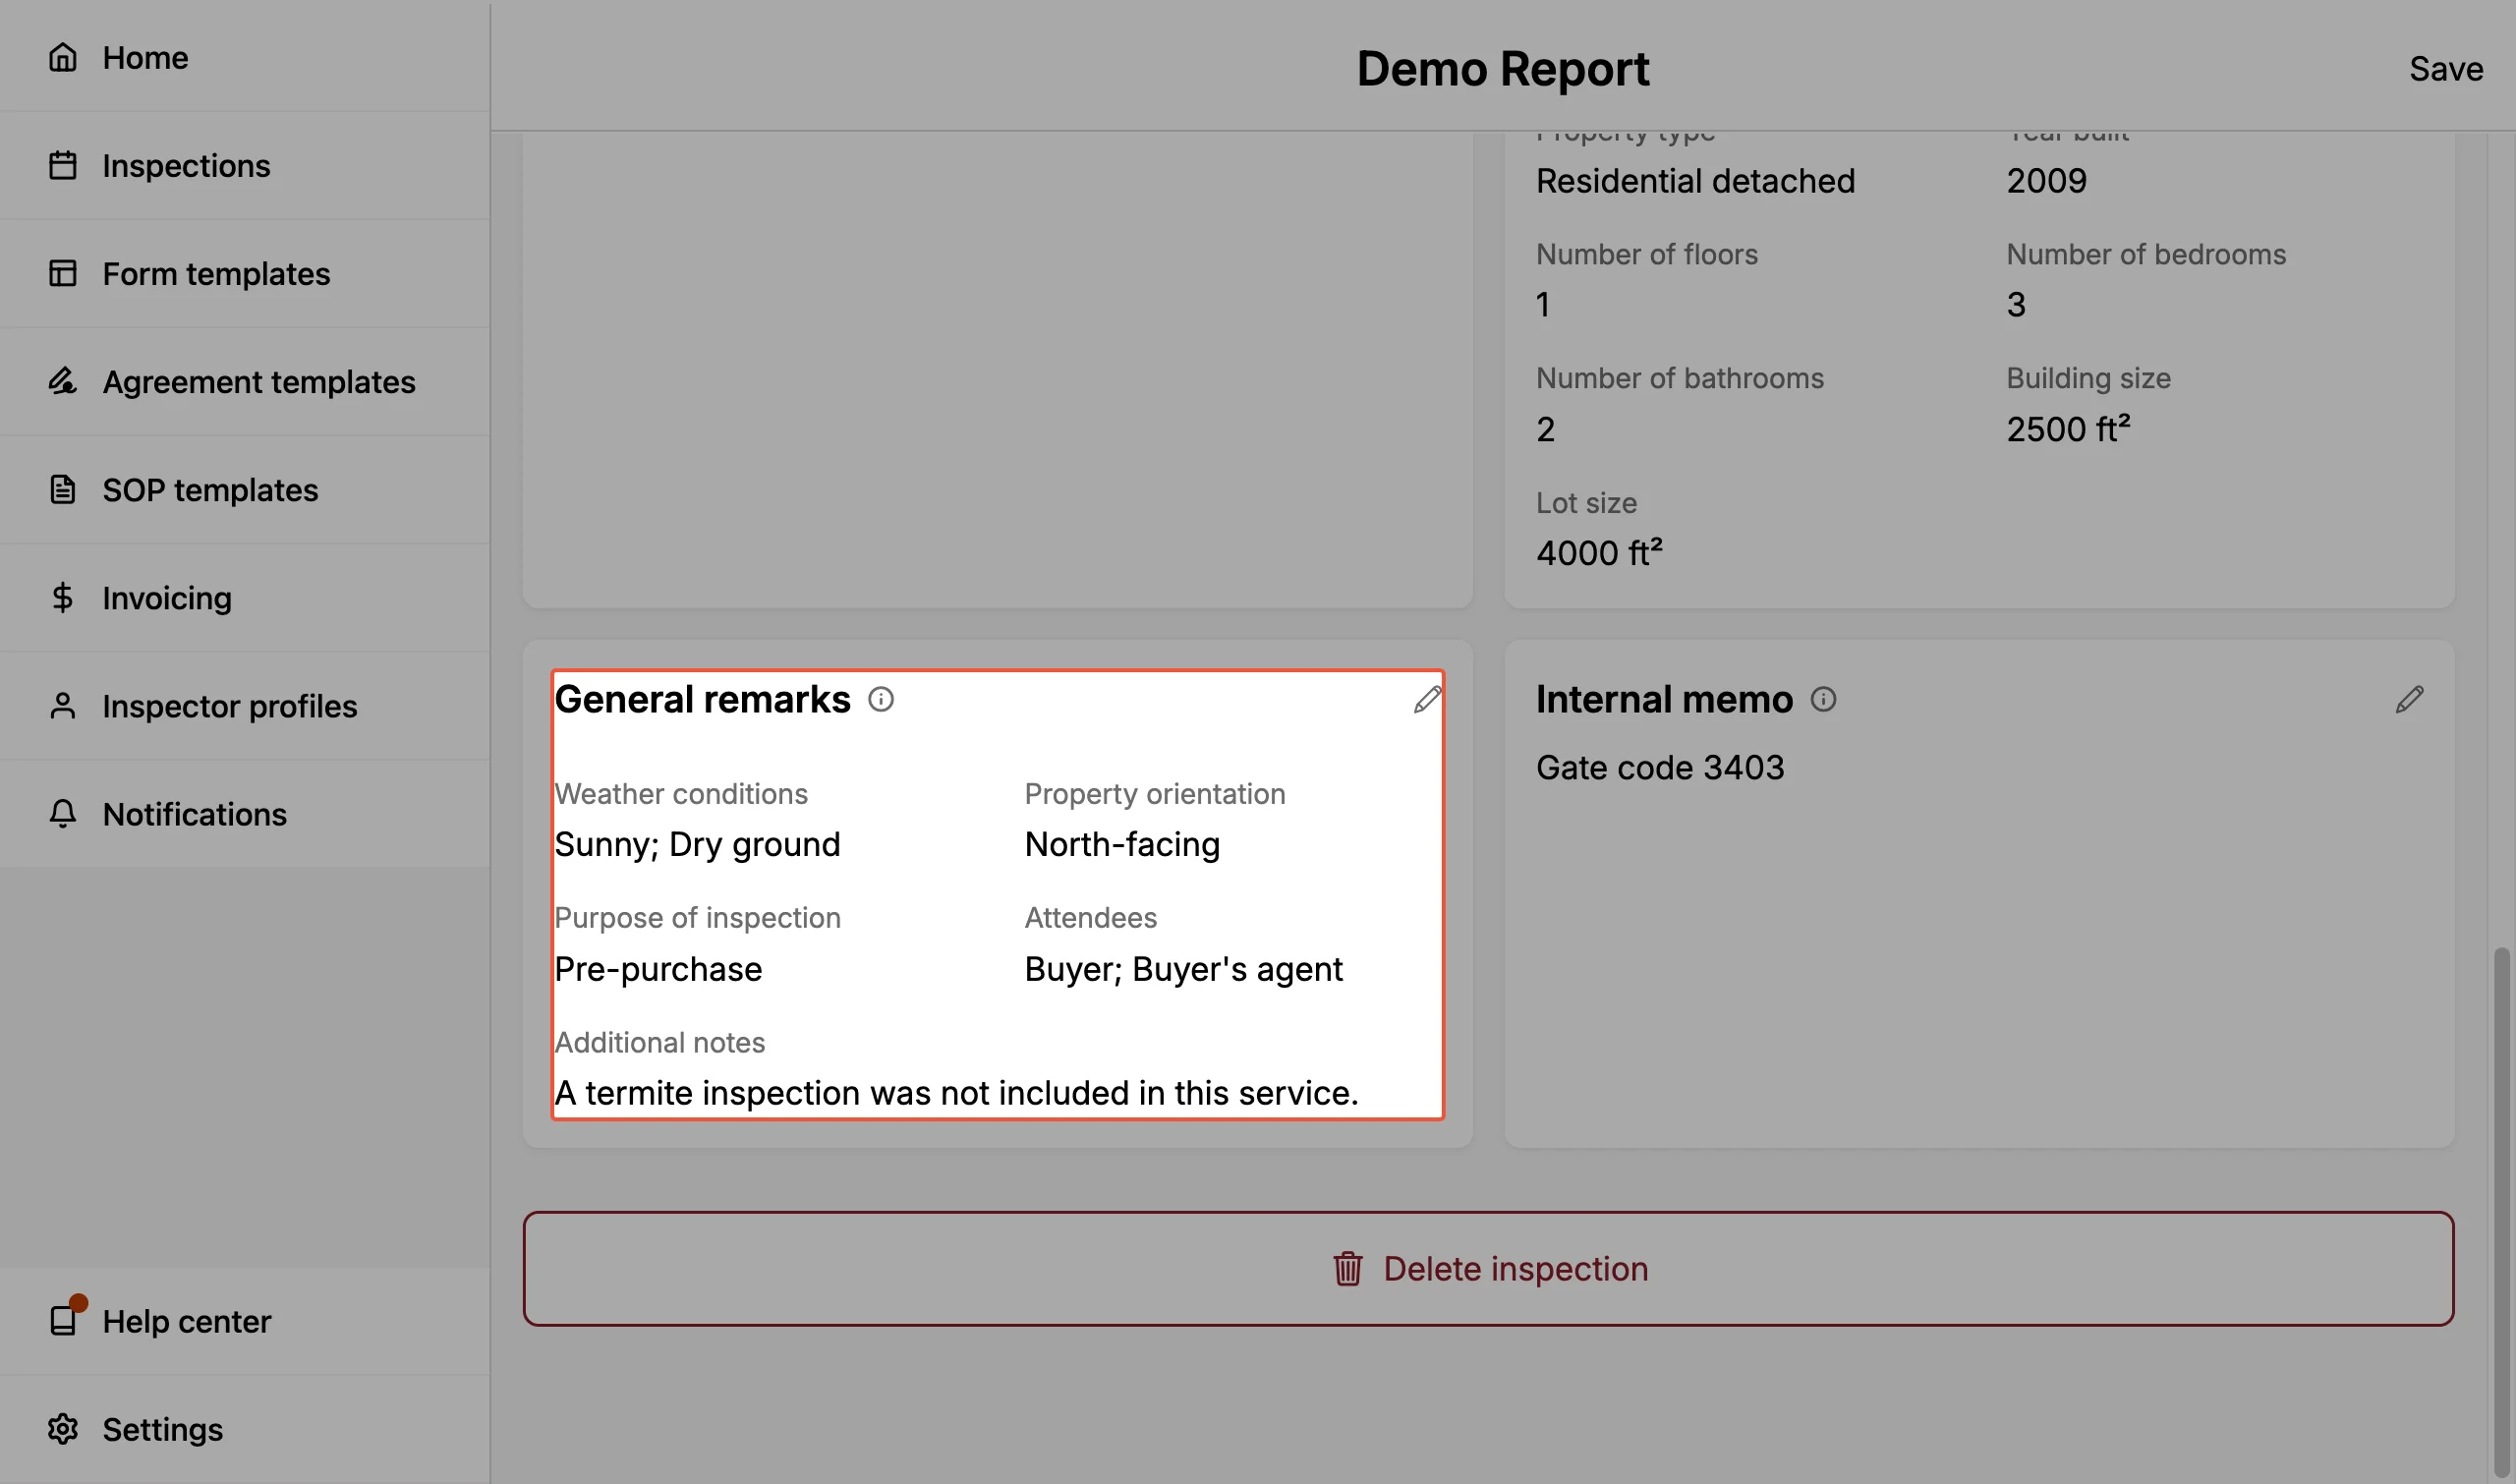
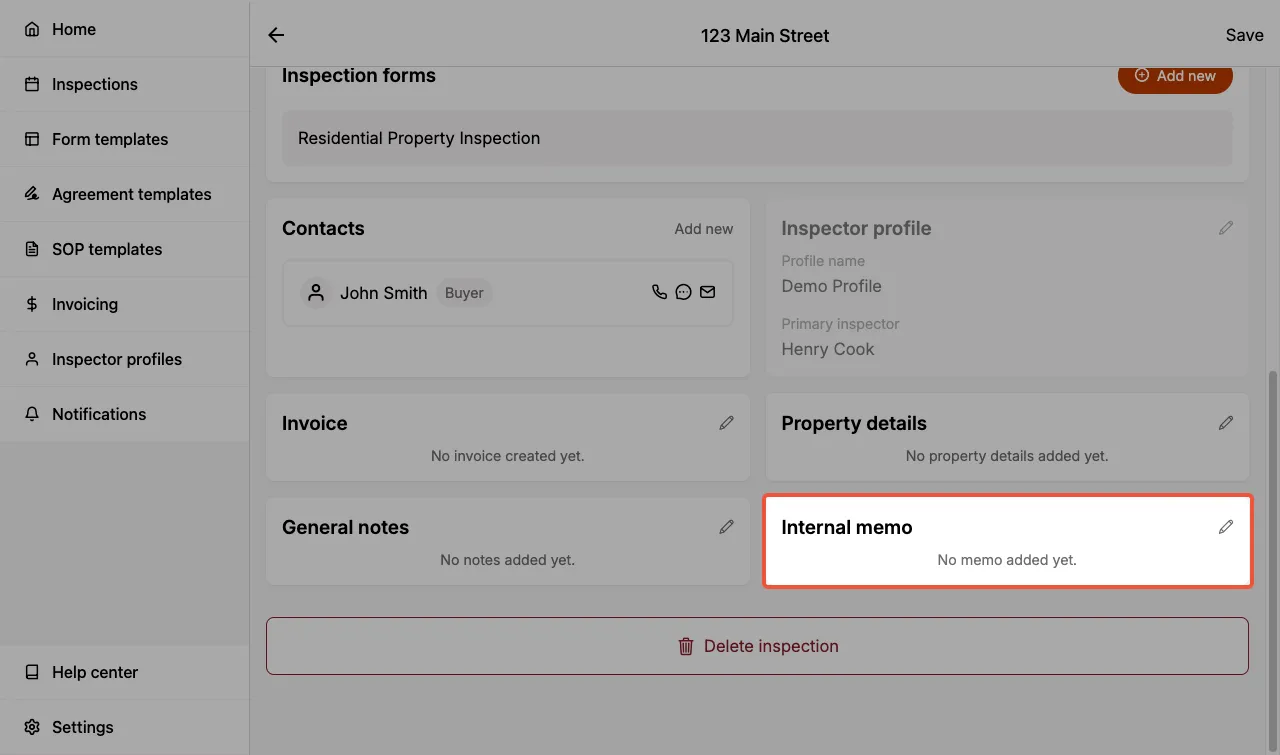
Internal Memo
Internal Memo is an open text field for you to enter anything you would like to note about the inspection and have it kept private for you (and your team). Notes entered here will not be shared with your client(s), which means it will not show up in the PDF report.
Example use cases:
-
You want to note something down for yourself regarding this inspection such as a gate code, buzzer code, scheduling notes, or other discussions with the client.
-
If you are part of a multi-inspector team, the back office admin may choose to leave you a note regarding this inspection job that is for your reference only.
Manage Access
If you're part of a multi-inspector team, Manage Access controls which team members can view and edit this inspection. Share it with specific people so they can collaborate on its forms, contacts, and reports. Learn more about working as a team in Multi-inspector.
The Shared with field shows who the inspection is currently shared with, or Not shared if it hasn't been shared with anyone yet.
To update access:
- Select the Manage Access card to open the access list.
- Check the team members you want to share the inspection with, or use Select All to share with everyone.
- Select Save.
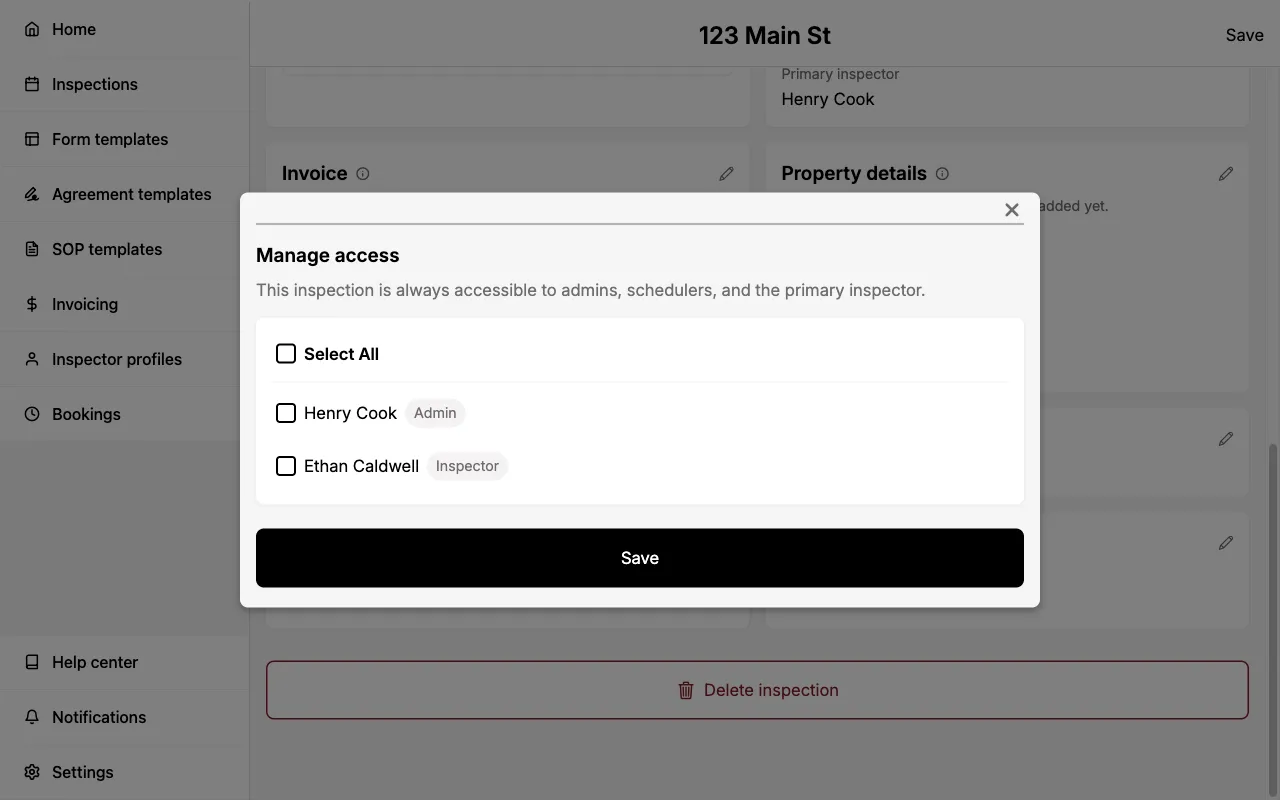
Team members with the Admin or Scheduler role, along with the inspection's primary inspector, can always access the inspection, so you don't need to add them here.
The Manage Access card only appears when your team has more than one member, and requires the "Edit Inspection" permission.
Delete Inspection
Permanently deletes the inspection and all associated data.
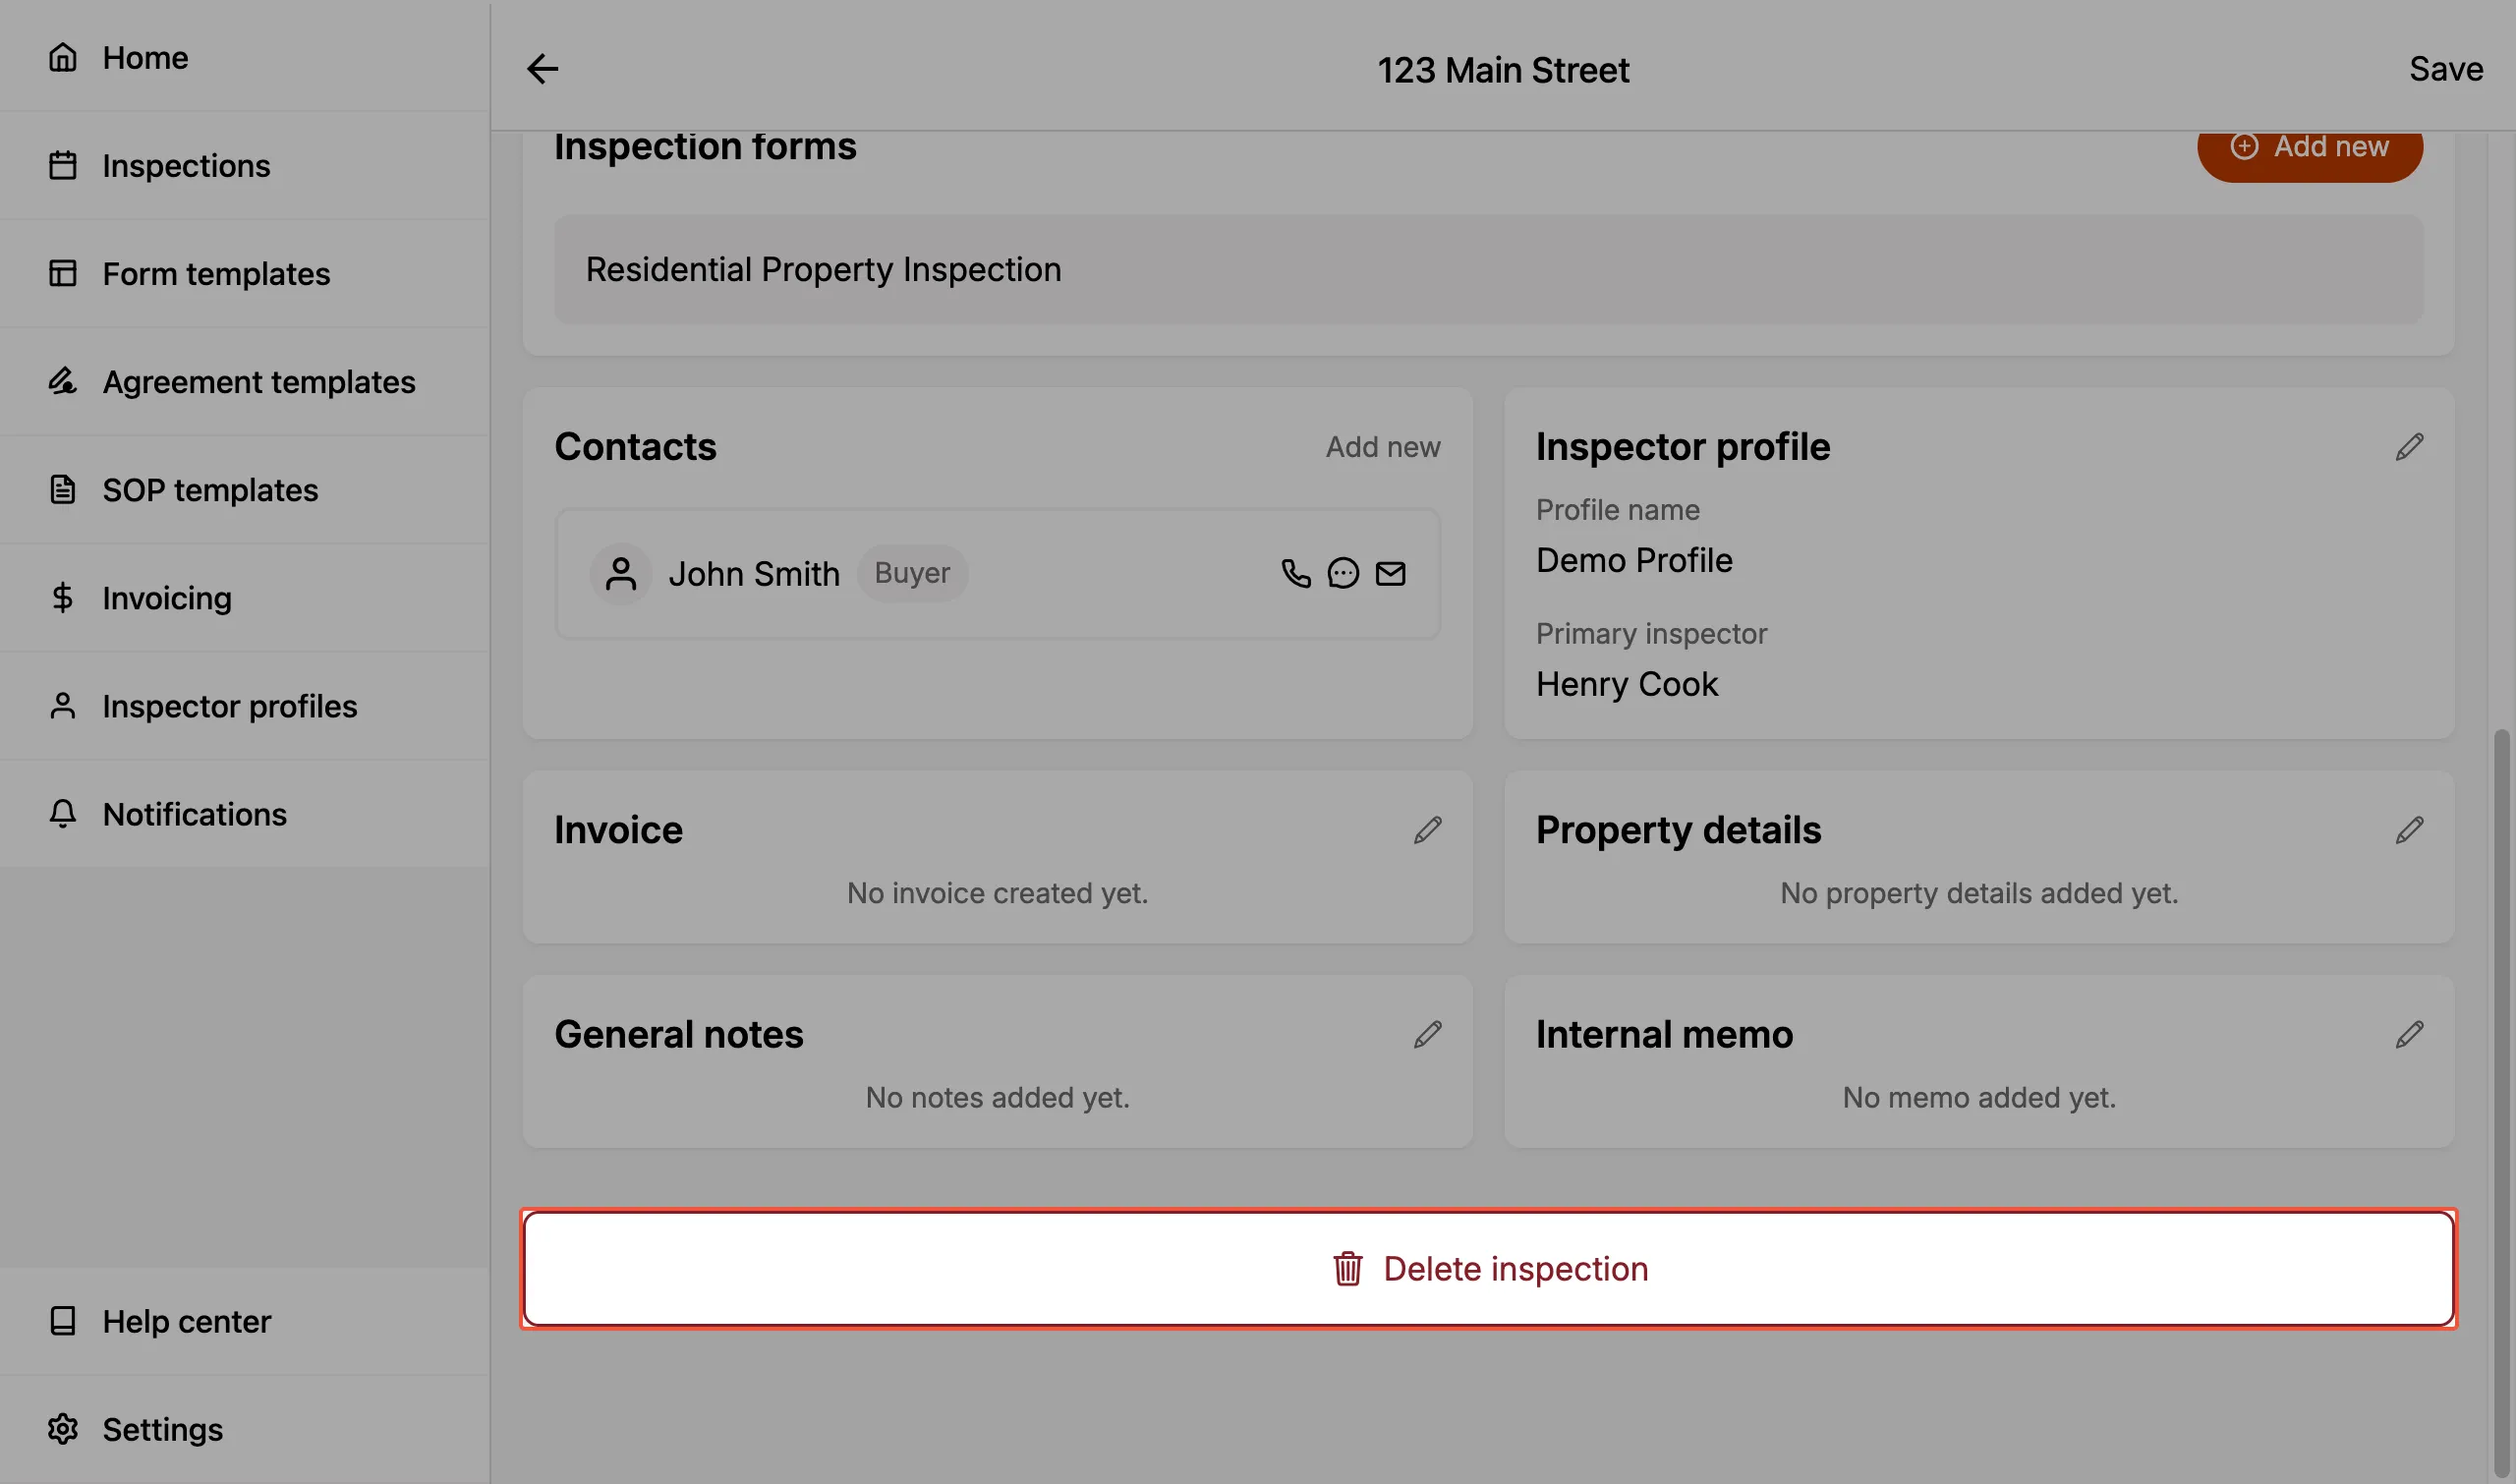
This action cannot be undone.