Client invoicing
Invoices can be easily generated, shared, and marked as paid within Eneris.
Generating invoices
- Navigate into the desired inspection.
- In the General page scroll down to the
Client Invoicingsection. - Select
+ Create Invoice.

- Select the relevant line items.
- Select
Add Custom Line Itemif a new line item needs to be created. After filling in the info, select the blue+button to finalize adding the custom line item.- This new line item will be saved as a selectable option for future inspections.
- Select
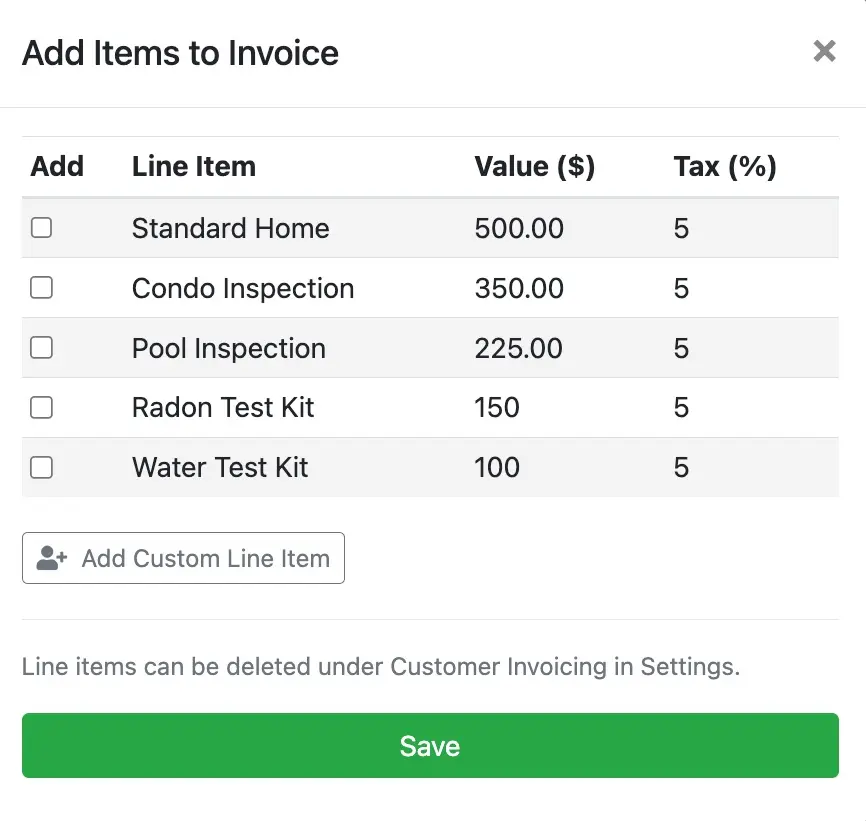
- Select
Save. - The selections will now reflect in the
Client Invoicingsection.- If you have connected your Stripe account to Eneris to accept online payments you may use the
Collect Nowand/or theEmail Online Invoiceoptions at the bottom. - If you have not connected your Stripe account to Eneris, continue with the steps below.
- If you have connected your Stripe account to Eneris to accept online payments you may use the
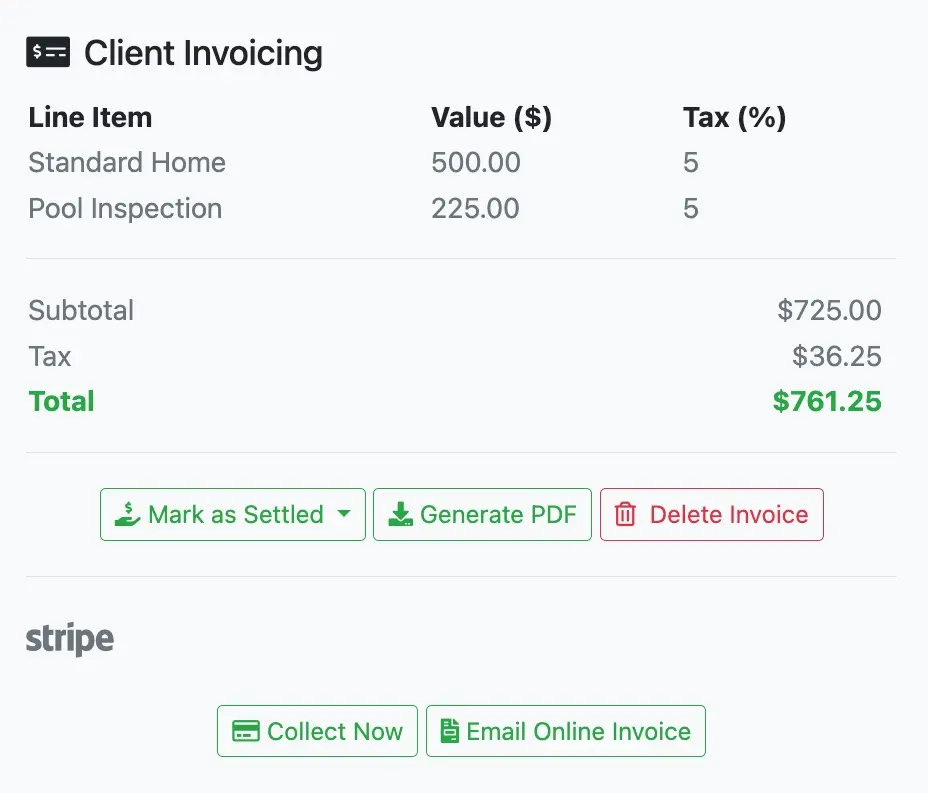
- Select
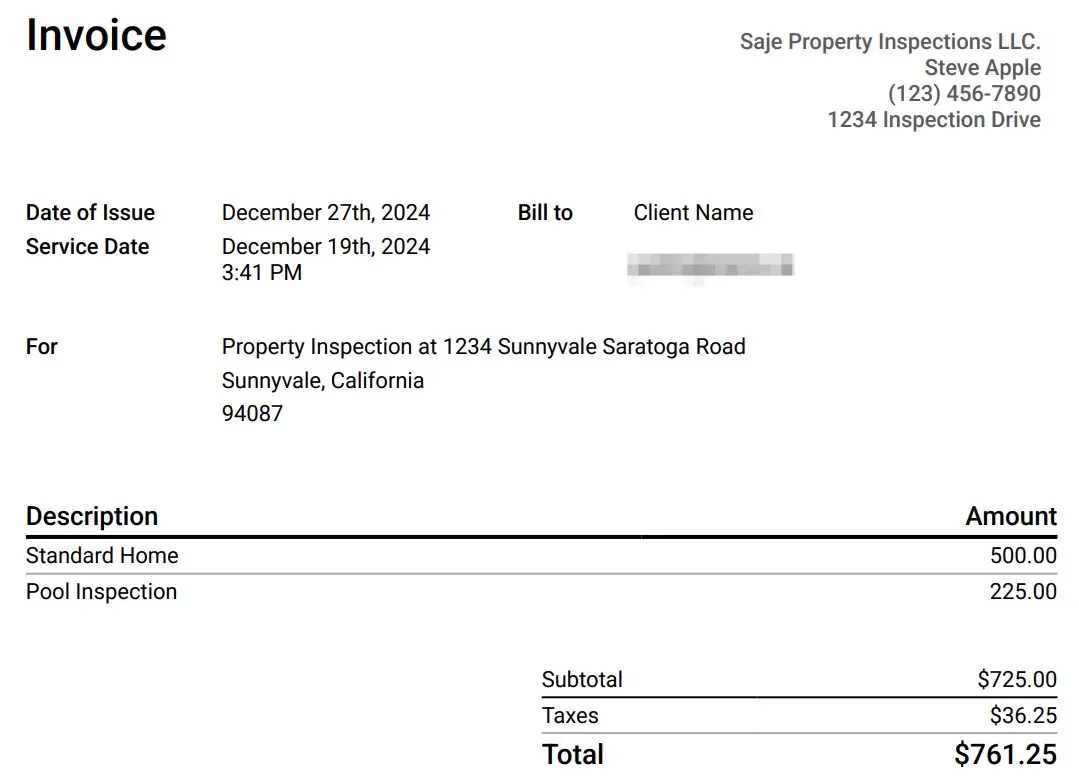
Generate PDF. - Select
View Invoiceto review the PDF invoice that was generated.
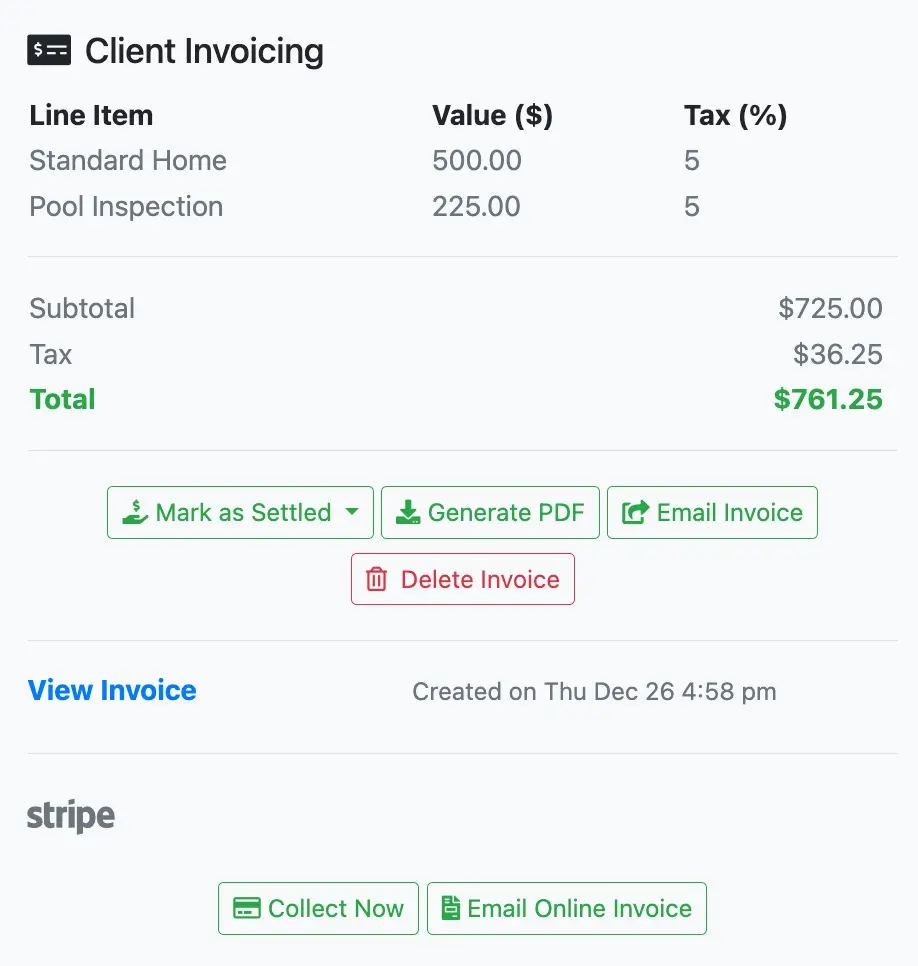
Sharing invoices
After an invoice has been created, select Email Invoice to send the invoice to the client and any additional secondary contact.
Marking invoices as paid
- Select
Mark as Settledand choose the appropriate payment method once the invoice has been paid. TheClient Invoicingsection will automatically update with the selection.
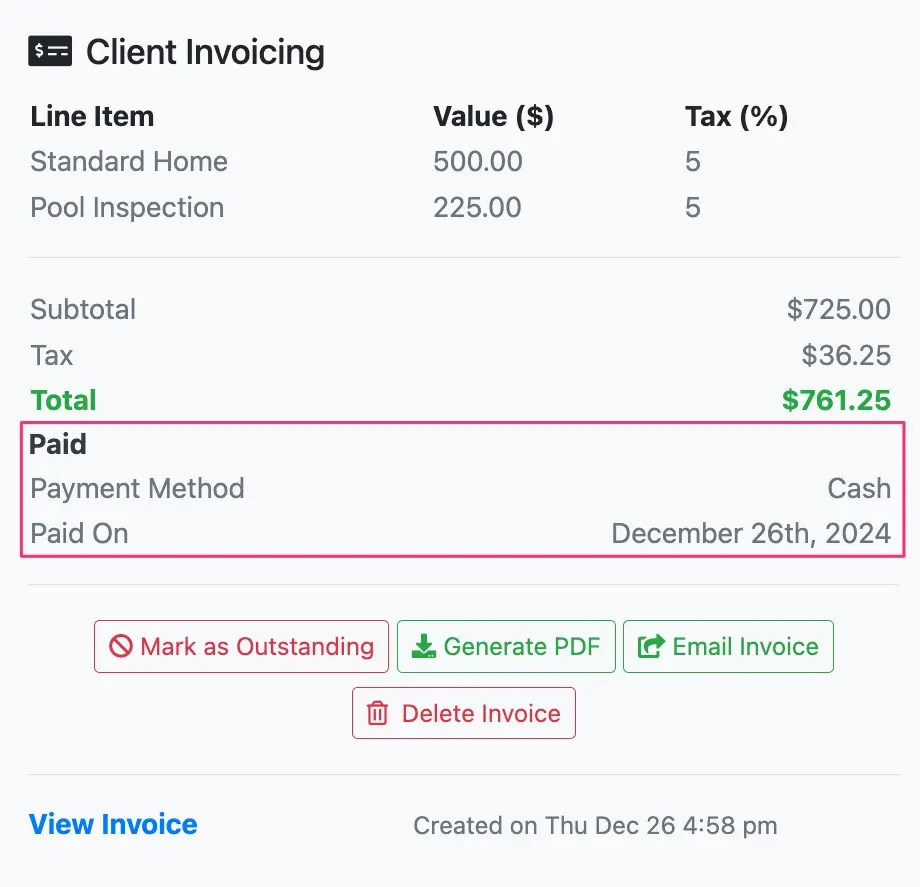
- Select
Generate PDFagain to include the payment method and date on the PDF invoice.
