Get Started
Welcome to Eneris, your ideal property inspection platform.
This is your guide to getting started with Eneris. If you’re new to using software for your inspection workflow, this is the guide you should start with.
What is Eneris?
Eneris is a property inspection platform, that helps you generate professional and interactive inspection reports with ease.
With Eneris, you can attach your findings (photos, video, and text) to every inspection item and then use that information to generate a report for your client, or your team, which helps them make an informed decision on the property.
Let’s get started
What we’ll be covering:
- Create an Eneris account
- Create your first inspection
- Report data entry
1. Create an Eneris account
To create inspection reports, you must first create an Eneris account.
Go to this webpage and fill in the requested information.
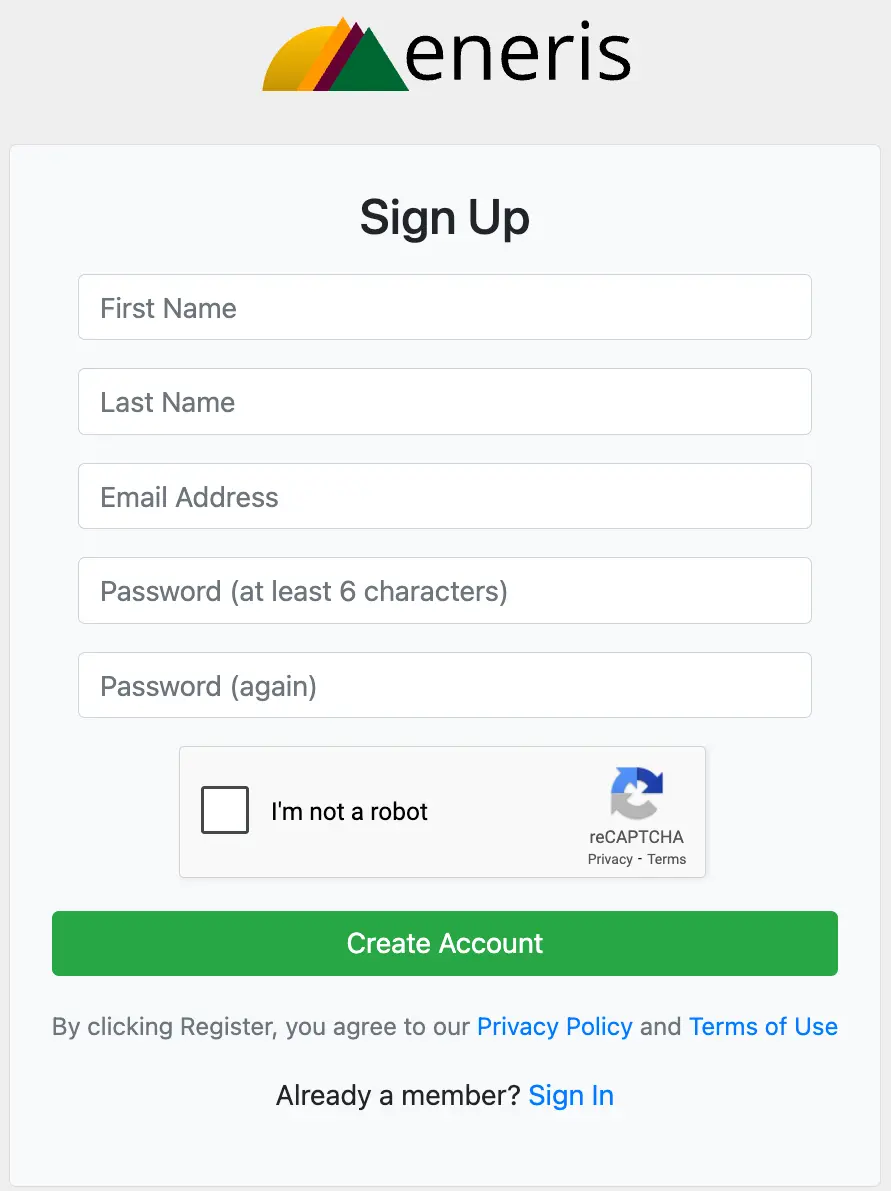
Once you have filled in the requested information tick the box next to I'm not a robot and then select Create Account.
Upon successful account creation you will be taken to the main Eneris Dashboard page.
2. Create your first inspection
To create your first inspection, navigate to the main Dashboard page.
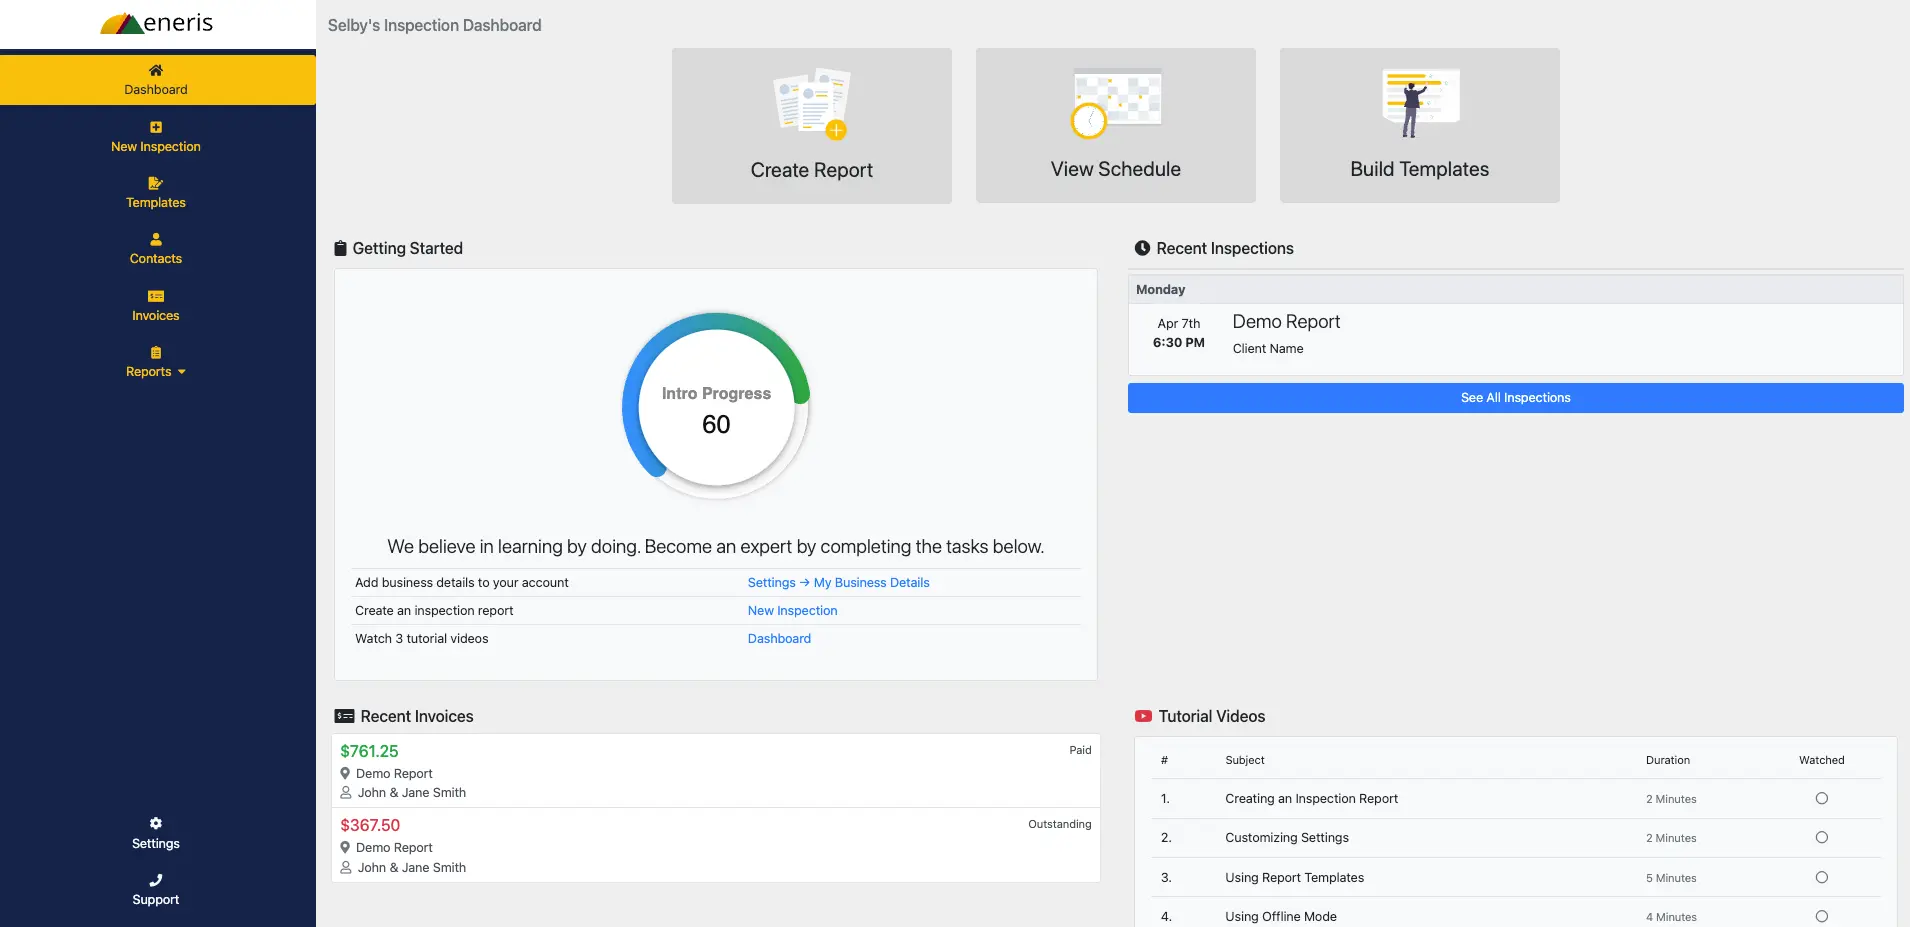
Select the New inspection menu item on the left. Fill in the requested information and select the green Create Inspection button at the bottom.

You will then be redirected inside the inspection you just created.
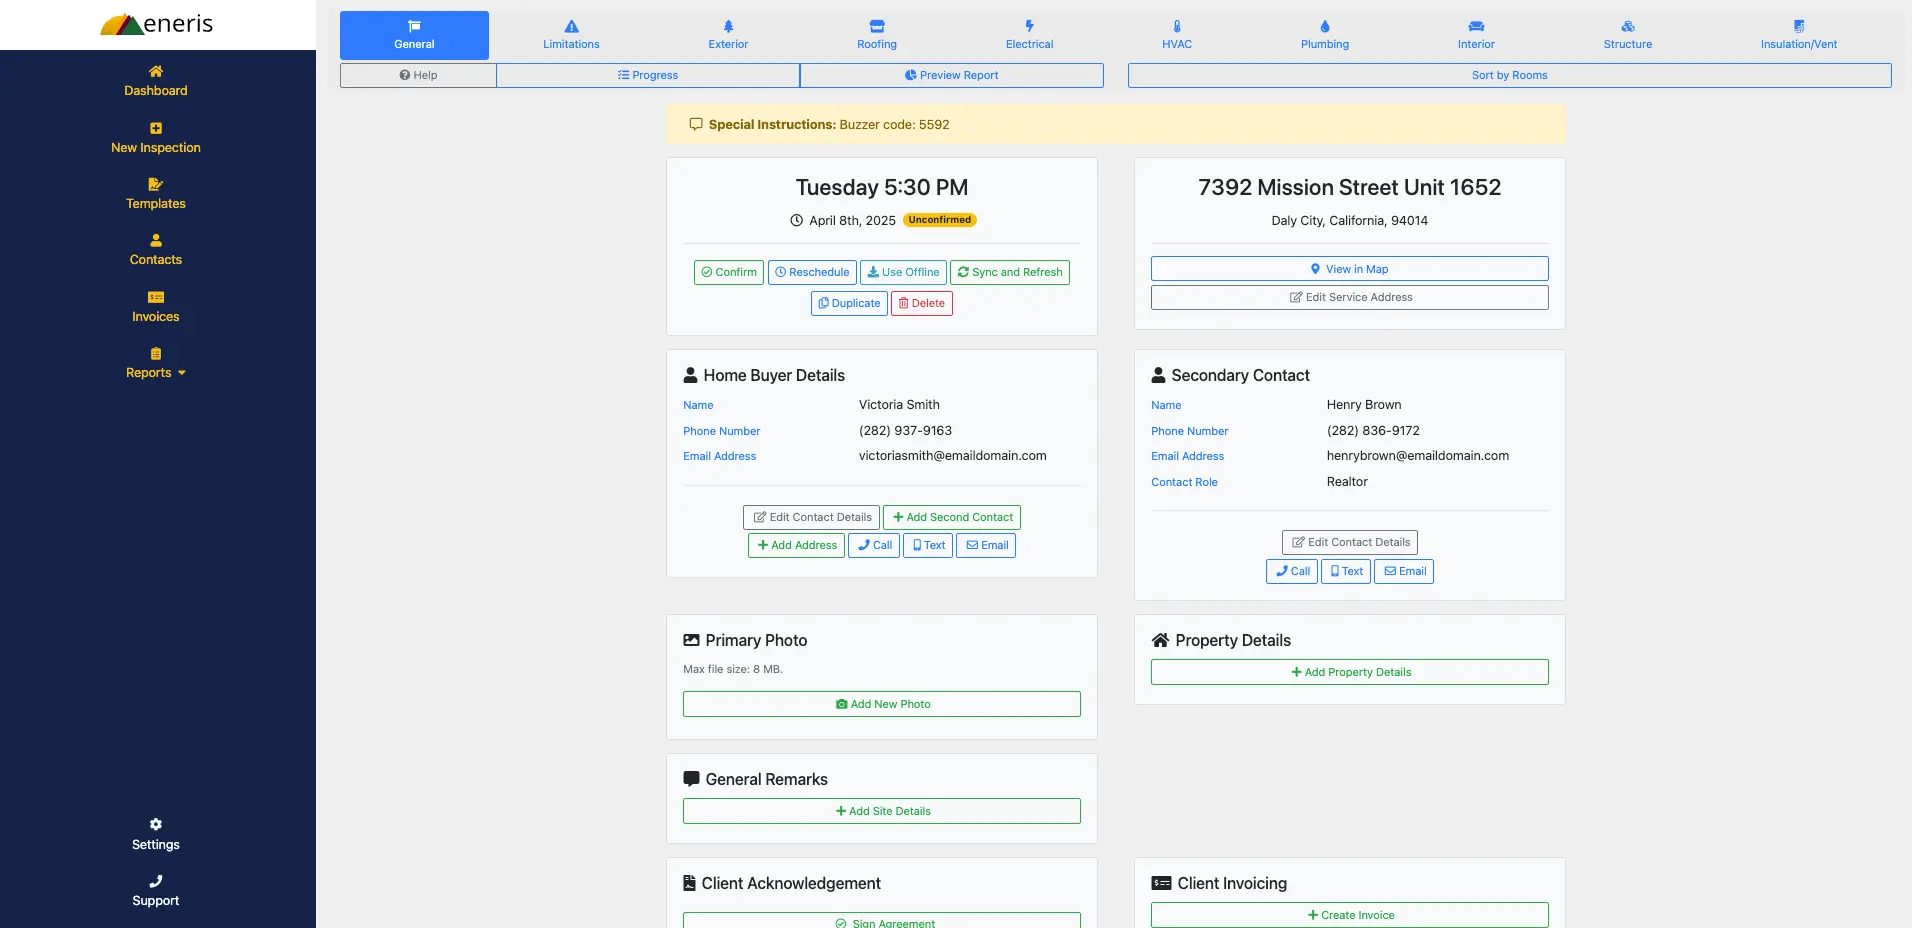
3. Report data entry
This section will cover how to enter data into your inspection reports. Templates make this process even simpler and you can find additional information about templates here.
Eneris helps you effortlessly build a custom comment and narrative library on top of hundreds of pre-loaded narratives. Smart fields quickly search for the comment you need as soon as you begin typing. You can even speak into your iOS or Android device to take notes.
Entering inspection findings
Open a report that has been created and navigate to a system, such as Roofing.
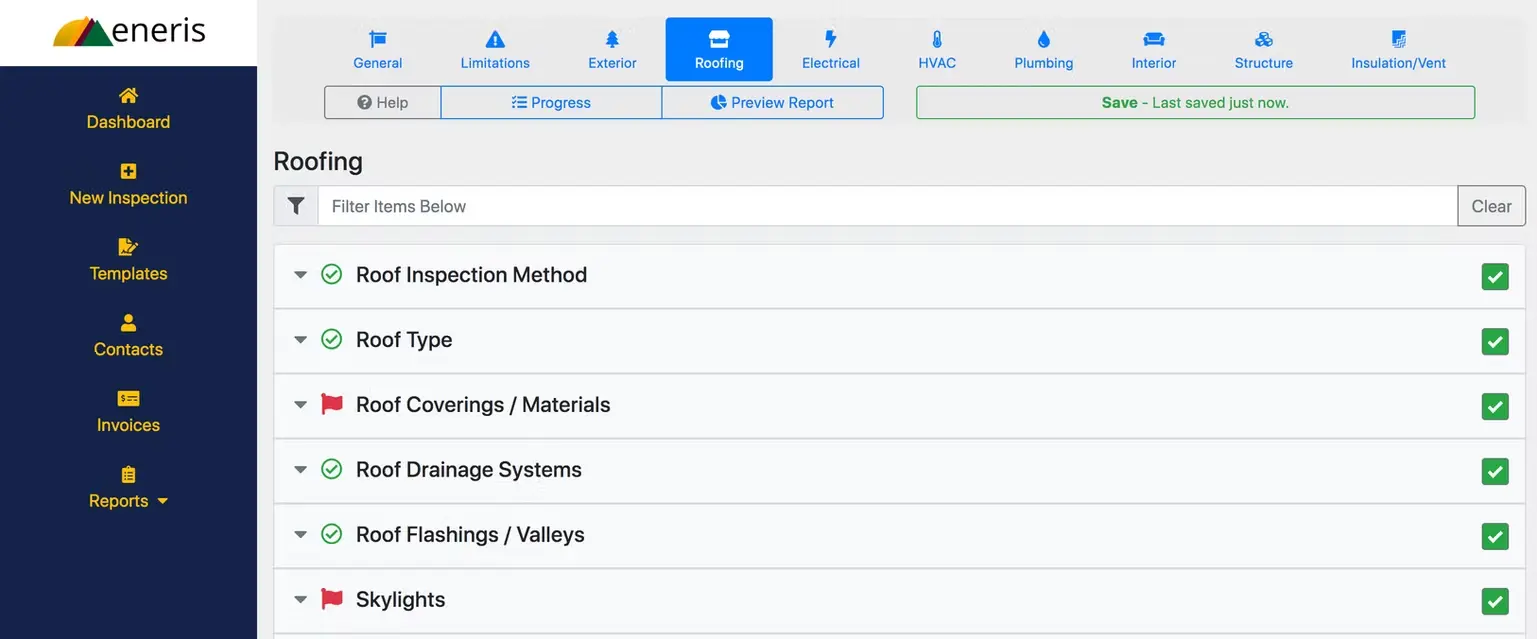
Expand an Inspection Subject, such as Roof Coverings / Materials.
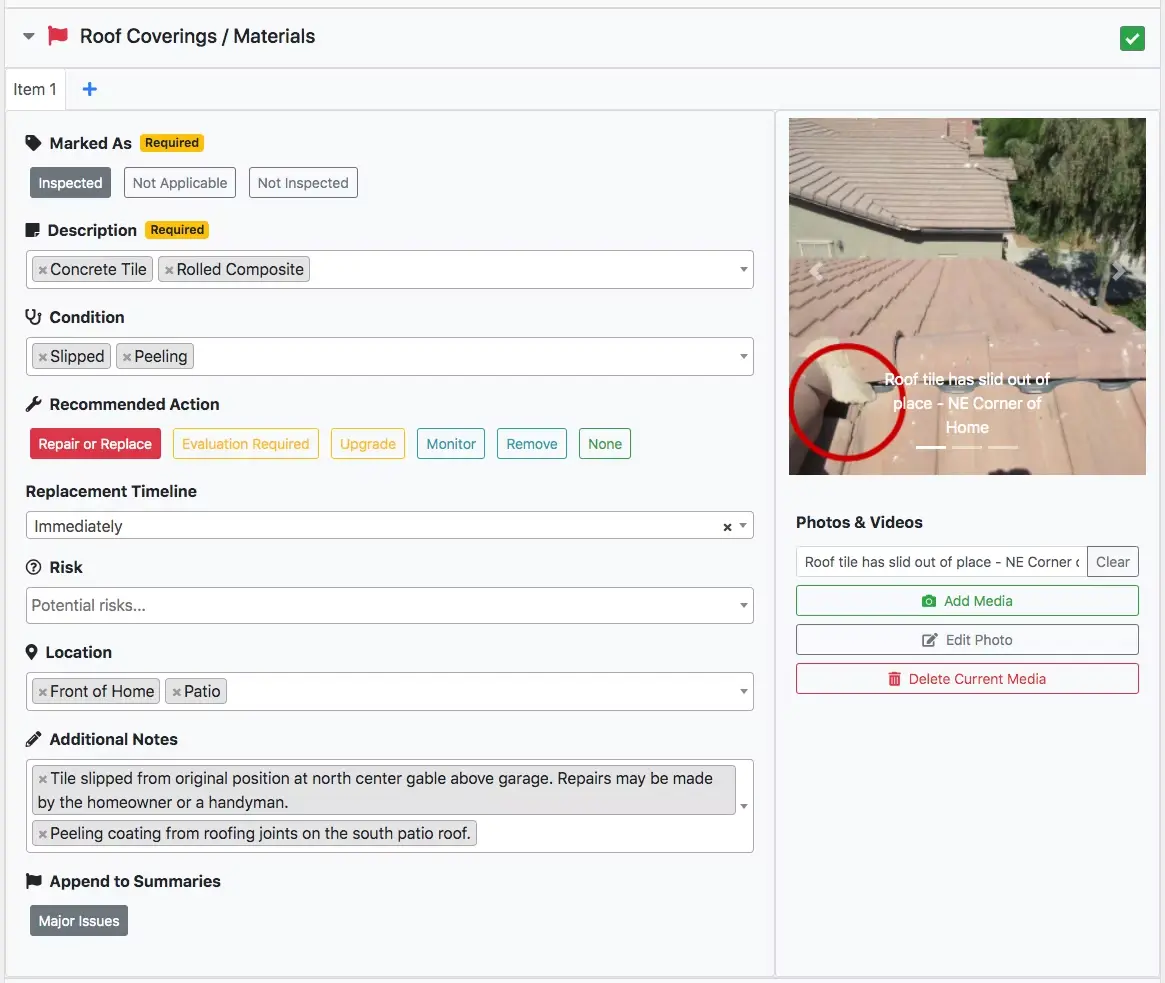
The Description, Condition, Replacement Timeline, Risk, Location, and Additional Notes have the following features as part of the Eneris Smart Fields system:
- Pre-written narratives: Every Eneris account includes pre-loaded narratives for inspection items that are commonly encountered in the field, such as: plumbing materials, manufacturers of HVAC and Electrical equipment, risks likely to occur as a result of inspection findings, etc.
- Automatic searching: Simply start typing keywords and Eneris will search for the most relevant narratives and suggest them automatically.
- Automatic learning: Need to type text into a field to add inspection findings? The entry will automatically be saved for next time and is connected to the template being used.
- Speech-to-text: Tap the Microphone icon on the keyboard of your device when using the iOS or Android App and speak to automatically type your notes into Eneris.
Customizing narratives
The pre-loaded text entries in any field can be customized. Scroll to the bottom of a report system, such as Roofing, and click Edit/Remove.

Scrolling back up and expanding an Inspection Subject, such as Roof Coverings / Materials now displays an Edit List icon next to each smart field.
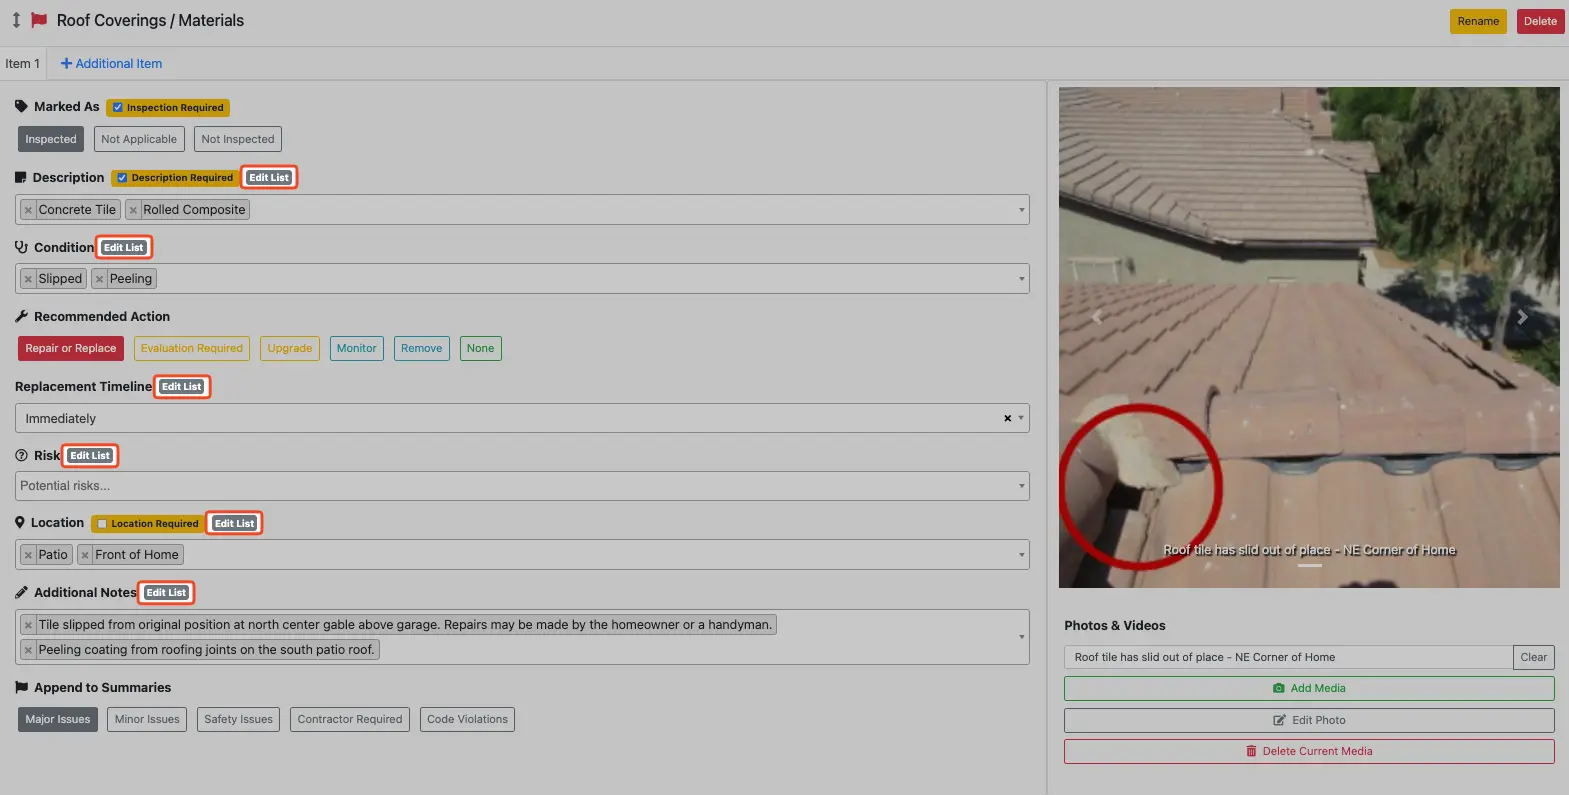
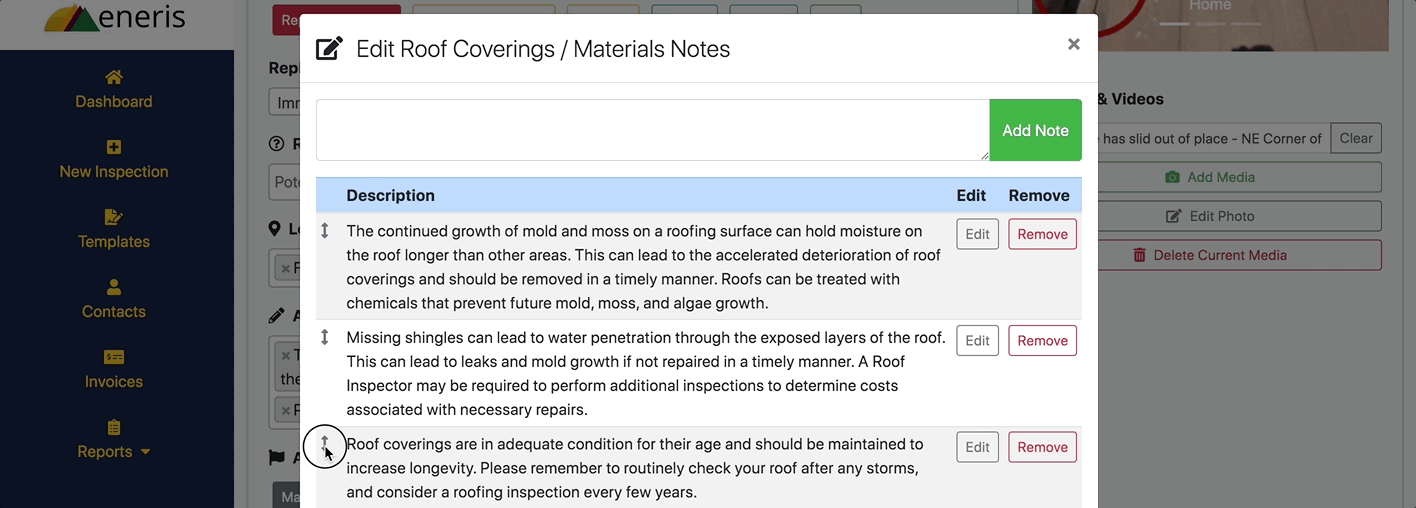
Clicking the Edit List icon next to Additional Notes opens a pop-up window with the ability to View, Add, Edit, Remove, and Reorder narratives, as needed.
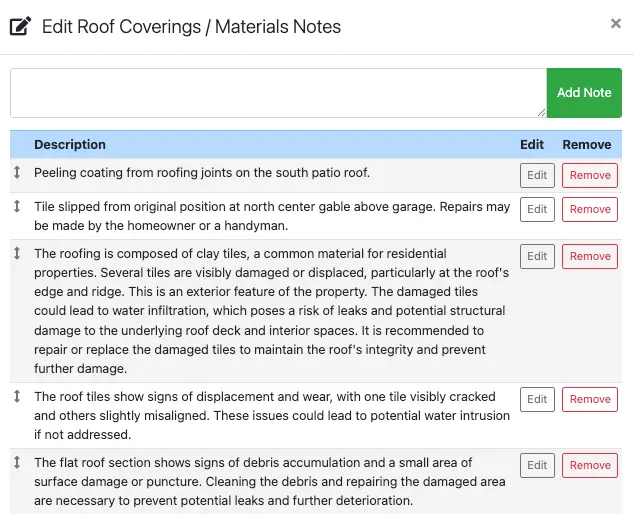
Click and drag the ⬍ arrow icon upwards/downwards to move the item’s placement the list. Release the mouse button to drop the item into its new location on the list.
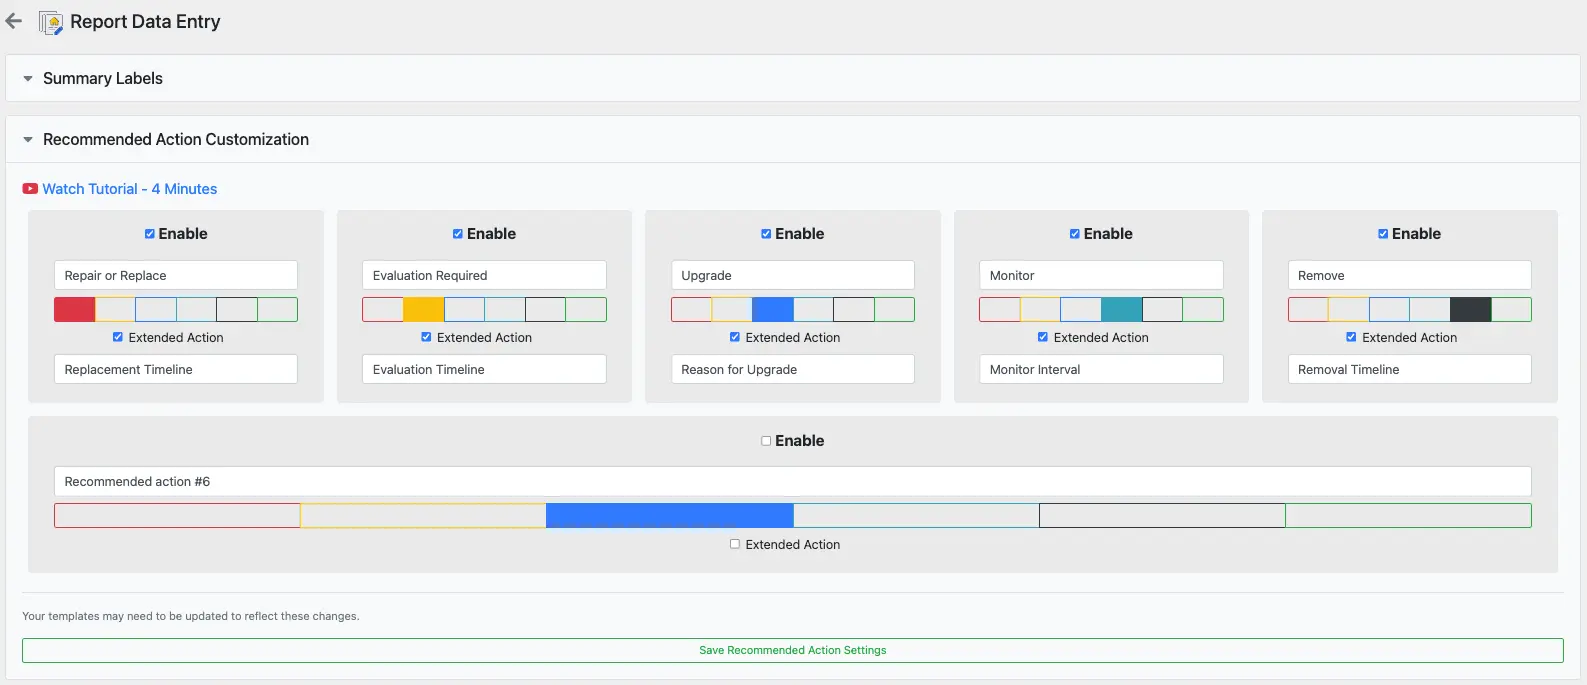
Customizing recommended actions
Recommended Action buttons are important tools in conveying inspection findings to your clients.

Each Recommended Action button can optionally prompt for a Timeline.
See the following examples of how the Repair and Replace button and Replacement Timeline looks in both the PDF and Web sample reports:
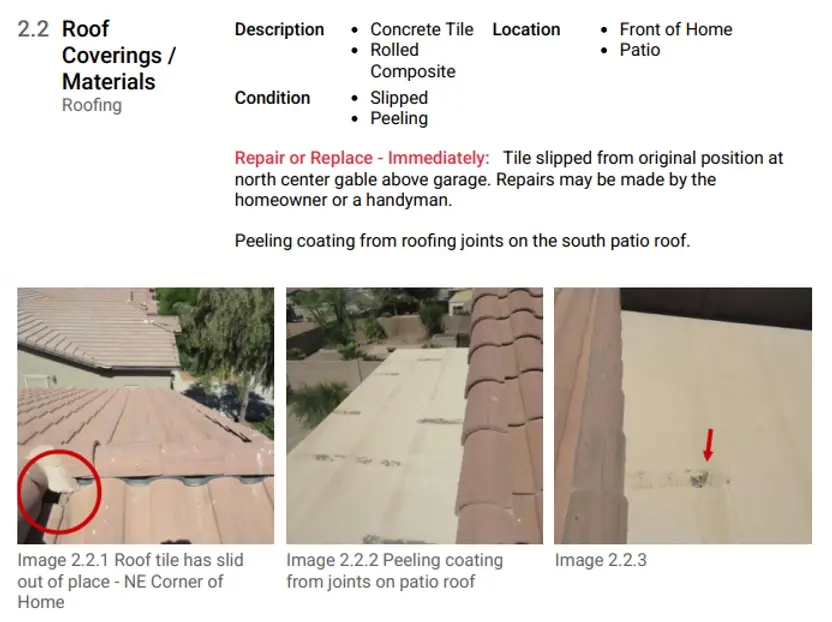
Example of how the Repair or Replace shows up in a PDF report.
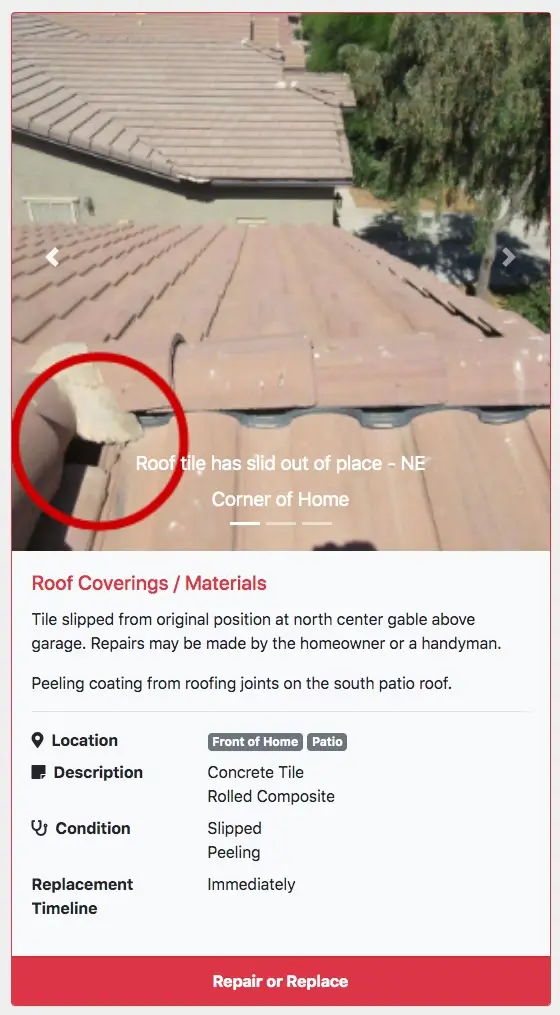
Example of how the Repair or Replace shows up in a web report.
To customize the Recommended Action options, navigate to Settings > Report Data Entry > Recommended Action Customization. Changes made will be reflected on any new reports created after the change is made.